• Hello there guest and Welcome to The #1 Classic Mustang forum!
    To gain full access you must Register. Registration is free and it takes only a few moments to complete.
    Already a member? Login here then!

New Project! 1968 Volvo P1800 "Bullwinkle"

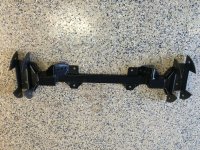
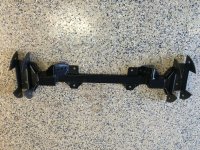
Sorry for the late reply and update. I have been reworking some of the rear suspension. We took some of the bulk out of the crossmember and boxed them even more for additional strength.

I also added a rear sway bar. The bar mounts are pretty simple. I used 2.5" angle iron and welded nuts on the back side. I boxed them in on the ends to create additional rigidity. I then had my bodyshop weld them in place. I wish I had at home for that part but it was a pretty simple job.

The bar is 37.5" long and is.188" wall hollow tube. I will likely pick up a .250" wall swaybar to swap out for track or autocross events.

1406971bca40a4159a3b290f9fd3677b.jpg

96e76b7a18ca1678c7a49da09d29d6c4.jpg


I have started working with Ultimate Performance for some new JRI shocks and tuning advice. I met the owner JJ last summer when he helped me with some shocks for my Mustang last summer when he worked for JRI.
53d9c950ea4afc29ad715c90c002a854.jpg

57a744da06321a9549c792932ee297e8.jpg


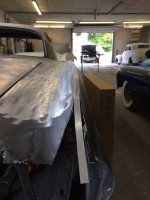
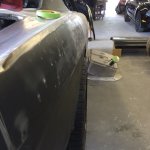
As I mentioned before, the car will be a few inches wider than stock in the rear. We've started to rework the fin in the back. They will be slightly reduced in the height as illustrated by the tape lines. It should look very close to the rendering when we're done.
6ae2d98c89a764327b28c30cbcaec45f.jpg


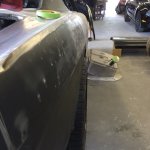
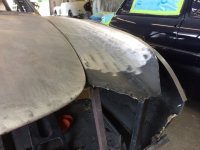
The shop has also repaired the horrible fender overlap on the passenger front fender. It must've been a repair from 25+ years ago.
ea7462b85409e2add0c7b57dcff7751f.jpg


Darreld
Sent from my iPhone using Tapatalk
 
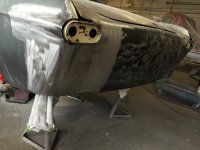
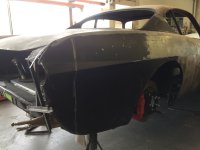
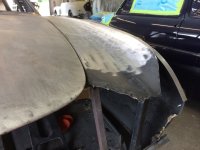
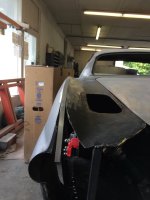
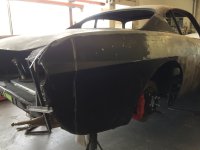
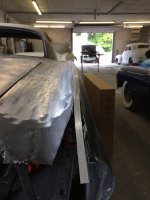
There is a bit more progress to report this past week. They continued working on the rear quarter panels. As you can see the fun is still there but just a bit smaller. We will make some trim to fit on the flat piece on the top of the quarter panel. They have started working out the plan of how to reattach the original rear but making it about 6" wider. I am pleased with how the shape is starting to take. It should look very much like the Vox rendering. There will be some variation on the rendering on the front and rear valance. You have to have some personalization don't you? :)

2f3b2ad5811e570b5facf5a3b10106b0.jpg
9a71b8e919729ec0ee59c5025277bdbe.jpg
b9efbdc9520bacd59c8fd1e67ee7e79d.jpg
6fd9fb1a950cd18c160860418dffe76d.jpg


Darreld
Sent from my iPhone using Tapatalk
 

Attachments

  • 2f3b2ad5811e570b5facf5a3b10106b0.jpg
    2f3b2ad5811e570b5facf5a3b10106b0.jpg
    175.9 KB · Views: 0
  • 6fd9fb1a950cd18c160860418dffe76d.jpg
    6fd9fb1a950cd18c160860418dffe76d.jpg
    76.2 KB · Views: 0
  • b9efbdc9520bacd59c8fd1e67ee7e79d.jpg
    b9efbdc9520bacd59c8fd1e67ee7e79d.jpg
    85.6 KB · Views: 0
  • 9a71b8e919729ec0ee59c5025277bdbe.jpg
    9a71b8e919729ec0ee59c5025277bdbe.jpg
    78.5 KB · Views: 0
Looking good.

From infinity and beyond.

Never argue with a Moron, they'll just drag you down to their level and beat you with experience.

If the women don't find you handsome, they should at least find you handy.
 
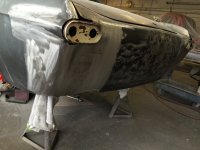
Progress has been a little slower this past month. We had to wait for some new trunk drop down panels from Wolf to be made. They were insulted and now they have started working on the rear panel now. That is off to a pretty good start and is coming into shape .

We are still taking about tail lights and I am exploring a few options right now. I think I have a plan there but I am waiting to hear back from a guy that may be able to make what I want. Fingers crossed.

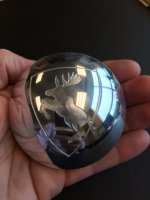
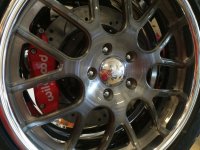
I decided I wanted to add a little touch of Volvo history to the car. Instead of advertising the wheel brand on my center caps I had new caps made. They incorporate the prancing moose logo. They came out pretty cool!
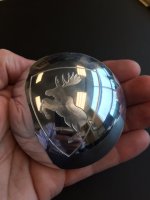
ab14b3cac10ebda7e049634498a65733.jpg
They are finishing up the gaps on the trunk to make sure everything is the same. That involves a lot of cutting and welding to make it just right. When that is done they will have to finish off around the exhaust holes. I will also need to mount the Corvette rear bumper on there. Once that is fitted we can work on the diffuser. I guess we are quite a ways from done now that I think about it. facepalm.gif

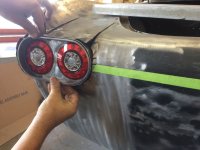
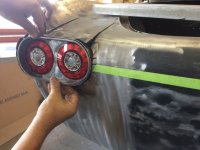
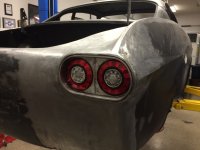
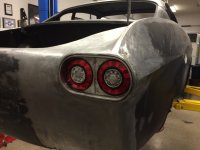
The tail lights I decided to use are from a Lotus Elise S1 and were shipped over from the UK. I got them in 2 days! I went for a set of aftermarket lights that were full LED and will give it a great look. The lights will be slightly frenched into the rear panel and I will have trim made to simulate the original bezels that came with the car. I will post some pictures when I get some.
https://www.youtube.com/watch?v=8conFPYfuGU

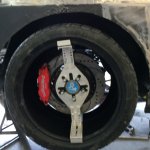
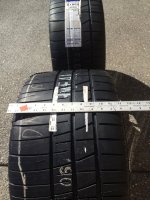
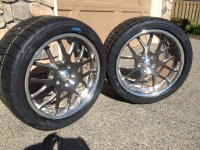
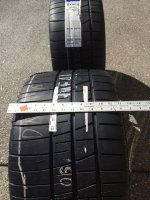
I also go the new tires in. My plan is to have two sets of tires/wheels for the car. The existing set will be for street use and the new set will be for more track or autoX use. The new tires are 315/30/18 BFG Rival S and it doesn't look like much will be needed to make them fit! Between the mini-tub and body modifications I think I can get them to slide in there with about a 1.5" fender lip. I don't think I want the look of a flare so I will end up relocating the outter link bar to the inside and I will have all the real estate I need at that time. With all the modifications I actually thingk I could get a 335 under there without too much drama. I won't do that since that would create too much of a difference in width between front and rear tires. From what I have read and experienced you want to keep the tires no more than 40-50 mm different in width. (315-275=40mm)

The front tires will be 275/35/18 but they are still on backorder. I hope to have them in a few weeks which is in plenty of time before they will start working on the front fender modifications. The tires should fit without any major mods but I want to raise the wheel arches up an inch or two to acheive the look I am after.

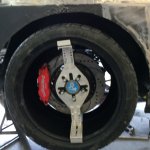
Here are the new tires in their place. I will move the back spacing out by about 1/4" to allow the new wheels to all all the extra width to the inside thus allowing the old and new wheels to look exactly the same. No need for wheel spacers. The only change is to relocate the lower link to the inside.
eeb29b99dfa098e4feaff6be568c4886.jpga0e79d39b2bb59debb04e070271e0cba.jpg26491da86e78786b9823644990f73679.jpg9181564d32469f497aa2426d4b9756d3.jpg

That is about 26" of rubber on the ground on the back of the car. I counld't get a good picture of how they look to give you a better perspective but they are wide! It is going to be wicked!
 

Attachments

  • a0e79d39b2bb59debb04e070271e0cba.jpg
    a0e79d39b2bb59debb04e070271e0cba.jpg
    257.1 KB · Views: 0
  • 9181564d32469f497aa2426d4b9756d3.jpg
    9181564d32469f497aa2426d4b9756d3.jpg
    234.7 KB · Views: 0
  • 26491da86e78786b9823644990f73679.jpg
    26491da86e78786b9823644990f73679.jpg
    91.8 KB · Views: 0
  • 26491da86e78786b9823644990f73679.jpg
    26491da86e78786b9823644990f73679.jpg
    91.8 KB · Views: 0
  • a0e79d39b2bb59debb04e070271e0cba.jpg
    a0e79d39b2bb59debb04e070271e0cba.jpg
    257.1 KB · Views: 0
  • eeb29b99dfa098e4feaff6be568c4886.jpg
    eeb29b99dfa098e4feaff6be568c4886.jpg
    238.7 KB · Views: 0
  • eeb29b99dfa098e4feaff6be568c4886.jpg
    eeb29b99dfa098e4feaff6be568c4886.jpg
    238.7 KB · Views: 0
  • facepalm.gif
    facepalm.gif
    666 bytes · Views: 0
  • ab14b3cac10ebda7e049634498a65733.jpg
    ab14b3cac10ebda7e049634498a65733.jpg
    161.1 KB · Views: 0
194324e508a958b7f5ba346f76572f52.jpg

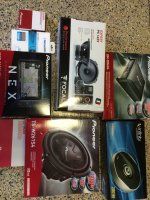
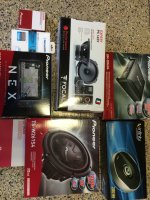
I have all the components for the sound system. A little early but I hate to wait for parts when I do need them. The head unit is a navigation unit from Pioneer and appears to have all the bells and whistles my new cars have including a backup camera. Should be a decent sounding system.


Darreld
Sent from my iPhone using Tapatalk
 

Attachments

  • 194324e508a958b7f5ba346f76572f52.jpg
    194324e508a958b7f5ba346f76572f52.jpg
    337.3 KB · Views: 0
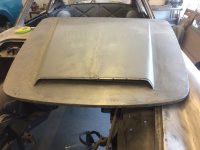
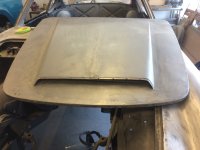
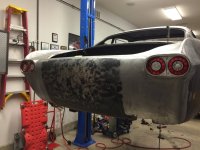
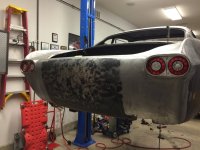
I had a conversation with my body guy last week about wanting to take the car to another shop so it will progress at a faster pace. He asked for anther chance and has really picked up the pace. He finished the hood and has the new buckets for the tail lights built and ready to mold in. I am really pleased with the progress he is making now.
a943f930104ded401cde9d2d01390432.jpgb131872589bad63c77e477b573d2b3c1.jpg


Darreld
Sent from my iPhone using Tapatalk
 

Attachments

  • b131872589bad63c77e477b573d2b3c1.jpg
    b131872589bad63c77e477b573d2b3c1.jpg
    202.6 KB · Views: 0
  • a943f930104ded401cde9d2d01390432.jpg
    a943f930104ded401cde9d2d01390432.jpg
    96.6 KB · Views: 0
  • a943f930104ded401cde9d2d01390432.jpg
    a943f930104ded401cde9d2d01390432.jpg
    96.6 KB · Views: 0
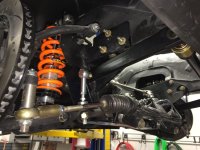
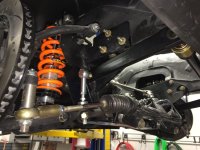
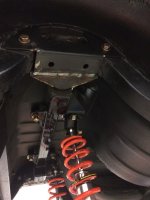
I have been making progress on the suspension modifications. I changed the springs to PAC Racing Springs but 1" shorter to allow for more ride height adjustment. The orange color isn't my favorite but they will work.

I changed out my lower control arms for a newer version that has additional reinforcements. They were provided to my by Mad Volvo who too over the production and sales for Sweedish Ops. They are really nice and the finish was a perfect match. [emoji3]

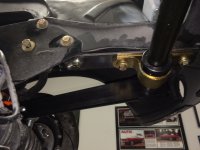
I also installed the front splined away bar. That took a little planning since the sway bar bushing has quite a bit larger spacing between the bolts. I mounted the bushing to a piece of flat stock with a nut welded to the cack side of the steel where the back hole is attached. The front hole is mounted where the factory mount is bolted to. For the back mounting point I used an existing factory hole and installed a Rivnut.. This way I can go back to a factory bar style setup it if I want.

The arms for the sway bar was kind of fun. I ended up buying some pretty nice end links from Total Control Products that utilize heim joints and are rebuildable. The have a stud that comes off at a 90* angle that attaches to the arms. I had to cut the arms down and then tap them to accept the studs. Looks really clean and should work great. I still need to shorten or buy shorter bolts for the suspension crossmember mount. It looks like they may rub on the arm if I don't.
c250a23083809a194f3e5fd59311edb8.jpg
408357508ab95d1ab41e4404d7bd50c8.jpg

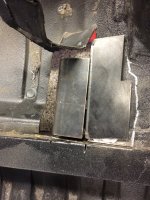
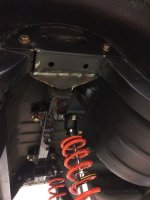
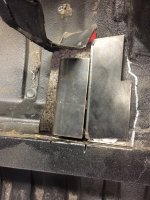
I also moved the upper link bar mounting pint to the inside of the frame rail. I picked up some brackets from Mad Volvo Performance. I had to cut some of the floor under the rear seat and still need to make that look pretty. I also picked up a revised upper shock bar that adjusts the shocks to a slightly different position and is less bulky than the original Sweedish Ops design. 0778d936eeafc51f304326c9ddb0213a.jpg
9f7e53756201184737123a0e34f99227.jpg

I still need to mount the rear end back in the car but it is getting close to done with the suspension for now. I do plan on getting rid of the QA1 shocks for a set of JRI's. I am not sure if I will go with triple adjustable a or stick to singles. One last item, My wider wheels should be done this week. Once I get them mounted I will give the car back to the body shop so they can work their magic.


Darreld
Sent from my iPhone using Tapatalk
 

Attachments

  • c250a23083809a194f3e5fd59311edb8.jpg
    c250a23083809a194f3e5fd59311edb8.jpg
    198 KB · Views: 0
  • 408357508ab95d1ab41e4404d7bd50c8.jpg
    408357508ab95d1ab41e4404d7bd50c8.jpg
    254.2 KB · Views: 0
  • 0778d936eeafc51f304326c9ddb0213a.jpg
    0778d936eeafc51f304326c9ddb0213a.jpg
    529.4 KB · Views: 0
  • 9f7e53756201184737123a0e34f99227.jpg
    9f7e53756201184737123a0e34f99227.jpg
    361.7 KB · Views: 0
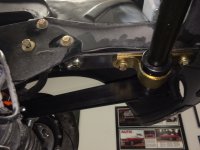
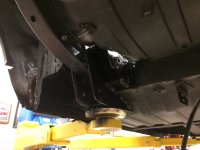
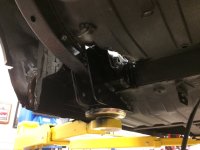
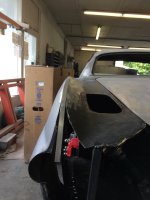
Here are a couple pictures of the rear suspension bar and brackets installed. And welded in place. The entire piece is removable for service if needed. Now it needs a little paint!
4217a3f0dd4fc7cf76a820be91b01d2a.jpgbd2438587bed5c4dac454599a70e86f0.jpg


Darreld
Sent from my iPhone using Tapatalk


Darreld
Sent from my iPhone using Tapatalk
 

Attachments

  • bd2438587bed5c4dac454599a70e86f0.jpg
    bd2438587bed5c4dac454599a70e86f0.jpg
    83.3 KB · Views: 0
  • 4217a3f0dd4fc7cf76a820be91b01d2a.jpg
    4217a3f0dd4fc7cf76a820be91b01d2a.jpg
    218.1 KB · Views: 0
  • 4217a3f0dd4fc7cf76a820be91b01d2a.jpg
    4217a3f0dd4fc7cf76a820be91b01d2a.jpg
    218.1 KB · Views: 0
One last photo update. The tail lights are done and look KILLER!
007d3ee83bc05169d3f08b1f9af4554a.jpg
1f5e55fa44646d1ea62957681aefeb9d.jpg


Darreld
Sent from my iPhone using Tapatalk
 

Attachments

  • 007d3ee83bc05169d3f08b1f9af4554a.jpg
    007d3ee83bc05169d3f08b1f9af4554a.jpg
    179.7 KB · Views: 0
  • 1f5e55fa44646d1ea62957681aefeb9d.jpg
    1f5e55fa44646d1ea62957681aefeb9d.jpg
    99.2 KB · Views: 0
It's coming along nicely and your rear end looks sweeet. [emoji15] [emoji16] [emoji23]

From Infinity and beyond

Never Argue With A Moron– They Will Drag You Down To Their Level, Then Beat You With Experience

If the women don't find you handsome, they should at least find you handy.
 
Roger's Autobody/Kevin's Restorations in Vancouver, WA. Kevin purchased the business from a guy named Roger a number of years back. He is a good honest guy.

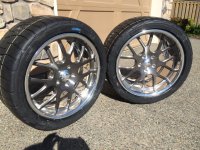
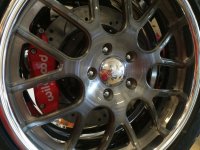
I got the new wheels in and tires mounted. The prancing moose center caps set them off nicely.
230e2ec7c9666f92e76f9e49cf11c76c.jpg
418732586175dc9c96fde86a0f5da5b9.jpg44dc6697e5a7a083836084597e963b02.jpg

When I was welding the brackets on the housing to move the link bars to the inside I had a little problem. I must have warped them and now the housing is leaking gear oil. I think I am just going to get a new housing and call this a learning experience. A 9" is now on the way.


Darreld
Sent from my iPhone using Tapatalk
 

Attachments

  • 230e2ec7c9666f92e76f9e49cf11c76c.jpg
    230e2ec7c9666f92e76f9e49cf11c76c.jpg
    419.3 KB · Views: 0
  • 418732586175dc9c96fde86a0f5da5b9.jpg
    418732586175dc9c96fde86a0f5da5b9.jpg
    294.2 KB · Views: 0
  • 418732586175dc9c96fde86a0f5da5b9.jpg
    418732586175dc9c96fde86a0f5da5b9.jpg
    294.2 KB · Views: 0
  • 44dc6697e5a7a083836084597e963b02.jpg
    44dc6697e5a7a083836084597e963b02.jpg
    271.8 KB · Views: 0
Love this build. Fast and loud had a p1800 on this weeks episode.

Living the dream or running it down... Haven't figured out which yet.
 
Back
Top