
-
Hello there guest and Welcome to The #1 Classic Mustang forum!
To gain full access you must Register. Registration is free and it takes only a few moments to complete.
Already a member? Login here then!
You are using an out of date browser. It may not display this or other websites correctly.
You should upgrade or use an alternative browser.
You should upgrade or use an alternative browser.
New Project! 1968 Volvo P1800 "Bullwinkle"
- Thread starter 68EFIvert
- Start date


70_Fastback
Hell Bent for Speed
"68EFIvert" said:I feel kind of weird posting this project on this site so if you guys are't interest let me know or I could always move this to the non-Mustang off topic section. Let me know, I won't be offended.
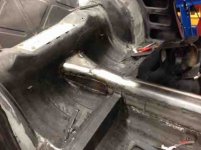
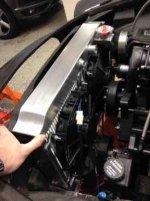
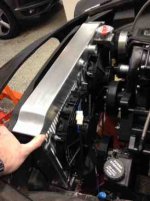
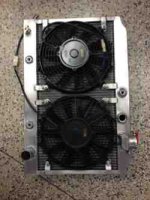
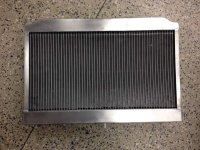
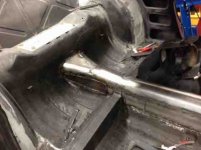
After spending the last month working on house projects I can finally get back to the Volvo project. I'm almost done with the driveshaft tunnel. There's just a small section next to the shifter I need to weld. After that I'll be able to put the car back on a rotisserie and weld the bottom then prime and undercoat. Picture of the radiator and back portion of the driveshaft tunnel.
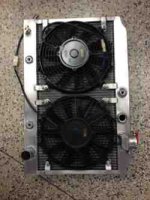
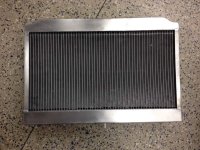
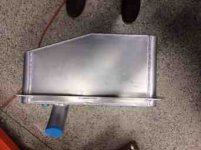
I picked up a new custom radiator today. I had it designed to my specifications. It is about 4 inches wider than the factory radiator and has the transmission cooler I need. It was even built to follow the contour of the radiator support. It retains the factory dowel on the bottom. I just need to fabricate some mounts for the side. I think it turned out awesome!
Darreld
Sent from my iPhone using Tapatalk
If I can post a 50+ page rat rod build, I think you're fine.
Sent from my iPhone using Tapatalk.
Attachments

68EFIvert
Well-Known Member
I will keep the updates coming then. I took a step backwards this week. I pulled the engine, tranny, front suspension crossmember, rear suspension and steering column the other day. This car is so familiar and easy to work on that it only took about 2.5 hours to do all that! I also put it on the rotisserie in that time period.
Now I can flip it over, weld it from the bottom, epoxy prime and then hit it with some more Raptor liner (truck bed liner). After that I can address the fuel system, plumbing and wire it so that I can start the engine/tranny.
Darreld
Sent from my iPhone using Tapatalk
Now I can flip it over, weld it from the bottom, epoxy prime and then hit it with some more Raptor liner (truck bed liner). After that I can address the fuel system, plumbing and wire it so that I can start the engine/tranny.
Darreld
Sent from my iPhone using Tapatalk
68EFIvert
Well-Known Member


SELLERSRODSHOP
Well-Known Member
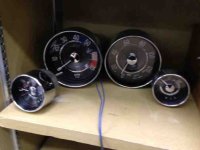
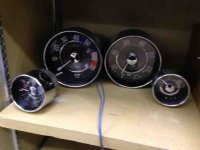
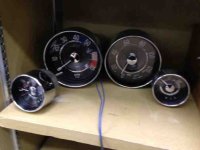
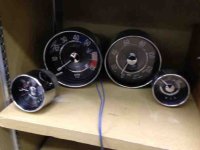
"68EFIvert" said:North Hollywood Speedometer sent me a picture of my rebuilt gauges today. They should be done by the end of the week. They have some work to do to the water temp gauge. I can't wait to get my hands on them!
Darreld
Sent from my iPhone using Tapatalk
what did they do to the gauges? i'm wanting to do the same thing with the tr4 gauges, only have them updated & if possible converted to electric sending units instead of the old style senders.
Attachments
68EFIvert
Well-Known Member
I had them the stock temp gauges since they are very unique and couldn't be converted to electric. The clock will have new guts as well as the tach. The speedo will be electric and the other gauges are either rebuilt or verified for accuracy. The centers are painted the body color instead of the stock baby blue color. They have been down there since the end of July. They are not for someone on a time limit but they do great work.
Darreld
Sent from my iPhone using Tapatalk
Darreld
Sent from my iPhone using Tapatalk

Grabber70Mach
Well-Known Member
Looks good.
Sent from my VS980 4G using Tapatalk
Sent from my VS980 4G using Tapatalk
68EFIvert
Well-Known Member
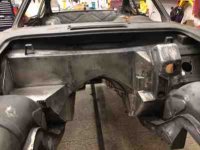
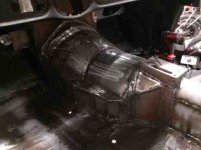
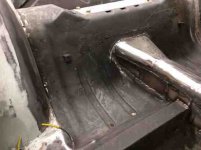
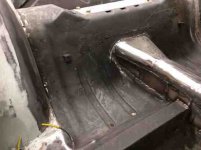
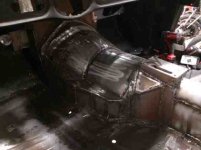
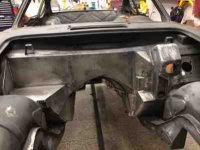
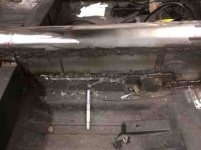
Well all the metal work is done to the firewall, transmission and driveshaft tunnels. I have a couple misc unused holes to fill and I will be ready to prune and undercoat.
Since I no longer have the original seat belt mounts I need to add those. I am not sure where I want to place the front mounts though. There was a bolt the is currently there but is not large enough for the seat belt. Can someone on here tell wat it was originally used for?
I was thinking of placing the bolt/mounting plate where the silver dot is. It is at the same location as the mount on the outside of the car. What do you think?
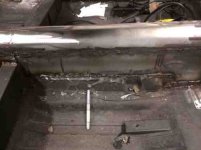
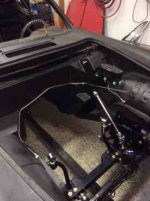
Here are a couple pictures of the final shape of the metal work. The area around the steering column was by far the most complex. It is tight around there. There is a small flat spot to the left of the column that is ther to mount the DBW throttle pedal.
Darreld
Sent from my iPhone using Tapatalk
Since I no longer have the original seat belt mounts I need to add those. I am not sure where I want to place the front mounts though. There was a bolt the is currently there but is not large enough for the seat belt. Can someone on here tell wat it was originally used for?
I was thinking of placing the bolt/mounting plate where the silver dot is. It is at the same location as the mount on the outside of the car. What do you think?
Here are a couple pictures of the final shape of the metal work. The area around the steering column was by far the most complex. It is tight around there. There is a small flat spot to the left of the column that is ther to mount the DBW throttle pedal.
Darreld
Sent from my iPhone using Tapatalk
Attachments

68EFIvert
Well-Known Member
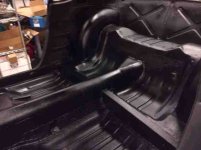
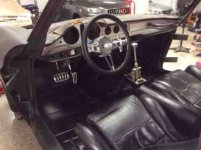
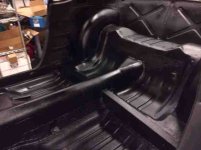
I've had a little bit more time to work on the car recently. I was able to complete the metalwork, prime the car again with epoxy and then undercoat the bottom of it with Raptor Liner. I had some Raptor Liner left over so I coated the inside floor of the vehicle as well. I really cleaned up the look. I think it looks nice.
I have now started working on the plumbing. The master cylinder and proportioning valve are in. I am working on the front brakes. I had to order a few fittings to work with the stainless tubing so it will be a few days before that arrives. Once it arrives I will have all the fittings I need to do the brakes, fuel and air conditioning.
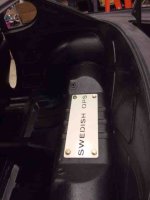
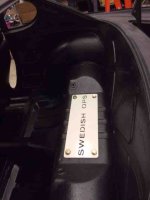
Once that is completed I plan on doing the wiring. I want to get the car so it will actually start and drive before I take it to the body shop. I am in no hurry to take it to the body shop though. I plan on using the flush mount glass kit that Swedish Ops is building but it doesn't sound like it will be ready until this coming summer.
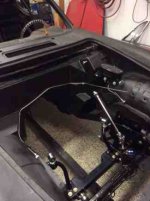
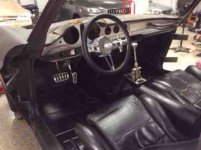
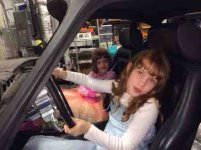
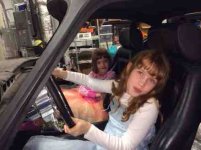
Here are a few pictures of the car right now.
I had a couple helpers to assist in assembly. It was right before bed so they are wearing their "work jammies". LOL!
Darreld
Sent from my iPhone using Tapatalk
I have now started working on the plumbing. The master cylinder and proportioning valve are in. I am working on the front brakes. I had to order a few fittings to work with the stainless tubing so it will be a few days before that arrives. Once it arrives I will have all the fittings I need to do the brakes, fuel and air conditioning.
Once that is completed I plan on doing the wiring. I want to get the car so it will actually start and drive before I take it to the body shop. I am in no hurry to take it to the body shop though. I plan on using the flush mount glass kit that Swedish Ops is building but it doesn't sound like it will be ready until this coming summer.
Here are a few pictures of the car right now.
I had a couple helpers to assist in assembly. It was right before bed so they are wearing their "work jammies". LOL!
Darreld
Sent from my iPhone using Tapatalk
Attachments

Looking good. I can't wait to see this thing when it's done.
Sent from my XT1058 using Tapatalk
Sent from my XT1058 using Tapatalk

68EFIvert
Well-Known Member
My older daughter could touch the pedals and is already making plans. She is only 9 so I have a few years left before I have to worry."AzPete" said:Looks like you better build it according to those future drivers specs...

Darreld
Sent from my iPhone using Tapatalk
68EFIvert
Well-Known Member
It has not been a very productive month. Between going on vacation and a family member dying I've been pretty busy. I have made progress on the plumbing of the car. The fuel line is in from the tank to the engine compartment. The brake lines for the rear of the vehicle are done. I'm waiting on a fitting to fit the front brake lines.
Sam came over a few weeks ago and helped me out on a couple things. He identified that my ratio for my manual break pedal was off. I ended up raising the master cylinder about 2" to get to a 7:1 ratio. He also helped me out on some wiring questions I had particularly with the layout.
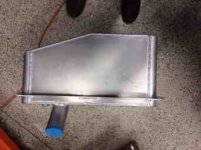
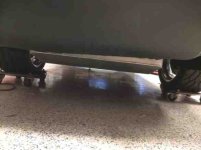
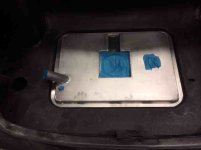
I picked up my new gas tank today. I had it made locally and I think it turned out great! I rerouted the inlet hose to make room for a dual exhaust and I plan on doing a little bit different set up for the gas cap.
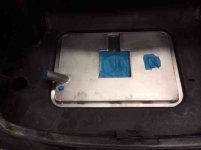
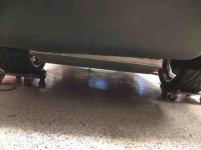
I have some body damage on the rear valance. Once it is repaired the gas tank should be pretty much even with the rear of the car. I'm actually thinking about taking it over and having a black anodized finish put on it. That one only cost me about $50, will make it look better and help it disappear.
Darreld
Sent from my iPhone using Tapatalk
Sam came over a few weeks ago and helped me out on a couple things. He identified that my ratio for my manual break pedal was off. I ended up raising the master cylinder about 2" to get to a 7:1 ratio. He also helped me out on some wiring questions I had particularly with the layout.
I picked up my new gas tank today. I had it made locally and I think it turned out great! I rerouted the inlet hose to make room for a dual exhaust and I plan on doing a little bit different set up for the gas cap.
I have some body damage on the rear valance. Once it is repaired the gas tank should be pretty much even with the rear of the car. I'm actually thinking about taking it over and having a black anodized finish put on it. That one only cost me about $50, will make it look better and help it disappear.
Darreld
Sent from my iPhone using Tapatalk
Attachments

68EFIvert
Well-Known Member
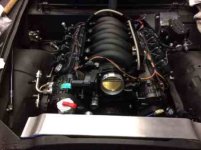
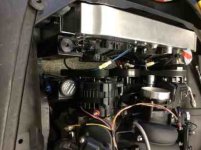
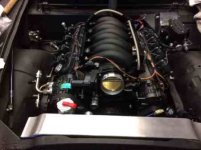
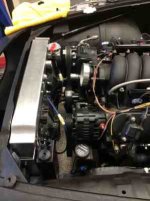
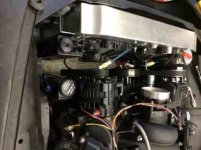
I haven't worked on the car much lately. I've started to rewire my old Mustang. I do have the engine back in as well as the transmission in its final position.
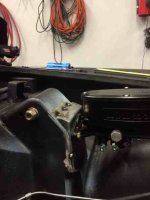
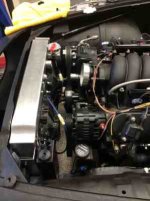
I started laying out the hoses and I've had to buy a couple new AC ends since I don't like the angles on a couple. I've put the wiring harness on the engine but have not drilled a hole in the firewall. I must say that the Easy Performance harness I purchased goes in very easily. LOL!
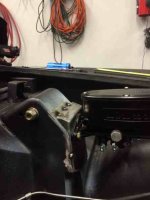
My next obstacle is finding a place for an air filter. It's really tight in there and with the addition of an overflow tank I'm not sure what I'm going to do yet. If anyone has a suggestion I'm all ears!
I also need to fabricate a mount for one of the coils. It has a slight interference with the brake pedal assembly.
Darreld
Sent from my iPhone using Tapatalk
Darreld
Sent from my iPhone using Tapatalk
I started laying out the hoses and I've had to buy a couple new AC ends since I don't like the angles on a couple. I've put the wiring harness on the engine but have not drilled a hole in the firewall. I must say that the Easy Performance harness I purchased goes in very easily. LOL!
My next obstacle is finding a place for an air filter. It's really tight in there and with the addition of an overflow tank I'm not sure what I'm going to do yet. If anyone has a suggestion I'm all ears!
I also need to fabricate a mount for one of the coils. It has a slight interference with the brake pedal assembly.
Darreld
Sent from my iPhone using Tapatalk
Darreld
Sent from my iPhone using Tapatalk
Attachments


68EFIvert
Well-Known Member
I spent the majority of the day finishing the wiring. I had to tighten up some hoses as well as install a temporary gas cap on the new gas tank. I think all I have left to do is put water in the radiator and put some gas in it. After that I should be ready to fire it up. I was hoping to have that done today but I couldn't get it completed before I have to start to barbecue.
Later tonight I'll doublecheck I have all the wires I need connected. I almost forgot, I still need to install my oxygen sensors in the down pipes. If I can I will hook my Borla mufflers directly to the down pipes.
Darreld
Sent from my iPhone using Tapatalk
Later tonight I'll doublecheck I have all the wires I need connected. I almost forgot, I still need to install my oxygen sensors in the down pipes. If I can I will hook my Borla mufflers directly to the down pipes.
Darreld
Sent from my iPhone using Tapatalk

Fast68back
Guest
Looks pretty sweet