• Hello there guest and Welcome to The #1 Classic Mustang forum!
    To gain full access you must Register. Registration is free and it takes only a few moments to complete.
    Already a member? Login here then!

I've made a poor decision

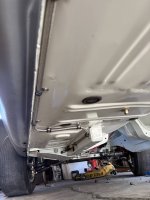
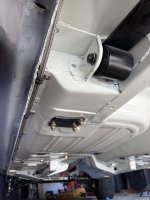
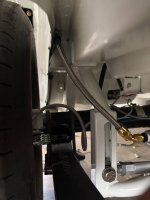
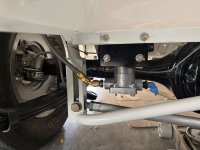
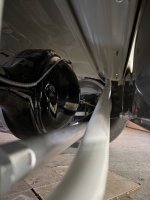
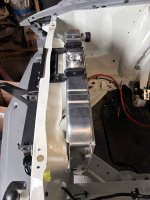
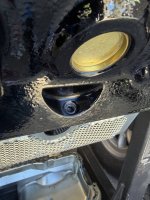
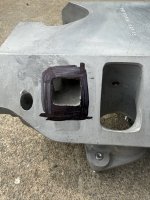
I will be able to finish things off under the car (at least for a while) once my Rhodes fuel cell arrives this week. Fingers crossed I have a enough clearance between the fuel line/feed coming out of the tank and the panhard bracket.

Guess we'll find out ;).

Automotive Exterior Tread Automotive Exhaust Silver Synthetic rubber


Silver


Automotive Wheel System Tread Silver Synthetic rubber Tire Care


Machine Nut Automotive Exhaust Tread Exhaust system


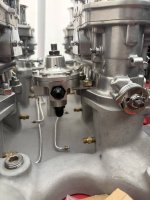
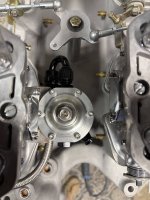
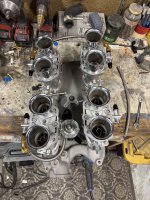
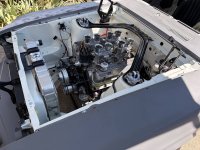
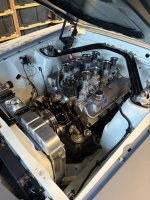
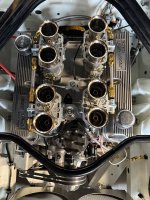
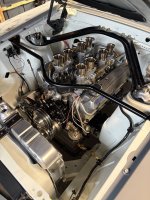
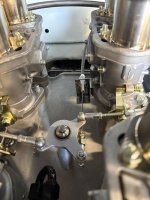
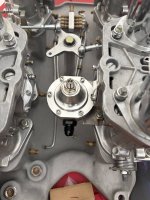
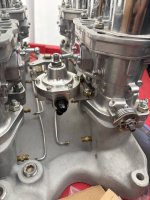
I was originally planning on mounting the Aeromotive fuel pressure regulator to the fender apron, but I ended up making a small bracket and stuffing it between the Webers. It looks more at home there and will free up some space in the engine bay. I will not be using the vacuum tree since I don't have power brakes. I will however use the ports to vacuum sync all the carburetors before plugging them.
Engine Machine Nut Automotive Fuel System Carburetor


Engine Machine Nut Engineering Fastener


Engine Nut Fastener Automotive Fuel System Carburetor


My goal was to have the car done (like driving AND painted) before August for Monterey Car Week, then I widened the goal post a bit to "driving and primered one color". Looking at what I still have left to do- I have a feeling that I will be taking my Datsun this year, lol. Either way, I'm going to do my best to get this thing driving.
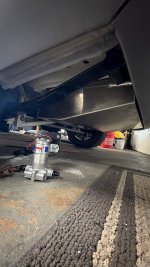
 
The Rhodes fuel cell arrived and fits well. The packaging was overkill and inadequate at the same time. Rhodes put the tank in a garbage bag, then into a cardboard box, then filled the empty space with expanding foam. The fittings still managed to punch through the cardboard and the foam made it a pain to get the tank out of the packaging. Luckily it made it here in once piece.
You'll notice my electric pump is no longer installed.

Metal Silver Steel Carbon fibers Aluminium


That's because there's very little room to fit the electric pump/filter & all the plumbing with the panhard setup. The fuel feed coming out of the tank points straight at the panhard bracket, so I'm forced to use my mechanical pump; unless I go with an in-tank electric pump. Oh well! At least I have less wiring to worry about :).

Metal Silver Carbon fibers Automotive Exhaust Steel


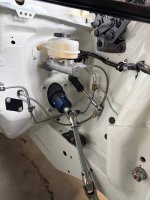
I also realized I never took a picture of the Ford Ranger master cylinder:

Engine Machine Electrical cable Wire Electrical wiring


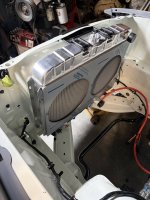
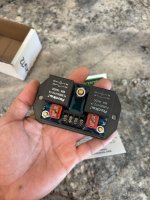
I also ordered an ACP 3 row 24" radiator and Champion electric fan shroud. The shroud isn't technically designed for the ACP radiator, but it fit with a few love taps. I will be running a couple SPAL 11" electric fans powered by a Leash Electronics Dual relay module.

Loudspeaker Hood Grille Kit car


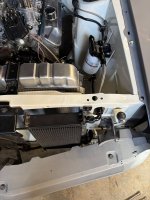
I needed the radiator in place so I could get an idea of where to install the remote oil filter mount. I wanted to put it where the washer bottle would be, but I think it's going to be a little cramped there.

Hood Kit car


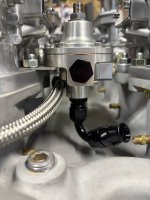
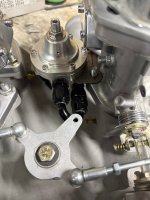
And lastly- I've been plumbing the quad Webers. I would have liked the fuel feed to come out of the front of the regulator, but that would have put it straight into the distributor. My solution is to have it come out of the backside with a 180* -6 AN fitting, which allows me to route the hose away from the distributor. I'm waiting on a few straight fittings to connect the front/rear Webers, but we're almost done here! I wasn't sure how I'd like the gold/black, but it's grown on me :).

Engine Machine Fastener Metal Nut


Engine Machine Fastener Screw Nut


Engine Fastener Machine Metal Nut


Machine Engine Nut Titanium Nickel
 
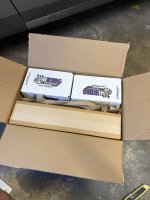
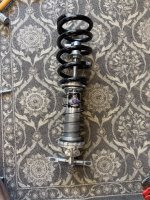
The shiny bits from Viking Performance were delivered- I'm very impressed with everything. These are not the same shocks/springs you get from CPP; this is Viking's competition-only double adjustable Crusader shocks along with 500 lb/in springs, helper springs, and lower bearings (to eliminate the urethane bushing on the T bar). They are made to order and take a few days to ship out. I worked with Ross at Viking and he helped spec out the whole package based on intended use, approx. weight, and desired ride height. All four shocks are slightly shorter to accommodate my lowered ride height.

Shipping Box Cardboard Packaging Box Packaging and labeling cardboard


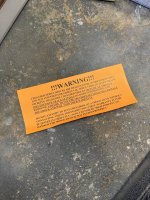
A neat warning about using them on the street.

Brown Concrete Handwriting Commemorative plaque


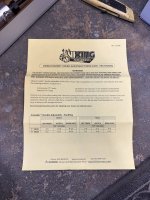
The shocks came with a nice guide to serve as starting point for shock adjustment. I was not impressed with their instructions- it appears to be a one size fits all sheet thrown in. Not many pictures and no Crayons to scribble ;).

Text Paper Font Paper Product Document


This is what the assembly looks like before getting installed; no spring compressor needed. I made sure to coat all the threads with antiseize.

One thing about the QA1 kit I like is the included upper shock mount, which is not included with the Viking kit.

Machine Coil spring Shock absorber Electromagnetic coil Nickel


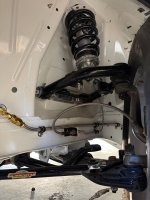
And here it is all installed! The helper spring is a cool upgrade and prevents the main spring from flopping around when the suspension is drooping.

Tread Vehicle brake Nut Carbon fibers Shock absorber
 
Time to assemble an angry V8 :)

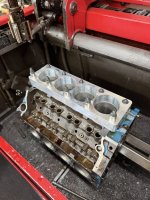
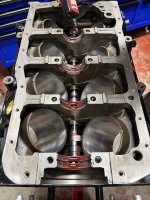
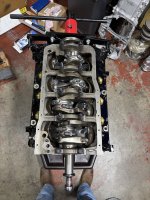
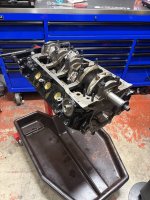
My friend Gabe over at Champion Racing Engines did all the machine work and assembly of the short block (I helped a little ;) )

Font Logo Label Graphics Advertising


I've known Gabe since 2014 and at the time, he was big into Subarus. I took him for a rip in my '69 convertible and within a month, he bought a Corvette and never looked back. 12 years later, he's building a spicy 306 for me!

Machine Engine Engineering Pipe Machine tool


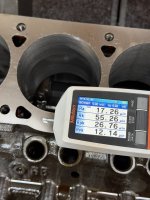
Neat fun fact- an LS torque plate fits a SBF perfectly ;). I'm sure that's a total coincidence.

Electronic device Technology Machine Display device Electronics


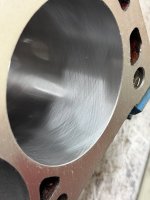
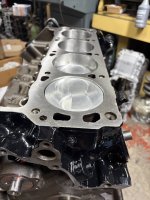
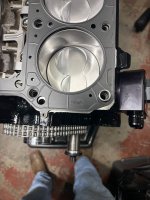
I'll be using Cometic MLS head gaskets, so we have a very smooth finish on the deck.

Metal Silver Titanium Aluminium Nickel


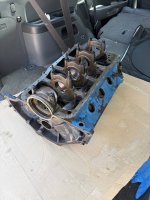
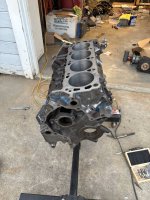
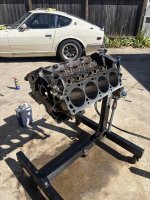
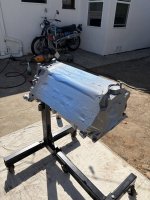
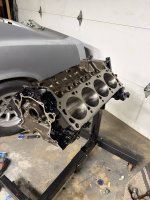
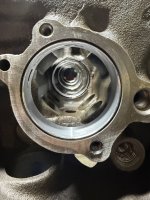
I brought the block home, wire wheeled it, ground down any casting flash, and ported the oil returns before cleaning/painting it with epoxy/urethane.

Engine Nut Fastener


Image


Automotive Tire Engine Automobile repair shop Hood Machine


Machine Aluminium


It is now violently shiny and smooth. I went a little overkill with a diegrinder and flap disc. This block had to be the roughest casting I've ever seen ('87 roller block).

Machine Engine Automobile repair shop Hood Steel
 
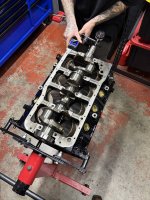
Some final cleaning before installing the cam bearings:

Engine Machine Engineering Automobile repair shop Nut

Nickel

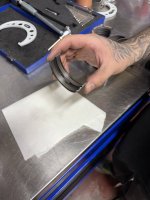
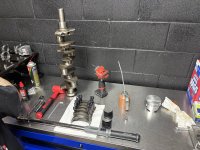
I'm using Clevite H series coated rod/main bearings and Total Seal rings.

Machine Metalworking hand tool Metalworking Mechanic Tool

Crank was ground 10/10 and the entire assembly balanced.

Machine Crankshaft Household hardware Cylinder Machine tool

Silver Plastic Titanium Nickel Steel

Cam is installed, we will degree it before we lock it down.

Machine Engine Titanium

Engine Machine Engineering Titanium

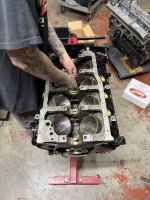
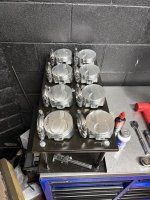
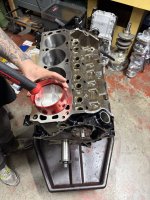
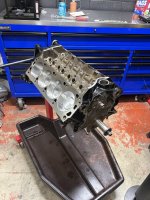
Pistons going in! Compression ratio will be around 11.3:1 per the Summit calculator; it should run fine on pump gas since the dynamic compression is fairly low thanks to the cam.

Machine Engine Titanium Nut Steel

Silver Titanium Engine Automotive Engine Gasket

Engine Machine Nut Automotive Engine Gasket Titanium
 
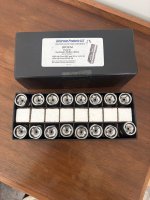
The Gaterman roller lifters, Cometic head gaskets, and ARP cam bolt came in, which means we can start buttoning this thing up!!

Both Gabe and I were very impressed with these lifters, especially for the price. I'm curious to see how they perform.

Box Silver Plastic Packaging and labeling Nickel


.030 compressed thickness head gaskets because we like to party. We clayed the pistons and the chunky 2.055 and 1.6 valves didn't leave a mark, even with the ridiculous .595 lift and .242/246 duration. It's amazing what happens when you buy the correct Trick Flow pistons for your Trick Flow heads ;)

Machine Engine Silver Titanium Fastener


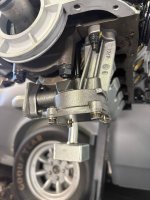
With the heads bolted on, I brought the long block home to finish reassembly. I installed an ARP oil pump drive shaft and Melling standard volume pump that was blueprinted by Precision Oil Pumps. They're very popular in the FE world, so naturally I opted for one of their Windsor pumps. At $150, it's hard to beat!

Machine Silver Vehicle brake Titanium Nickel


I also installed a Canton windage tray; it uses ARP main studs that have a provision for another (smaller) lock nut.

Machine Engine Engineering Metal Automobile repair shop


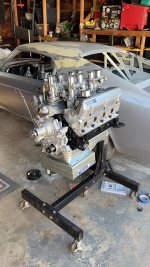
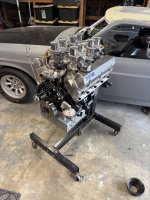
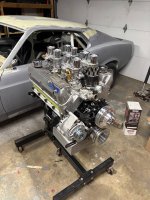
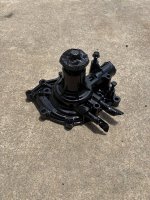
I couldn't resist slapping on the 8 stack, timing cover/water pump and oil pan just to stare at it. Like holy sh!t this is rad!!!! I plan on getting the valve covers vapor blasted for a cast finish. I really like the timing cover/water pump in the raw cast aluminum, but experience tells me that they will look nasty within a few weeks. They will get a coat of gloss black paint :).

The oil pan will be painted silver.

Engine Machine Engineering Hood Kit car
 
The water pump and timing cover are now hilariously shiny.

Machine Nickel


The blue Felpro gaskets are ungodly hideous, so I ended up buying some Mahle gaskets; which also required less trimming!

Machine Metal Engine Fastener Silver


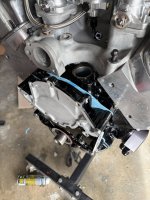
I drilled/tapped the timing cover and block for an NPT plug since my oil pan has a dipstick provision.
Carbon fibers


I don't know who made my Weber intake, but the water crossover ports were TINY. I ended up opening them up (I forgot to take a picture of the finished product).

Silver


And here we are today! I painted the oil pan silver and installed it with one of those one piece Felpro gaskets. I'm still waiting on the ARP water pump/timing cover bolts, but I'm hoping to install the motor this weekend. Once installed, I will be able to start routing oil lines and maybe even attempt to fire it up in the next couple weeks!

I ended up order the larger Weber 48's; they will arrive Friday. Anyone want a set of 44's? :D

Engine Machine Engineering Hood Kit car
 
IT'S TIME!!!!

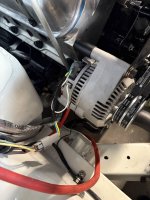
I've been trying to get as much stuff mocked up on the motor before it goes in. I ordered a 95 amp 3g alternator for a 90's F700(?) that allegedly (per the little slip inside the box) actually puts out 130 amps. It even came with a zinc plated double sheave pulley already installed!

Engine Machine Engineering Hood Kit car


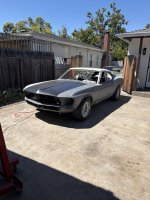
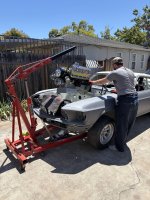
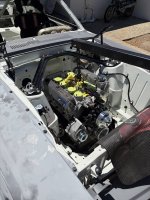
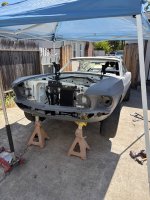
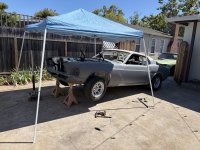
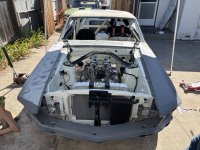
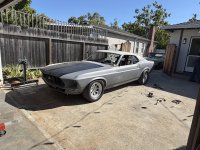
With the help of some buddies, we rolled the car outside to begin installing the engine/transmission. I gotta say, it looks awfully mean with the dark primer and black hood.

Car Land vehicle Motor vehicle Automotive Exterior Hood


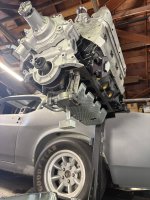
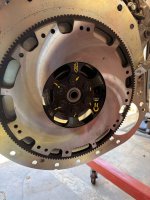
I forgot to remove the old pilot bearing while the motor was apart, so we had to dangle the engine on the hoist while I stuffed bread/WD40 into it with a punch to press it out.

Vehicle brake Machine Disc brake Synthetic rubber Clutch


After having to deal with installing FE's in mustangs, stuffing a short deck SBF was a breeze.

Tire Wheel Motor vehicle Automotive Tire Automotive Exterior


Motor vehicle Engine Hood Kit car Classic car


Automotive Exterior Automotive Tire Bumper Hood Fender


I also installed the transmission/shifter- everything fits great!

Automotive Exterior Fender Muscle car Car door Bumper


I had to install the Webers, even though I won't be using these ones, lol.

Motor vehicle Automotive Exterior Hood Car Engine


Motor vehicle Engine Hood Automotive Fuel System Kit car


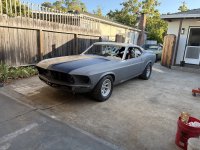
And with the weight of the drivetrain/hood on the car, I was finally able to get an idea of how it will sit. The Viking Coilovers are a breeze to adjust. The car sat a little too low at first (I actually like it, but the tires would probably rub):

Car Automotive Exterior Automotive Tire Hood Muscle car
 
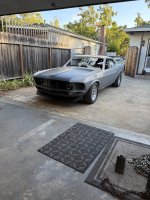
And after a bit of adjustment, I have the front sitting slightly higher than I'd like, but I figure it will settle a bit once I have the glass/bumpers/etc installed:


Car Tire Automotive Tire Automotive Exterior Hood

My buddy convinced me to put the chin spoiler back on:


Car Automotive Exterior Hood Automotive Tire Muscle car

The rear sits way too high, even with the reverse eye Detroit Speed springs and 1" lowering blocks. I will likely rob the Hotchkis springs out of the convertible since it sits a little low anyways.

I will be ordering some 1 3/4" primary JBA long tube headers in a week, I need to give me credit card a rest. In the meantime, there are plenty of details to drown in that cost nothing ;).


Motor vehicle Engine Hood Kit car Automotive Air Manifold
 
The Weber 48's arrived, so I was able to set up the throttle linkage and finish making the fuel feed hoses. I'm just about done with the fuel system; I'm waiting on carburetor insulators/spacers and one more fitting. I was a little disappointed that the Weber's didn't come with base gaskets, especially for how much they cost. Whatever.

I will need to order a throttle cable and fab up a bracket to mount it; the OEM '69 cable will not work. I wish I had splurged on a fancier linkage kit, but I can make this one work.


Engine Machine Titanium Carbon fibers Pipe


Next will be plumbing the oil lines for the remote filter/cooler.


Motor vehicle Engine Hood Machine Silver


The electric fan relay module arrived from Leash Electronics as well- pretty neat piece!

Technology Electronic device Circuit Component Electronic component Electronics
 
One step closer!

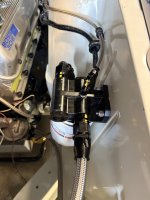
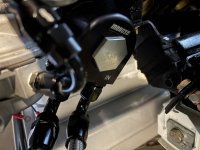
I finished the oil cooler/filter lines. I mounted a Setrab oil cooler in the factory SCJ location, then ran -10an PTFE hose to an Earl's remote filter and Moroso filter adaptor.

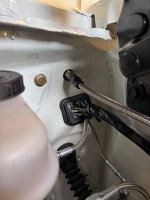
The Earl's filter mount has an 1/8 NPT bung; I used this to run a line for my mechanical oil pressure gauge. The gauge is fed via -4an PTFE hose into a bulkhead fitting at the firewall, then another line to the gauge itself. I do not trust those plastic lines!

I filled the 306 up with BR30 and primed the oil system- no leaks and 45 PSI of oil pressure with my drill!


Hood Engine Kit car


Electrical cable Machine Engine Automotive Fuel System Fuel line


Filter changes will be a breeze from now on ;)


Electrical cable Electrical wiring Wire Silver Fuel line


This would have been so much easier if I didn't have a mechanical fuel pump in the way.

Machine Nut Carbon fibers


I made a bracket for my throttle cable, so we now have 2/3 pedals functioning. My headers arrive Tuesday and carburetor base gaskets on Wednesday. I'm hoping to fire this thing up next week!!!

Engine Machine Metal Fastener Engineering
 
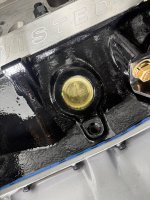
I had to take a couple steps back- the damn freeze plugs were leaking. I've installed dozens over the years and never had an issue. I normally use a large socket on the inside of the plug with some Right Stuff. My machinist friend says that doing so can cause them to concave and therefore lose some press fit. I don't doubt it, but I've also literally never had an issue doing that. Ce la vie! Lesson learned. I had a grand ol' time replacing all 6 plugs with the engine in the car.

Image


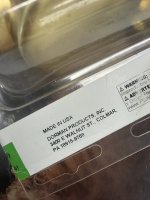
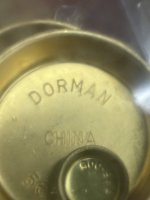
I bought two other replacement kits- the first one a Dorman "made in USA" (which is complete bullsh!t), then a Pioneer "made in USA".

The Dorman packaging:

Transparency Silver Label Plastic Packaging and labeling


The Dorman plugs:

Metal Silver Serveware Cookware and bakeware Dishware


The original freeze plug kit was Summit Racing branded- the plugs were VERY shallow; I think that exacerbated the concave/distortion problem. I ended up using Pioneer branded ones with Permatex #1; these ones were much deeper.

Hardwood Wood stain Still life photography Plank


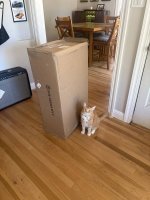
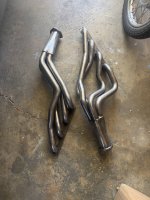
The 1 3/4" stainless long tube headers showed up- I was stoked for parts and Mango was stoked for the box.

Cat Felidae Flooring Wood Floor


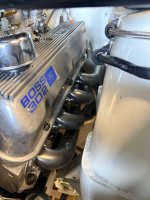
Not cheap and not the best fitting (at least compared to the original set I bought for my other '69), but they do fit :p

Titanium


Engine Automotive Fuel System Pipe Cylinder Titanium


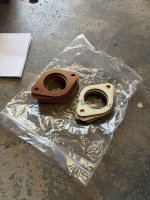
Other odds and ends like alternator wiring/carb insulators/gaskets showed up as well:

Pipe


Electrical cable Electrical wiring Machine Engine Wire


....which means we're about ready to fire it up :)
 
Thanks for bringing your build thread over here. Your car is going to be a beast with the sound of that motor. It's definitely going to be a blast for you.
 
Ya, thanks Armon for posting your outstanding build here. I had forgotten about half the things you had to fix. You have much more drive and energy than me. Kudos.
 
Back
Top