• Hello there guest and Welcome to The #1 Classic Mustang forum!
    To gain full access you must Register. Registration is free and it takes only a few moments to complete.
    Already a member? Login here then!

I've made a poor decision

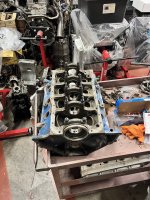
I got lots done in the last few days. A close friend of mine opened up his own machine shop, so we're going to be building my motor together. He had me install the ARP main studs so we could start measuring. I opted for the studs that let me run a windage tray.

He walked me through setting up the bore gauge and we got to work- it looks like we won't need to line bore the block, which is great news
Engine Machine Automobile repair shop


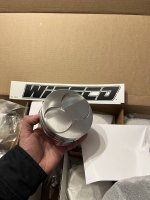
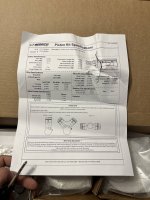
The Trick Flow pistons (made by Wiseco) also came in. For how much these damn things cost- you'd think they'd include piston rings. The compression ratio should be around 10.7:1 depending on the head gasket I use. I'm still waiting on the connecting rods (Scat), I think they're lost somewhere in Nevada with all the snow.
Silver Nickel Titanium


Paper Paper Product Receipt Number Document


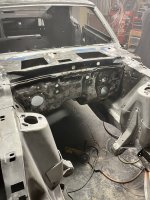
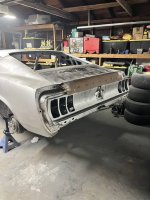
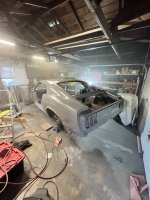
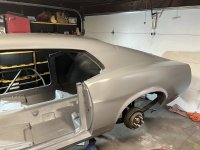
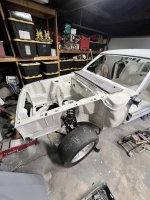
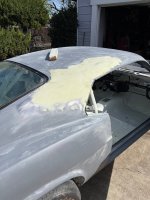
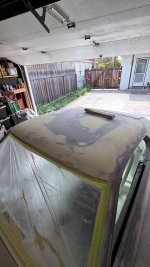
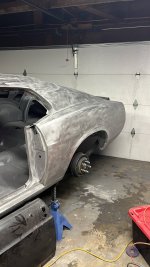
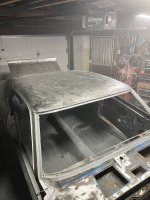
I also started stripping the entire exterior and as much of the engine bay as I could. I should have replaced the roof skin, there are so many dents.
Automotive Exterior Automotive Tire Hood Fender Automobile repair shop


Metal Hood Kit car Steel


Motor vehicle Automotive Exterior Hood Fender Windshield


Bumper Fender Muscle car Hood Classic car


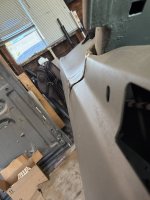
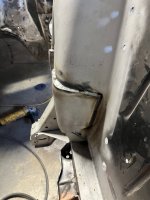
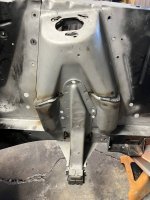
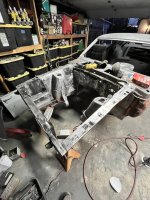
I had swapped in big block shock towers because I wanted the factory style wrap around bracing. I took pictures of many of the Bud Moore prepared cars during Monterey Car Week and noticed that most of the cars had the gaps welded shut. So naturally, I did the same :)
Synthetic rubber


I thought about stitch welding the bracing near the control arm mounts, but I figured I've already introduced enough heat into the panels lol,.
Metal Silver Hood Synthetic rubber


Motor vehicle Automotive Exterior Hood Kit car Automobile repair shop
 
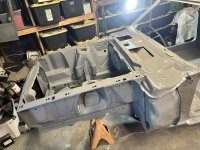
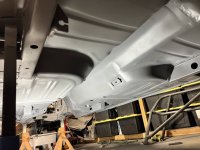
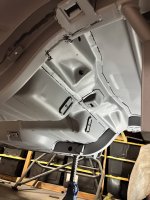
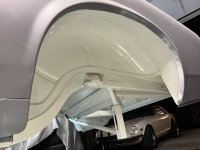
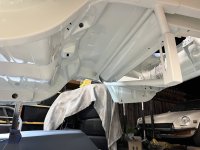
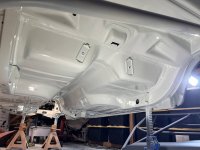
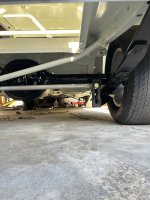
After a few days of scrubbing/scuffing, the underside of the car was finally ready for epoxy/seam sealer. I bought a Spectrum siphon style gun from Harbor Freight since I'd laying on my back to paint. Total game changer- it made life much easier, although I'm still a little sore from rolling on concrete.
I used a combination of 3M's 1k seam sealer and Evercoat's brushable seam sealer.

Tread

Image

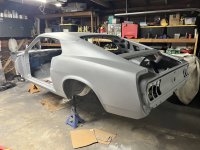
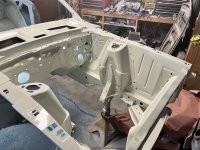
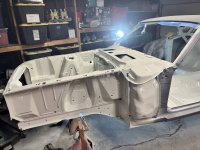
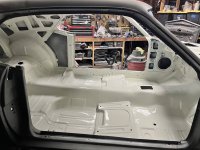
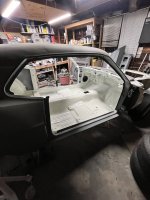
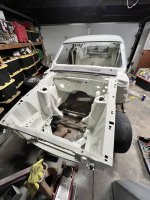
I seam sealed the rest of the car and scuffed the engine bay/interior- which means it's time for some paint! I've been using Summit Racing branded epoxy and single stage- the color is Winter White (which I think is a GM color, shh). I haven't decided what color the exterior will be, but I figure I have plenty of time to decide lol.

3M recommends that you topcoat their seam sealer within 24 hours. Anything beyond that requires that you scuff the surface. The Summit epoxy has a 4 day window before you need to scuff the surface for proper adhesion. I was still within the re-coat window, so I wanted to take advantage of not having to scuff the entire underside of the car (again).

Automotive Exterior Hood Fender Bumper Car door

Automotive Exterior Hood Fender Bumper Kit car

Fender Concept car

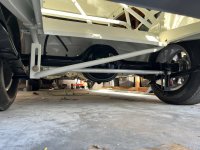
I opted to paint the panhard rod bracket white as well.

Kit car


Image

Automotive Exterior Windshield Car door Trunk Car seat

Automotive Exterior Car door Windshield Hood Kit car
 
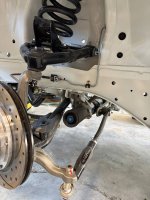
I reinstalled the front suspension/steering (hopefully for the last time) and put the front end back on the ground.

Motor vehicle Automotive Exterior Hood Windshield Kit car


I may ditch the springs and go with one of those QA1 coilover conversions- we'll see. This project has snowballed so I'm trying to be mindful of spending (whatever that means).

Motor vehicle Automotive Exterior Hood Fender Windshield


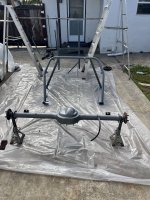
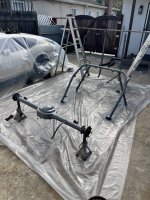
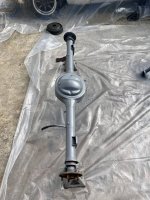
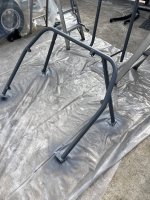
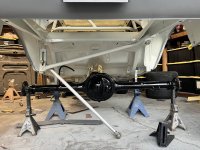
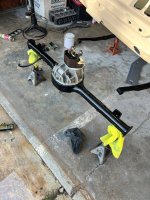
I also spent a couple days stripping the rear axle housing, roll cage, and sway bar. I got everything epoxy primed and painted as well.

I've been running out of places to paint things, so a couple ladders, 1" box box tubing, and zip ties served as a paint rack.

Iron Metal Pipe Steel Aluminium


I was in the process of replace wheel bearings on my 240z when I noticed what appears to be a crack in the stub axle, so it's been on jack stands while I search for another set. The replacements should hopefully be here this week, but it will be a paperweight until then.

Silver Aluminium Railing Automotive Carrying Rack


Automotive Exhaust Tread Exhaust system


Carbon fibers Kit car Synthetic rubber
 
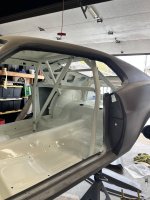
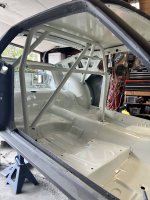
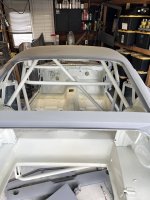
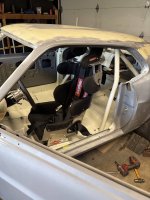
he best place to store parts is where the belong- on the car! The cage went in today; I'm waiting for the paint on the brackets to dry so I can bolt it in for good.

Automotive Exterior Fender Hood Windshield Car door


Automotive Exterior Windshield Car door Hood Kit car


Kit car Hood


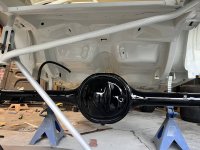
I probably didn't need to paint the axle housing gloss black, but I think it will look good against all the white underneath. I need to bead blast/paint the U bolt brackets and shackles, then the car can hopefully start rolling again this week.

Metal Tread Steel Chassis Automotive Exhaust


Automotive Exhaust Exhaust system Automobile repair shop Synthetic rubber Kit car
 
The rear axle is buttoned up and back under the car. It's a 9" from a '70 Mercury Cougar that went up in flames. It has an aluminum Yukon center section/Daytona pinion support, REM polished 3.89 gears, Trutrac, and Ten Factory 31 spline axles. For anyone on the fence about paying the extra money for the REM finishing, it's 10000% worth it. It makes break in a breeze! I could not for the life of me get the gear oil to heat up.

FYI- do not buy the CJ Classic's branded shackle kit. It is AWFUL. I used the bushings (hoping I don't regret this), but the shackles themselves are too wide and are extremely sloppy. I ended up bead blasting/painting my originals.

You'll notice the car currently has Bluetooth rear brakes. I don't think I'll be putting the rear drums back on- I was having issues with pedal fade under hard braking (I don't care what anyone says- drum brakes are ass and I'm not buying fancy shoes for them).

I have the fixed 4 piston Wilwood calipers on my convertible and I have the dreaded pad knock, which makes the pedal spongey after some hard cornering. All the T/A cars ran K/H 4 piston calipers in the rear with full floating axles, which should in theory prevent pad knock. I will likely use a kit that runs the Cobra style single piston floating caliper.

Machine Automobile repair shop


Metal Tread Silver Steel Automotive Exhaust


Metal Tread Silver Synthetic rubber Carbon fibers


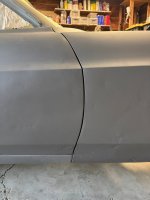
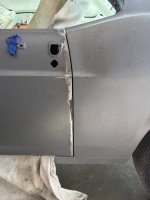
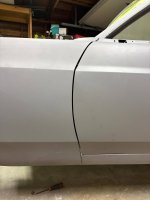
I also rebuilt the door hinges and hung the doors. The driver side door and fender are aftermarket CJ classics branded that I got for next to nothing, so it's hard to complain (but I will). The gaps aren't horrible, but the lower bodyline on the door doesn't match the quarter and the top of the fender to the door is egregiously bad. I had already stripped them both, so I got a coat of epoxy on them. We'll deal with those gaps later, lol.

Silver Synthetic rubber Hood


Silver Synthetic rubber


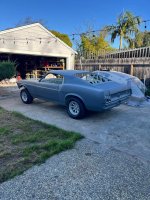
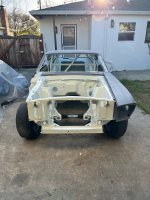
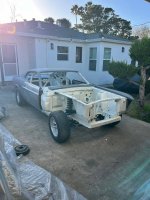
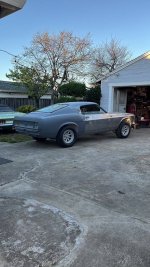
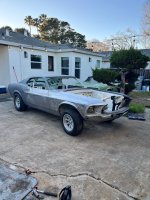
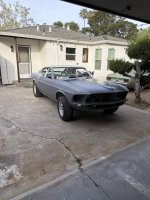
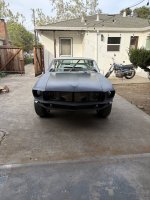
Anyways- it rolls again and mostly looks like a car from one side.

Car Muscle car Hood Classic car Fender


Automotive Exterior Fender Hood Bumper Windshield


Motor vehicle Automotive Exterior Car Hood Automotive Tire
 
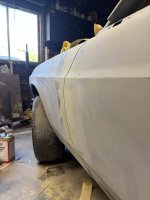
I finally finished stripping/priming the last few panels; what a nightmare. The passenger fender and door are OEM and looked pretty nasty until I got a few layers of epoxy on them. The headlight bucket is missing the tab for the valance (typical), so I will need to make something and bond it.

Car Automotive Tire Muscle car Classic car Automotive lighting


Car Automotive Tire Automotive Exterior Hood Muscle car


I also started some of the bodywork. I replaced the lead seam with Evercoat Metal-2-Metal (although I put it over epoxy). This is my first time using the stuff and it's... interesting. The activator is clear and the consistency of water, which makes it hard to tell if it's thoroughly mixed. The ratio of filler to activator is also tricky- the first batch I mixed didn't have enough, so it didn't really dry; that was a fun mistake.

I figured it out eventually and filled in both seams, the rest is getting a skim coat of Evercoat Rage.

Automotive Exterior Hood Car door Fender Muscle car


I'm not a paint/body guy. I've done it before and I despise it. The whole car will need a skim coat, especially the OEM panels.

Motor vehicle Automotive Exterior Car Hood Car door


The good news is that the gaps on the OEM panels are fantastic and won't need much work.

Fender Bumper Hood Hubcap Car door


The side with the aftermarket door/fender though, is AWFUL. The contours don't match, so a block of wood/sledgehammer/filler will be needed.

The corner where the door meets the fender will need to be cut up and reshaped entirely, along with filler metal added to even up the gaps.

Automotive Exterior Fender Hubcap Bumper Silver


Transparency
 
On a more fun note:

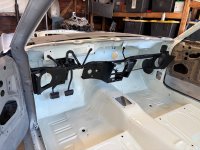
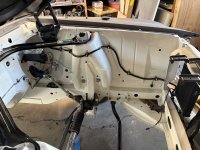
I stripped/painted the lower dash, steering column, pedal support, and all associated brackets. The pedal support got a Mustang Steve roller bearing conversion.

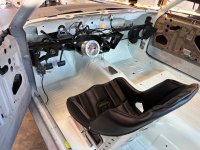
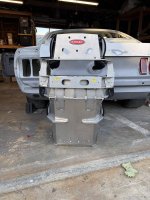
The seat is also installed and fixed to my driving position; it will get a brace from the top of the seat back to the roll cage. I had to make some adaptors (not pictured) to run the Kirkey seat brackets with the stock seat platform as I didn't want to drill more holes.

Someone swapped in an A/C lower dash into the car. I have the vents; I think it would be cool to make some fresh air ventilation system with them. In the meantime- we have two gaping holes.

Windshield Hood Car door Kit car Engine


I also rewrapped the wiring harness with 3M Super 33 electrical tape and added a few extra wires for accessories/ignition.

Motor vehicle Automotive Exterior Windshield Car door Hood


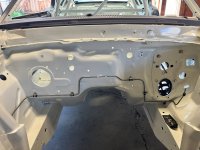
I also started mocking up brake lines. I don't like the factory clamps and screws, so I install stainless rivnuts and adel clamps. I have bits and pieces of a prebent kit, so it will save some time. I may cut off the fittings and replace them with stainless ones.

I'm undecided on what to do with the long line that runs along the transmission tunnel. I see many cars run them inside the car with an adjustable proportioning valve by the driver seat. Sounds great, but also a pain to plumb.

Engine Kit car Hood


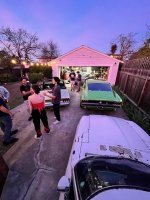
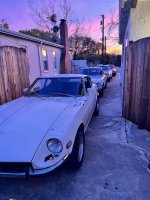
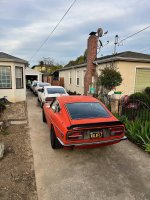
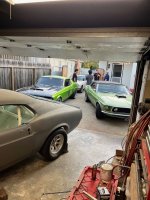
We had a party at the house, driveway parking was reserved for Mustang's and Z cars :).

Motor vehicle Car Automotive Exterior Automotive lighting Car door


Car Land vehicle Vehicle Tire Wheel


Land vehicle Car Tire Automotive Exterior Automotive lighting


Car Motor vehicle Automotive Exterior Automotive lighting Automotive Tire


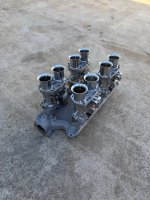
And lastly- I FINALLY finished removing 99% of the disgusting yellow paint from the quad weber setup. What do you have to smoke to want to paint these things YELLOW?!

Cylinder Engine Titanium Carburetor
 
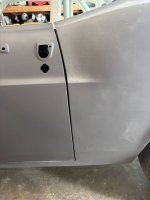
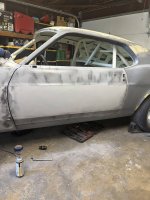
It's finally time to start addressing the door gaps (I've been avoiding this for a while). I got the driver door adjusted as close as possible before I start cutting/welding.

I'd like the rear gap to be about the width of a paint stick- I think about 3/16th? Something like that.

The gap was wide at the top and tight at the bottom. The actual bottom of the door has some weirdness going on as well towards the door jam area, but that will be addressed later on. I mainly wanted to ensure all the body lines are in the right place.

Fender Automotive Wheel System Hubcap Car door Bumper


Image


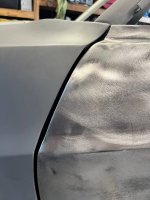
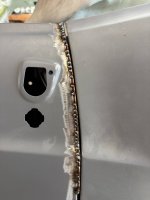
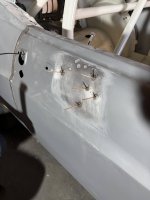
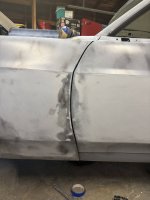
I welded in some 1/8" thick TIG rod to close the gap and hit it all with a flap disc to even it out. I like using a piece of thin masking tape to draw out the gap, this ensures a uniform gap and that I don't grind too far.

Image


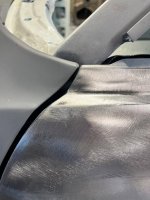
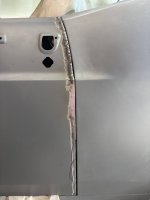
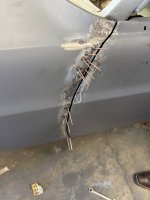
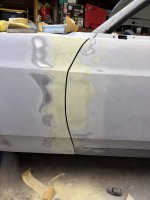
.....after some grinding

Image


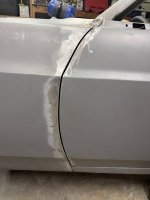
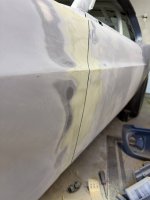
And after a few passes with a hand file, I'm calling it done!

Automotive Exterior Automotive Tire Fender Automotive Wheel System Hubcap
 
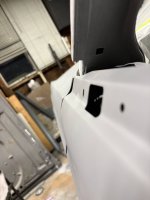
Next is the atrocious door corner to fender gap. The contours are... wrong :)


Silver


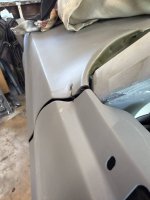
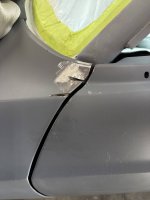
Some strategic pie cuts:

Fender Synthetic rubber


Car door Synthetic rubber Fender Hood


And after welding it back together- all done! I will address the front/bottom door gaps another day.

Image
 
Next time you get a quote for paint and body- just pay the guy. This is not fun, lol.

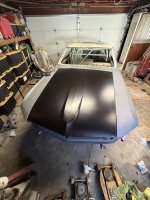
I ordered an OER hood via JEGS, I couldn't argue with the price. The fitment is decent and more importantly- I don't have to strip layers of paint/filler from the top and bottom. I also found out that my original hood hinges are toast; this is of course after I spent time bead blasting them then shooting epoxy primer/gloss black paint. I ordered new hinges and reused my original springs.

The hinges were VERY tight and will take some time to break in.

Car Motor vehicle Automotive Exterior Hood Automotive lighting

There is a slight bow in the hood, but I'm just going to live with it.

Car Land vehicle Vehicle Tire Wheel

Car Motor vehicle Automotive Exterior Automotive Tire Bumper

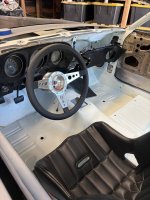
Also on the list of low hanging fruit/low effort high dopamine projects: we have a steering wheel.

Windshield Center console Muscle car Steering wheel Car door

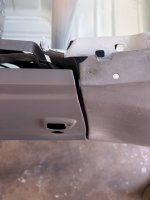
On the list of high effort/low dopamine tasks: tackling the gap on the front of the door. Holy hell this was miserable. I was putting off buying a Motor Guard Dent Puller, thinking that this would be the only car I needed it for; then I looked at my Datsun. Yeah, I'll probably use it on that too, lol.

It's a game changer- I wish I bought one sooner!


Silver


Automotive Exterior Fender Bumper Car door Windshield

After some welding/violent beating with hammers:

Automotive Exterior Automotive Tire Fender Hubcap Automotive Wheel System

I deem it good enough. The passenger side was fine.

I epoxy primed the door/fender again, then hit it with some 2K and started blocking. Not bad, but it will need a skim coat of filler where I was correcting gaps.

Automotive Exterior Automotive Tire Fender Hood Automobile repair shop

Automotive Exterior Automotive Tire Fender Bumper Hubcap
 
....After some skim coats:

Automotive Exterior Fender Hubcap Bumper Hood


Fender Automotive Wheel System Hubcap Car door Hood


I'd say it's not too bad!

Automotive Exterior Automotive Tire Fender Hubcap Automotive Wheel System


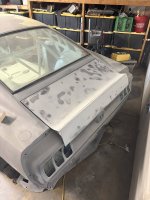
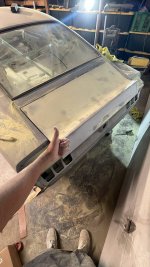
It's amazing what the 2k primer shows. I knew the trunk needed work, but not this much, lol.

Fender Bumper Muscle car Hood Kit car


There's probably $8 of Rage filler dust on the the ground.

Automotive Exterior Hood Windshield Car door Kit car


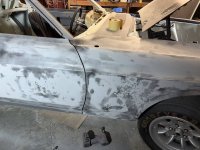
I don't know what the hell happened on the passenger side, but someone had a field day with a body hammer in the past. This is a later Armon problem.

Automotive Exterior Automotive Tire Fender Hood Hubcap
 
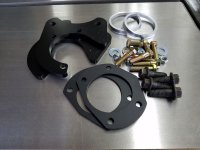
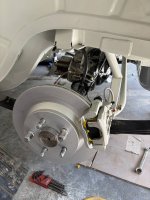
I installed rear discs, thanks to a bracket kit from Vintage Race Works.


www.vintageraceworks.com

1965-1973 Mustang Cobra Rear Disc Brake Adapter Kit — Vintage Race Works

Rear disc brake adapter kit for 1965-1973 Mustangs using 11.65-inch Cobra rear brakes. Bolt-on solution for improved rear braking performance.
www.vintageraceworks.com www.vintageraceworks.com

The short answer- I'm VERY impressed with how simple everything went together- bonus points for being reasonably priced!

I've been looking for a rear disc setup that uses a floating caliper, but most of the kits use GM calipers (no thanks), or are fixed. I have 4 piston Wilwood rear brakes on my convertible and while they work great, I get severe pad knock after some cornering, causing a squishy pedal. Some companies offer a Ford Explorer disc brake conversion which seems like a good choice, but I really wanted vented rotors AND something that will clear 15" wheels.

Installation was very straightforward and doesn't require you to remove your wheel bearings (I already have aftermarket axle retainers so it wasn't an issue anyways).

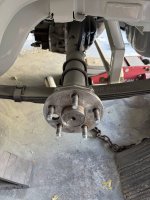
Remove the drums:

Machine Nut Synthetic rubber Vehicle brake Tread

Pull axle and install spacer plate (this goes in place of the drum backing plate):

Fastener Nut Steel Cylinder Nickel

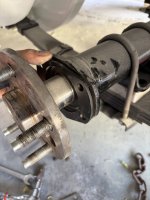
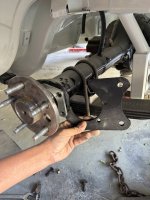
Install caliper bracket and torque bolts to 35 ft/lbs:

Note: the instructions have black and white photos and it is a little difficult to tell the correct orientation of the brackets. I wouldn't call it an issue, just an observation.

Machine Nut Vehicle brake Steel Tread

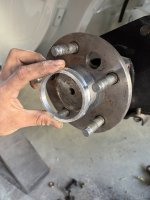
Install register/locater thing on axle:

I cleaned up the axle with some 320 and applied some anti-seize (might be worth including this tip in the instructions).

Vehicle brake Synthetic rubber Locking hubs Nut Disc brake

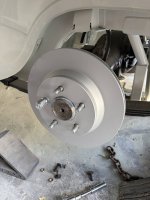
Install rotors:

I bought my rotors/calipers from Rock Auto. I will be using EBC Yellows (haven't bought these yet).

Calipers: POWER STOP L4825A and L4824A
Rotors: DYNAMIC FRICTION 60454037

Disc brake Vehicle brake Metal Brake Synthetic rubber

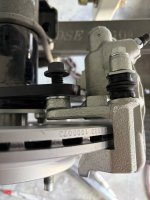
Install calipers:

I did not see a torque value for the caliper bolts in the instructions, so will default to German torque value of GĂĽd-n-tight plus some red Loctite. They will be loosely bolted on for now while I get brake lines plumbed and pads installed.

Machine Machine tool Silver Steel Nickel

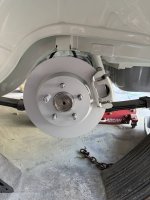
...And there we have it. 11.65" discs that clear 15" minilites AND use all Ford parts!

Disc brake Automotive Wheel System Vehicle brake Tread Hubcap

Automotive Tire Automotive Wheel System Synthetic rubber Tread Hubcap
 
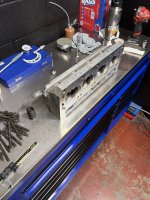
I stopped by the machine shop- the heads have been resurfaced and a few bits were walnut blasted. I think I've decided on a cam, so my buddy is beginning to shim the valve springs accordingly.

Steel Titanium

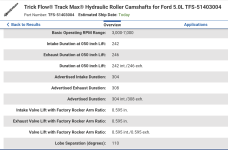
Since we're here to party and don't give a damn about vacuum, I've opted for the silly cam:

Text White Screenshot Font Number

The last 306 I built had a similar cam and it was completely driveable on the street, so we're going to see how much we can push it ;).

I also finished plumbing the hardlines on the axle and engine bay- I ran out of tubing for the line that runs down the transmission tunnel.

Machine Pipe Nut Wire

Disc brake Vehicle brake Machine Brake


Metal Pipe Steel Carbon fibers

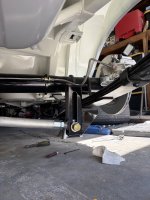
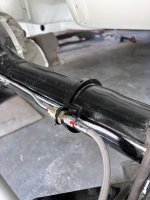
Also if you're dumb like me and forget to weld on tabs for the brake lines before painting the axle, Wilwood makes these awesome aluminum mounts that clamp on the axle tubing.

I like them because you can relocate them anywhere without having to cut/weld new tabs. I personally can't stand seeing hose clamps used to hold the lines in place.

Pipe Carbon fibers Automotive Exhaust

And here's the front! I love using stainless fittings whenever I can.

Vehicle brake Disc brake Tread Nut Carbon fibers
 
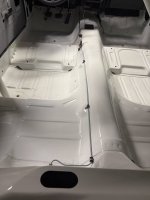
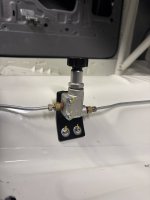
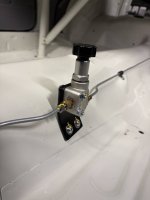
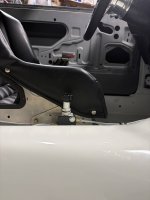
I plan on mounting the brake proportioning valve next to the driver seat (because racecar), which means I need to run brake line into the cabin along the transmission tunnel.

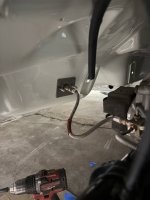
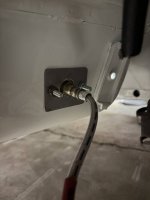
I also realized that the Dynacorn floor does not have the bracket to mount the rear axle hose to the body; I think mine might be in a landfill.

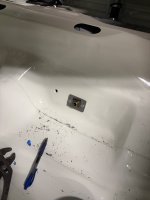
This means we have to get a little creative :). Stuffing the hose through a grommet seems lazy and potentially unsafe, so I made a couple sandwich plates out of some 14 and 18 gauge steel. The hose clips into the thicker piece with the OEM hose retainer, then gets bolted through a hole in the body into the other sandwich plate. Overkill and simple ;). I'll give the plates a coat of paint and replace the hardware with stainless.


Electrical cable Machine Wire Silver Electrical wiring


Electrical cable Technology Wire Electrical Supply Silver


The plan is the run a length of hardline inside the car (with the valve plumbed in line) to a bulkhead fitting at the firewall. A -3 AN stainless hose will be plumbed from the bulkhead fitting to the master cylinder. More fittings than I would like, but this makes everything MUCH more serviceable.

It was definitely a little sketchy drilling into fresh paint (I put down some masking tape first).

Plastic
 
I debated on how to go about routing the rear hard line through the cabin, I ultimately decided to reuse the OEM brake line clamp holes with stainless rivnuts.


Synthetic rubber Kit car


I whipped up a quick bracket for the proportioning valve- it's tucked away, but still within reach of the driver.


Technology Electrical cable Machine Fastener Nut


Machine Nut Fastener Household hardware Screw


Car door Silver Car seat Carbon fibers Kit car


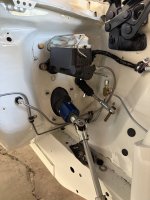
So fun fact on the '74 Maverick master cylinder for a manual disc/drum application:

There is no residual valve in the master for the rear brakes. The seat for the fitting is also cast into the master cylinder and is not removable ;). I found this out after trying to remove it, which shattered the seat. Oops.

I ended up replacing the master cylinder with an aluminum bodied one from an 80's Ford Ranger. Besides being super light, it has the correct 15/16th bore and uses a plastic reservoir with a screw in cap- no more leaks! I know some folks might think it looks out of place, but that's not my problem :D.

The pictures below are with the Maverick master, I need to snap a few photos of the Ranger one.

Electrical cable Machine Wire Electrical wiring Nut


I also installed the reproduction headlight harness. I will probably butcher this in the future to add relays for the headlights.

Windshield Engine Hood Windscreen wiper Kit car


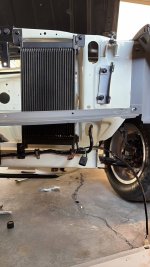
The Setrab oiler cooler is also installed, it's conveniently about the size of the OEM Drag Pack cooler and allows me to use the OEM holes in the core support.

Bumper Fender Grille Tread Hood
 
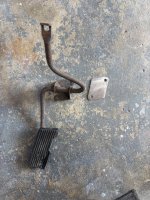
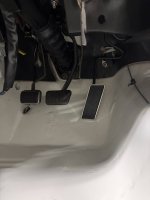
We also have all three pedals installed! My original throttle pedal was pretty mangled, so I bought a reproduction. I also made a reinforcement plate that sandwiches the firewall between it and the go-pedal.

Iron Household hardware Carbon fibers


Silver Automobile pedal


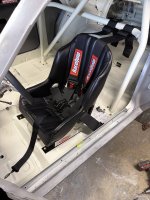
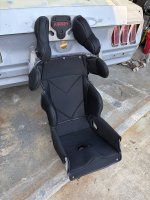
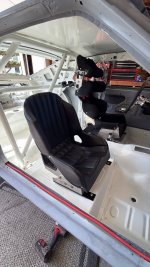
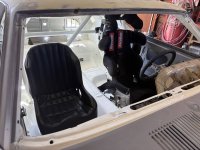
I also mocked up the 5 point harness with the Kirkey lowback racing seat. The plan was to add a headrest to the rollbar, but I've since bought one of Kirkey's series 81 full containment seats. The lowback seat will become the new passenger seat (no headrest. Sorry, passengers).

Car seat Synthetic rubber Kit car Carbon fibers


The full containment seat is surprisingly comfy and sized to me. For context, I wear a 30/32, so I don't think many folks will be able to squeeze in ;).


Car seat Car Seat Cover Toy Baby transport Seat belt


Automotive Exterior Bumper Fender Hood Tread


And lastly:

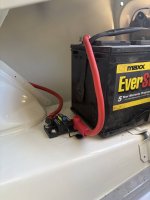
I began installing a trunk mounted battery. I took my original battery tray, removed the spot-welded bracket that holds it to the apron, then drilled through the trunk floor and bolted it down. I will use an OEM style battery clamp with an AGM or lithium battery (no need to vent those).

I debated moving the starter solenoid to the trunk, but I will keep it on the apron with a 200 amp circuit breaker (mounted with rivnuts, of course). I found a company in Alaska (Polar Wire) that sells the Made in USA version of the circuit breakers you see on Amazon. Sure, it's triple the cost, but I don't care to find out why :).

Electrical cable Wire Electrical wiring Machine Electric battery
 
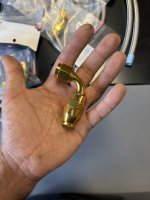
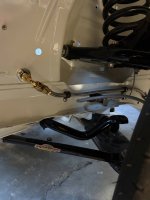
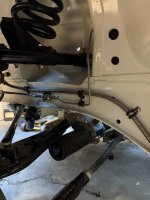
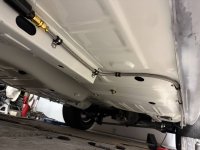
I've been tackling the rest of the fuel system. A buddy of mine at Color Fittings hooked me up with some black/gold AN fittings and braided stainless PTFE hose. I'll be running -6 hose the entire length of the car following the factory route (mostly).

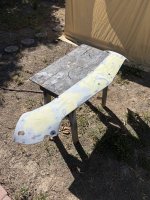
I'm trying to tackle as much stuff underneath the car to avoid having to roll around in filler/paint dust whenever I start back up on the body work. In the meantime, I'm addressing some of the panels that I can work on outside of the garage (e.g. valance & decklid.


Hose Household hardware Brass Nozzle Plumbing


Pipe Automotive Exhaust Nut Automotive Fuel System Exhaust system


Image


I plumbed an inline fuel filter where the factory fuel lines would normally split. The lines are held in with stainless rivnuts and adel clamps, per usual.

Image


I don't know why I bothered putting so much work into the valance- you'll hardly be able to see it.

Plastic
 
Back
Top