• Hello there guest and Welcome to The #1 Classic Mustang forum!
    To gain full access you must Register. Registration is free and it takes only a few moments to complete.
    Already a member? Login here then!

I've made a poor decision

happystang

Member
** Howdy! A number of folks have asked me to start sharing this build thread that I had going from the other forum ;) . This is basically going to be a copy and paste dating back to December 2024. **
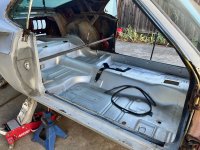
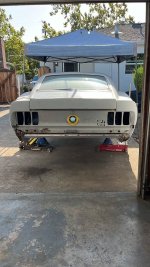
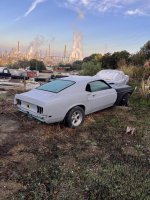
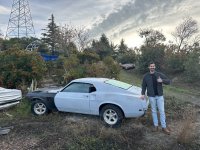
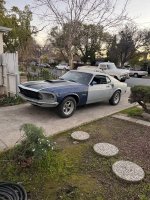
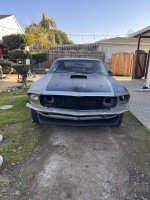
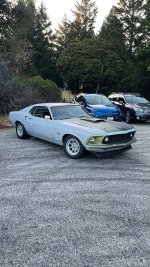
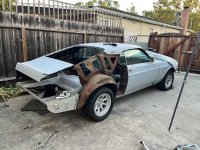
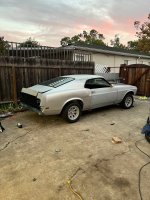
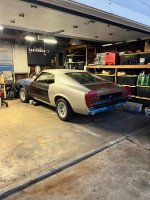
It's been a while since I've bought a turd, so naturally I found the cheapest running (ish) '69 fastback in California. There are many, many things wrong with it- but it has a clean title and it's a fastback.
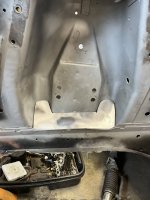
I was originally looking for a 67/68 coupe, but this hunk of crap popped up instead. The plan is to build a period correct (ish) Boss 302 Trans Am car. It will not be legal for any vintage racing classes, but it will definitely look legal ;). It's about as poverty spec as they come. It was a dealer stock ordered car- 302, automatic, and styled steel wheels. Didn't even have a fold down rear seat.

I'd like to mimic the formula I had with my '69 convertible, but with a roof; for obvious reasons.

High revving small block, aluminum heads, global west control arms etc... but with 15" wheels.

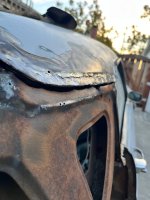
The rust situation isn't too bad, but it's been hit hard in the back and has had some seriously atrocious metal work done to "fix it". There's actually a ton of boneheaded repairs and "upgrades" on this car that will get corrected ;).


Car Muscle car Hood Classic car Fender


Car Hood Muscle car Fender Classic car
 
The car was originally equipped with manual steering, manual drum brakes, and a C4 automatic transmission.

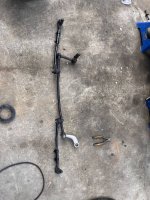
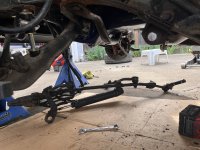
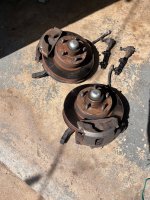
Someone took the time to swap in a full PS setup (poorly) from an early '67 mustang. They also converted it to manual discs (again, poorly) using Granada spindles.

They kept the mustang outer tie rods, which were flopping around dangerously in the Granada spindle knuckles. I took this opportunity to ditch the OEM PS in favor of manual steering with a roller idler arm. The only things I was missing were the Granada outer tierods and some hardware. I had a few steering boxes laying around from other projects to replace the 1" sector shaft steering box that was previously swapped in.

Carbon fibers Electrical cable


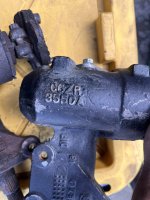
I had this steering box laying around. It was missing the tag, but it turns out to be a 16:1 late '67 steering box. I replaced the rag joint since it was all apart.

Machine Fastener Nut

Synthetic rubber Nut Pipe Tread Carbon fibers


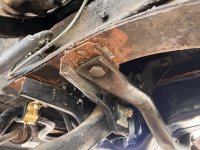
The PS ram bracket was booger welded to the frame rail, along with the replacement shock tower and lower control arm mount. This will all get replaced in the future- I don't trust a single weld on this car. The shock tower was actually delaminating, I had to weld the damn thing back together.

Rust Fastener Pipe Automotive Fuel System Nut


You'll notice that I've ditched the eccentric in favor of a lock out for the lower control arm. The ball joints have been replaced, but they're all trashed. The car will get GW upper/lower control arms and strut rods at some point.

Again- phase 1 of this car is to make it run and drive using mainly leftover parts. I'm not only clearing out my garage, but I'll hopefully have a car to screw around with over summer. I think folks forget how important it is to make sure you can actually use the damn car. It's easy to lose motivation on a project when you're only working on it and never driving it!
 
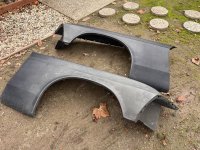
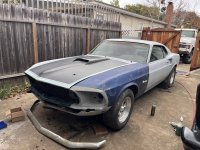
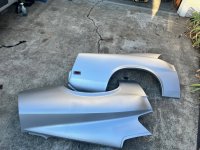
The car had aftermarket front fenders dangling on the front, the rest of the pieces were sitting in the backseat. I ended up sourcing a set of OEM fenders and headlight buckets for the car; granted it's still missing quite a bit ;).

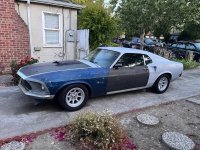
At least it looks like a car now?

Fender Synthetic rubber Tread Bumper Hood


Car Motor vehicle Automotive Exterior Hood Automotive Tire


Car Hood Automotive lighting Muscle car Automotive Tire


I also couldn't resist buying a front air dam. I probably should have bought headlights, but the air dam is cooler.

Car Automotive Exterior Hood Muscle car Automotive lighting


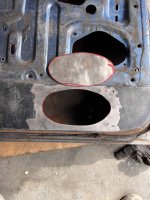
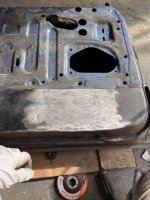
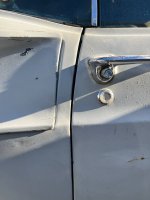
I ended up replacing the driver door. The glass shattered when I closed it, turns out the door is very bent. The replacement door had a speaker hole that I welded up.

Metal Rust


Not my finest work, but it'll do.

Rust
 
The right thing to do with this car would be to blow it apart and fix all the rust/accident damage, but that's boring and I want to drive the damn thing.

So naturally, I dumped a bunch of time/money into an undeserving pile of a '69 fastback. Some of this is out of order and I'm sure there's a few steps/fixes I'm forgetting.

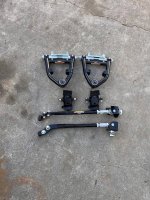
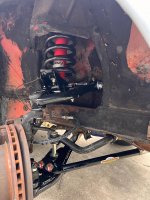
I rebuilt the front end with Global West control arms/strut rods/springs, Koni shocks, Opentracker roller perches, and a mystery branded 1 1/8" sway bar. It's hilarious how well it handles now. I also found a nice crack in the passenger side shock tower, so we'll just add it to the list of things to replace next year.

Carbon fibers Nut Titanium Household hardware


Machine Suspension Shock absorber Vehicle brake Coil spring


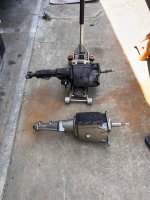
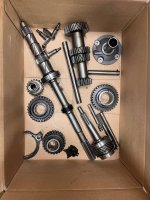
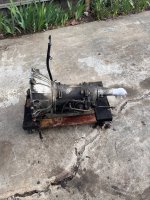
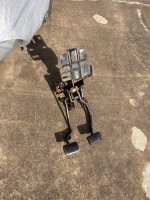
The car also has three pedals now- I pulled the C4 and swapped in a wide ratio toploader I had laying around. I'm not a fan of the ratios (and it's not ideal for what I plan on doing with the car), so I built a close ratio toploader. The transmission came out of a big block fastback, so I swapped the input shaft for the longer smallblock version. I accidentally dropped a needle bearing into the case when I was reinstalling the cluster gear shaft, so this debacle turned into a full rebuild.

Image


Gear Machine Differential Hub gear Household hardware


Image


Carbon fibers


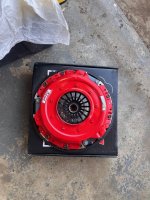
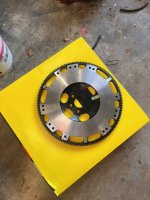
An ACT lightweight flywheel and McCleod super street clutch were also used.

Red Synthetic rubber Kit car

Machine Vehicle brake Titanium


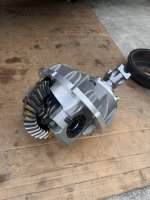
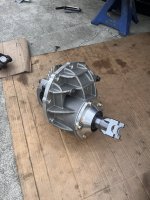
The first gear of the close ratio transmission is hilariously tall- I could probably do 70+ mph at redline LOL. I splurged and installed an aluminum center section with REM finished 3.89 gears, Eaton trutrac, billet yoke, and 31 spline axles (I had already installed a 9" housing).

Machine Differential Carbon fibers


Machine Silver Steel Nut Titanium


MUCH more fun, freeway sucks though ;). But that's okay! This isn't supposed to be a comfortable daily (even though I drive it daily now).
 
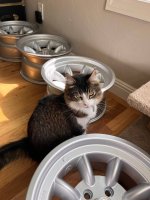
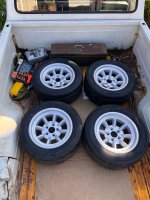
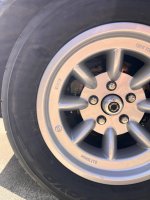
Since I'm going for a Trans Am look, there's really only one option: 15" Minilite wheels! The wheels took a couple months to arrive since they are made to order and come from England. I ran into some issues with fitment; the hubs on Granada brakes are massive and the wheels wouldn't clear (rears were fine). Teddy was not stoked.

Automotive Wheel System Spoke Hubcap Tread Tire Care


Tires are 235/50/R15 R888's; they should serve as a happy medium between street and light track use. I will eventually get a set of Goodyear blue streaks or Hoosiers.

Tire Wheel Motor vehicle Automotive Tire Automotive Exterior


A few weeks later, I happened to be in Nevada so I made a pitstop at Summit Racing. Low and behold on the scratch/dent rack: a brand new (demo) 4 piston Wilwood disc brake kit for 1970-73 mustang spindles at an unbelievable price. So- problem solved!

Automotive Wheel System Automotive Tire Synthetic rubber Spoke Hubcap


The Wilwood kit will be temporary as I want the SoT Trans Am brakes, but I will essentially get my money back selling them (selling the Granada brakes/spindles already paid for the Wilwood kit). I will be ditching the rear drums at some point as well.

Vehicle brake


I picked up a Baer bumpsteer kit while I was at Summit since they were on sale and I needed to swap the Granada tierod ends out anyway. With new the spindles, I was finally able to install the Minilites!!!

Car Land vehicle Automotive Exterior Hood Muscle car


Car Tire Wheel Automotive Tire Automotive Exterior
 
My mantra with classic cars: carrot on the stick. When you have a taste of how fun the car can be, you tend to stay more motivated. Car are more fun when you can drive them and I've had to accept that it's okay doing things twice (or four times), within reason of course. For example: I've played musical transmissions on this car and I'll be pulling/installing it at least twice more in the future.

Same with the engine :).


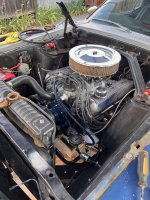
Someone had swapped in a late '68 302 into the car, the original motor was long gone. It ran well and I think there was a mild cam in it, BUT- I want to party. Out it comes.

Engine Machine Muscle car Hood Classic car


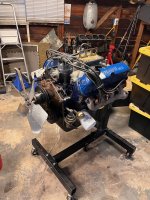
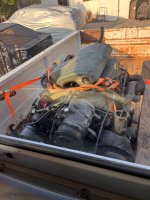
My hot take: God created the foxbody mustang so folks with 60's mustangs can rob the engine out of them ;). I scored a mystery 5.0 out of a wrecked foxbody. The guy drove the car home, parted it out, and stored the motor in a shed for a year until it was time to make room.

At $600 with all the accessories and a set of BBK headers, I was willing to take a chance.

Motor vehicle Engine Machine Hood Fuel line


Tire Wheel Motor vehicle Car Automotive Tire

After pressure washing all the grease off it, I noticed that someone had been in here once.... The leak down test also showed the top end to be in fantastic condition.

So much so, that the wrench I was using to hold the crank during the test slipped and flew towards my face and Mach 10, chipping/cracking my tooth and cutting my chin open. Not my brightest moment, but it could have been MUCH worse.

My $600 motor ended up costing closer to $900 after my doctor/dentist visit to glue the wound shut and fix the tooth. Oops.

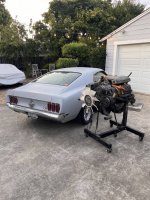
Anyways- I moved forward with disassembling the new to me motor. Turns out, it's been bored .040 over, making it a 308! Top end is solid, but I won't be using the cylinder heads ;).

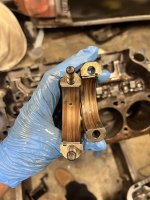
Bottom end is a different story- the rod bearings and crank journals looked like they've had a hard life (which is not surprising, it's a Foxbody motor from the East Bay LOL). I could pull the crank and have it ground/new bearings, but I could also throw in a new oil pump and pray; which is exactly what I did.

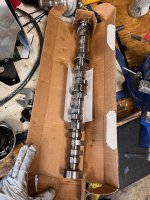
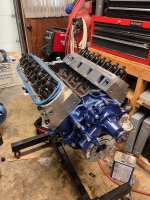
Keeping with the theme of using used/leftover parts- I conveniently had the TFS 190 11R heads from the original 306 that I built for my '69 convertible. I had a link bar lifter fail on that engine, which sent metal through all the bearings; it now sits on a shelf in my garage. It would be a shame to let the parts sit, so naturally I slapped them on the mystery motor along with a TFS stage 2 cam (one of the few new things I bought for the car). I also reused the timing cover, valve covers, Comp Ultra Pro Magnum rocker arms, QFT 650 DP carburetor, ARP head bolts, and Flowkooler water pump.

The 190 11R heads are (in my opinion) the BEST cylinder head for the money. They flow similar to an AFR 205 head at a considerably lower price and can be used with stock 5.0 pistons due to the revised valve angle. I had tons of PTV clearance even with the TFS stage 2 cam.

The previous 306 they were on had KB311 hypereutectic pistons, which had the correct valve reliefs in them- I had miles of room with the silly Lunati roller cam I was running (.571/.587 231/239 @.50 on a 110 LSA). Long term- I will build another shortblock with the correct pistons to take advantage of what the heads can offer; next cam will be closer to .600 lift.

(Pardon the messy workbench)

Titanium Camshaft Nickel Cylinder

A Howard's billet timing set, Summit SFI balancer, and Canton road race pan/pickup (which I of course picked up second hand) brought it all together.

Engine Machine Engineering Titanium

After driving the car with the new motor, it can only be described with one word: VIOLENT. I will get a video soon.

Motor vehicle Engine Hood Fuel line Classic car

Note: the rubber fuel line to the carburetor was temporary, it now has a hardline.
 
Two steps forward, several thousand back.

As promised, here's a video of the silliness:


The motor however, has met a painful death:

https://www.vintage-mustang.com/threads/check-those-air-cleaner-studs.1234759/

1785513838894.png

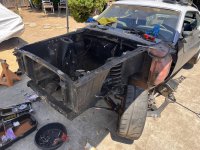
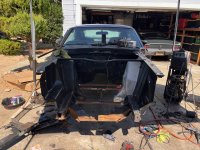
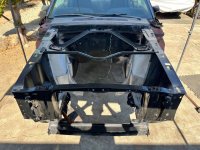
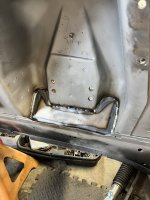
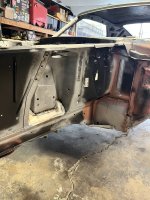
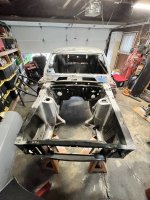
So, I'm using this opportunity to fix some of the horrendous patchwork and rust in the engine bay. Both shock towers will be replaced, both front aprons, the core support, and the driver side strut rod mount. We'll see if I decide to tackle the rest of the metal work, or wait till next year.

Image


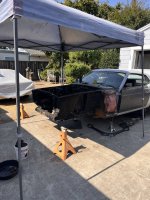
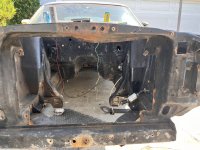
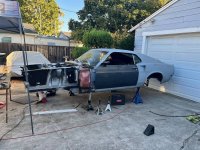
Mostly stripped down, there's a few things left to remove.

Image


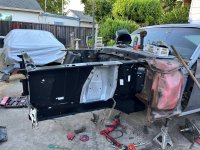
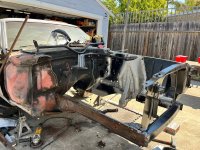
Let's take a look at everything that's wrong:

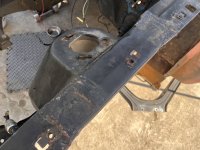
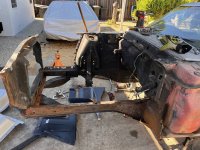
The driver side shock tower was replaced already (poorly) and aprons weren't really patched... More like booger welded and seam sealed?

Image


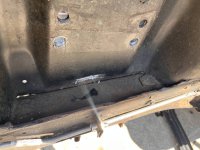
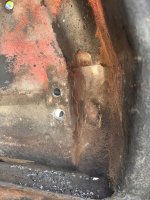
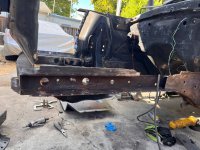
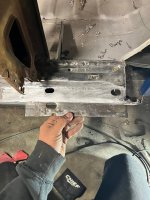
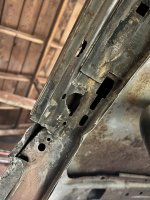
They also just chose to ignore the giant rust hole in the frame rail, lol.

Image


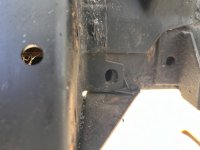
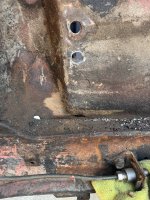
Lining up the holes was also a huge ask, apparently.

Image


The passenger side shock tower is cracked in many places.

Image


Image


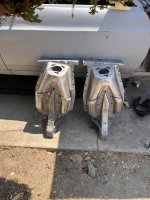
Both are getting replaced with an OEM set of big block shock towers. I found them on ebay and couldn't pass them up- they were removed without any damage, stripped and best of all- it's OEM!!!

Image


The core support appears to have had an engine dropped on it along with many, many other things (it's wrinkled badly). The driver strut rod mount is also bent and mangled.

Image
 
I think I'm replacing at least 80% of this car.

I took measurements off this car as well as my '69 convertible before cutting into this hunk of crap.

Image


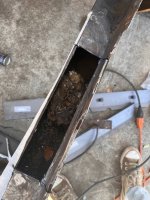
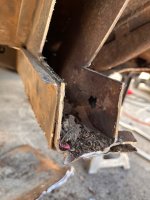
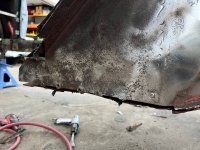
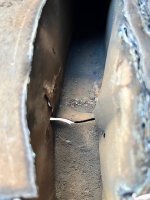
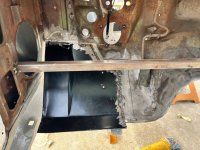
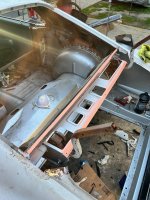
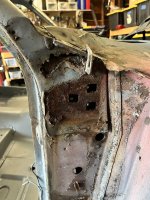
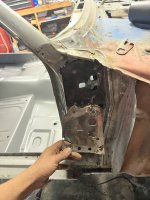
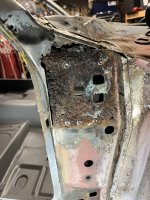
I found this lovely surprise inside the frame rail under the shock tower. The mice essentially destroyed this frame rail, so it had to go.

Image


I was not comfortable patching so much of this frame rail, the metal was heavily pitted. Not worth the trouble.

Image


Things got worse the more I dug into it.

Image


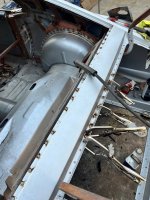
Driver side mocked up along with the new core support. I made some bracing/fixtures to located the frame rail. I was very impressed with the reproduction frame rail and core support, everything locked into place nicely.

Image


Image


Once welded in, I dug into the passenger side. This frame rail was in much better condition, but needed a patch under the shock tower. No nests this time.

Image


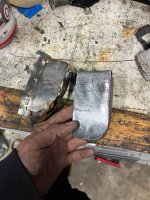
I had originally bought a couple of outer skins for bumper bracket patches. I ended up cutting them up to make patches for other areas on the frame rail.

Image


Anyways. Tada: new front end.

Image
 
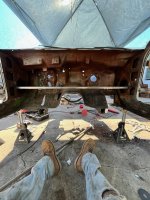
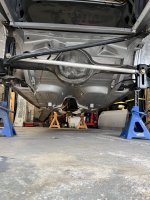
Now the fun part: the rest of the underside.

Image


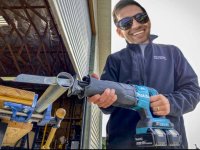
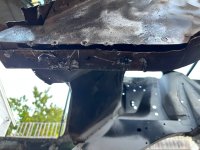
I took photos and measurements, then wiped out the Sawzall.
Image


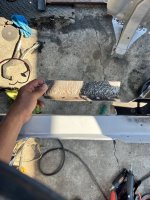
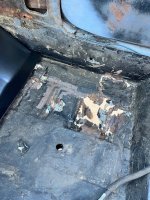
I really want to meet the person that thought roof tape and paint was a fix for floors. I just want to talk, that's all.

Image


Contemplating my life choices:

Image


Image


Image


Image


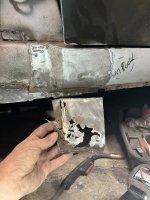
I ended up patching the portion of the frame rail that overlaps with the floor support.

Image


Image


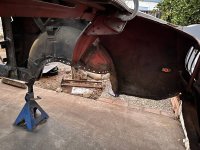
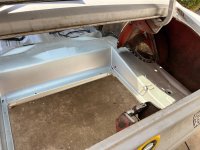
I peeled back the trunk floor over the crumpled rear frame rails, this thing took a nasty hit.

Image
 
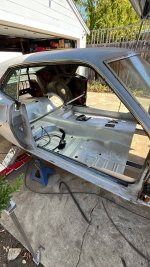
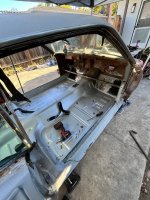
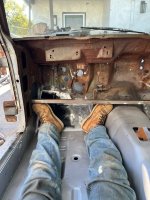
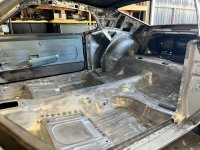
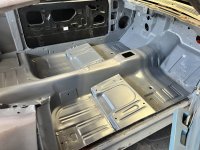
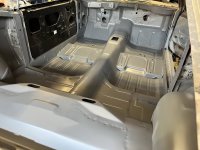
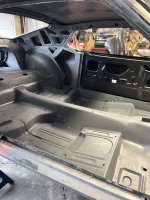
....another 1000 misc. patches and the full floor is now one with the car, as are the torque boxes/toeboards.

Metal Iron Rust


Metal Iron Steel Rust


Automotive Exterior Metal Hood Kit car Rust


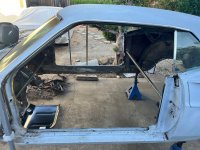
It's a strange feeling being able to finally sit on the floor.

Rust Scrap Kit car


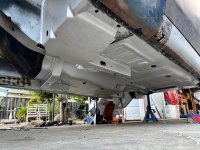
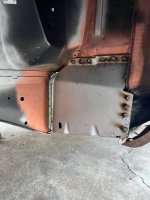
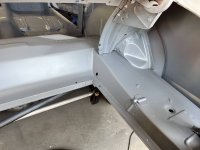
Test fitting the torque box- the entire underside of the car will be painted gloss white, since I'm insane and want a period correct T/A racecar.

Tread


Rust
 
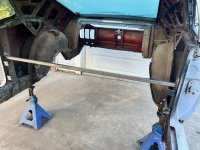
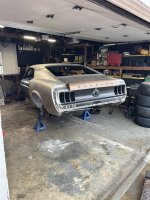
Now that my suspension has a place to bolt to- I installed the rear axle/springs/etc and put the car back on the ground so I could roll it around.

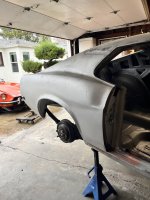
I opted for '70 quarters without the scoops, since '69 Boss 302's did not have them.


Fender Bumper Hood Tread Synthetic rubber


I did my best to get the door gap solid before I started chopping.

Automotive Exterior Car door Hood Fender Windshield


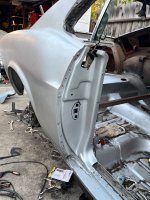
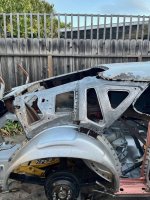
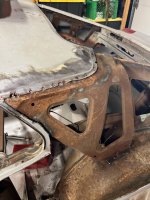
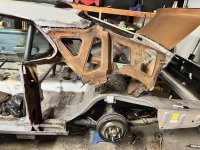
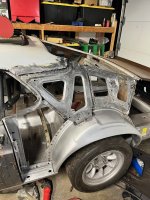
The passenger quarter had previously been replaced (poorly) and they cut through the inner roof structure. That was super fun to fix (it wasn't).

Automotive Exterior Rust Hood Car door Glass


Car Automotive Exterior Automotive Tire Hood Bumper


Some cleaning up/test fitting of the inner/outer wheelhouse and door jam.

Hood Fender Car door Muscle car Bumper


Metal Automobile repair shop Synthetic rubber Steel Hood


Car door Tread Synthetic rubber


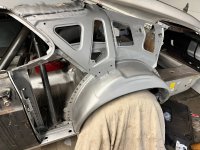
And we have a quarter!

Muscle car Fender Hood Classic car Car door
 
The decklid filler panel had some holes from a CB radio and rust from what I can only assume is the result of not sealing up the hole, so it's getting replaced.

Automotive Exterior Kit car Steel Hood Synthetic rubber


Machine Metal Steel Aluminium


Then off to the passenger quarter. This side was MUCH easier to fit up, it might have to do with not being wrecked on this side then getting "fixed" by Jimbob and Cleetus.


Image


Hood Kit car


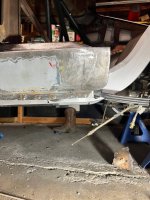
The area under the quarter (top of rocker panel) had some damage/previous repairs, so more patches!

Tread Synthetic rubber Fastener Steel


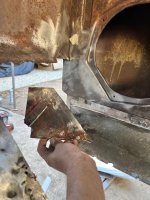
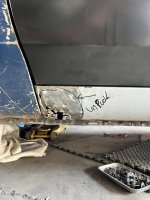
I've heard the replacement outer rockers fit awful, so I opted to make these patches (the front of the rocker also needed a patch).

Safety Glove


Metal Rust Synthetic rubber


If anyone is keeping track- I think the car is made of about 12 different mustangs now.

Automotive Exterior Car Bumper Fender Muscle car


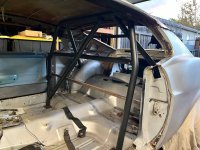
I also test fit the Autopower cage- it fit perfectly, meaning that I appear to have welded everything in the right place, LOL.

Automotive Exterior Windshield Fender Hood Car door
 
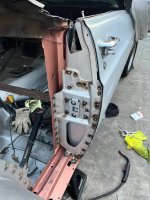
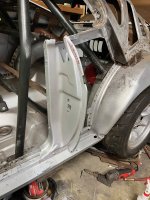
The passenger side also received a new B pillar and inner/outer wheelhouse. The roof inner structure also received the same cleaning/Rust Bullet treatment.

Automotive Exterior Fender Synthetic rubber Tread Hood


Automotive Exterior Fender Automobile repair shop Hood Synthetic rubber


Fender Synthetic rubber Automobile repair shop Hood Tread


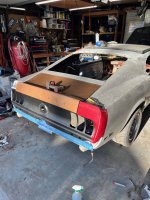
Anyways- it's mostly a car again. I will be blowing the whole thing apart to epoxy primer every square inch. I think the last bit of rust repair will be on the A pillars and a bit around the windshield channel. I haven't decided how far I'm going to go while I have the car in pieces. This is the best time to paint it, but I also want to you know.. drive the damn thing.

Car Tire Automotive Exterior Automotive Tire Muscle car
 
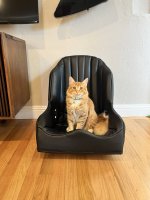
The Kirkey 55V seat/cover arrived- Mango is a fan. I will have a headrest mounted to the cage so I don't snap my neck.

Cat Felidae Felinae Carnivores Whiskers


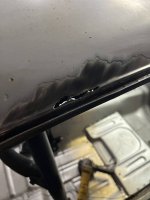
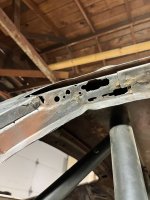
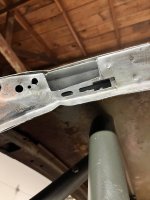
The roof had rust near the quarter window. I should have just replaced the roof skin, but hindsight is 20/20 or whatever.

Rust


This was totally hidden until I started cleaning up the driprails with a wire wheel. It didn't look too bad until I started cutting.

Silver Windscreen wiper Hood


This car rusted in such a weird way- like from the inside out and top down? Had to have been by the coast or something.

Image


I did my best to clean up the rust around the roof/roof structure then hit it with Ospho:


Hood Automobile repair shop


Dissecting:

Metal Beam Rust


Image


Patching:

Image


Test fitting:


Metal Steel Carbon fibers
 
I bead blasted the piece I cut out and fabricated the missing bits. Not a fun task and I'm not totally satisfied on how it came out, but it'll do. I will replace the entire roof skin if I run into problems in the future. For now, we'll do our best to make sure it stays dry: Rust Bullet, seam sealer, and cavity wax should do the trick.

Automotive Exterior Hood Windshield Glass Windscreen wiper


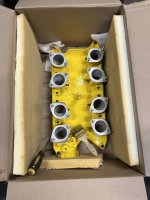
My 240z has triple Weber DCOE side draft carburetors on it which are amazingly fun. Induction noise is music to my ears, so naturally- we're going to need something similar for this one.

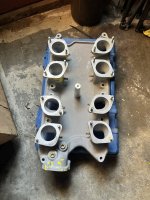
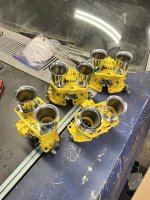
I scored a brand new 289/302 quad IDF Weber intake/44 carburetors for a screaming deal. The catch? Someone painted them Kraft cheese yellow (I hate yellow).

I don't know what type of insanely strong 80's paint they used, but this stuff has been a pain in the ass to remove. I managed to get the intake mostly stripped, but the carburetors will take a while. The 44's are a little small for what I plan on doing, so I will be selling them in favor of a set of 48's once I remove the paint.

Yellow Machine Engine Plastic Cylinder


Image


I may bite the bullet and get them vapor blasted. We'll see.

Yellow Machine Engine Fastener Nut


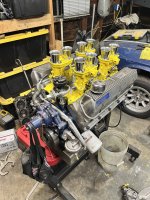
I couldn't resist mocking them up on my grenaded 308:

Engine Machine Hood Classic car Kit car


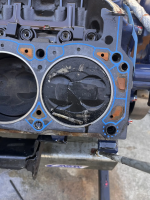
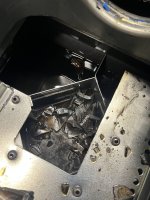
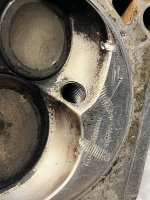
Speaking of which, I finally took apart the motor to see if I could save anything. Long story short: the bottom end and block are probably in a landfill now. The cylinder head that took the carb stud survived, but will have some battle scars that need to be smoothed out.

Machine Engine Fastener Mechanic Titanium


I can't complain much- the mystery longblock was $600 ($300 after I sold stuff off of it) and was a blast until it wasn't.

Metal Household hardware Brass Nickel Titanium


I'm glad it had some cast pistons, because it shattered and probably saved the cylinder head.

Silver Macro photography


Machine Metal Iron Silver Nickel
 
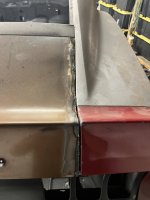
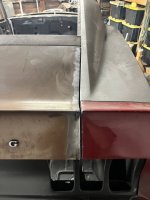
Back to metal work. The trunk gap was way too tight on the passenger side, so I ground it down, welded it back, and reshaped the edge.

Transparency


I got some minor warping in the skin, but I can live with it. I've been very OCD about the gaps on this car, then I looked at my '69 convertible (which I paid someone to paint) and realized that the gaps on that car are AWFUL. What I've done looks infinitely better, so I will leave it at "good enough".

Steel


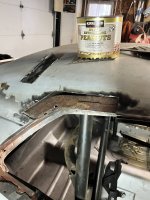
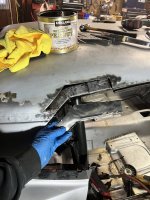
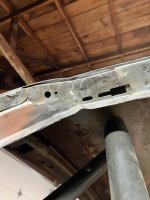
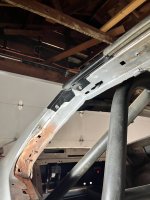
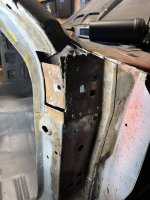
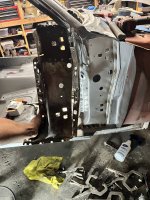
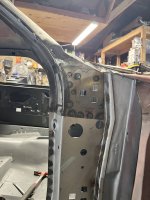
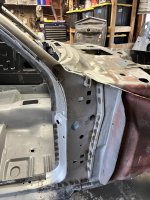
I've been avoiding the A pillar and windshield area for a while, but I finally knocked it out. I'll spare all the details, but I ended up replacing the entire A pillar and made the windshield post/cowl corner from scratch. There's like 4 layers of metal here; it's truly ridiculous.

Rust Windscreen wiper Hood


Automotive Exterior Fender Hood Car door Windscreen wiper


Automotive Exterior Rust Tread Synthetic rubber


Automotive Exterior Rust Synthetic rubber


New A pillar:

Automotive Exterior Fender Hood Tread Synthetic rubber


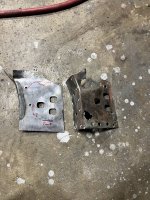
Using the old bits as a template:

Rust


Automotive Exterior Car door Carbon fibers


The weird corner/transition between the cowl/A pillar/windshield post made of 4(?) layers:


Denim Wrist Nail Stitch Artisan
 
Yeah, not pretty.

Silver


All fixed!

Automotive Exterior Tread Synthetic rubber Rust Hood


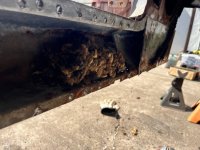
The rocker panel near the fender had a large rats nest inside it, so it needed some work. This was a surprisingly challenging piece to make.

Car door Hood Synthetic rubber


Tread Rust


...And that concludes the rust repair. It took 183 days from the first cut to knock this all out. Why the weird sense of urgency? Because I'm insane and want to drive the car by August for Monterey Car week.

Anyways.

I didn't want to pay the $50~ for the T/A shock tower brace kit, so I made my own.

Fender Tread Synthetic rubber


Metal Silver


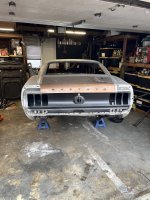
Time to prep for epoxy primer!!!

Automotive Exterior Hood Automobile repair shop Windshield Fender


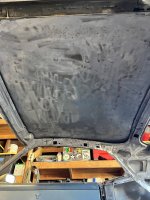
There was some pitting on the underside of the roof skin. I did my best to clean it up, then hit it with Ospho and a coat of Rust Bullet in the deeper areas. The rest of the underside will get epoxy primer. I haven't decided if I'm going to paint this area gloss white, or maybe some kind of grey splatter paint? Or even Lizard skin?

There isn't a spec of sound deadener in this car, so it will be quite miserable on the street.

Hood Windscreen wiper
 
I'm using Summit Racing's house brand of epoxy primer. I love this stuff. I will let it cure for a few days, scuff, seam seal, then shoot some gloss white when ready.

Hood Kit car


Hood Kit car


I forgot to remove the spare tire hold down before priming. I will be installing a trunk mounted batter and would like some more space/flexibility.

Metal Steel


So here's where we're at today. I'm removing the mechanical bits again so I can get the car sealed up in epoxy. I'm running out of places to hide parts.

Muscle car Fender Classic car Bumper Hood


Muscle car Bumper Fender Classic car Car door


The front clip and underside will all be gloss white.

Automotive Exterior Hood Windshield Car door Kit car


Muscle car Automobile repair shop Hood Fender Classic car


Automotive Exterior Car door Windshield Fender Hood


Metal Automotive Exhaust Synthetic rubber Automobile repair shop Pipe


Motor vehicle Automotive Exterior Hood Machine Automobile repair shop
 
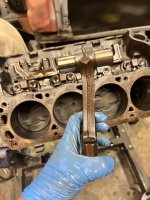
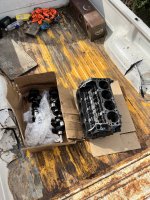
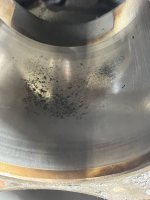
I picked up another mystery motor, this time for only $100. I stripped it down and found some interesting things. The guy I bought it from had zero history on it. I did a leak down test and numbers were great except for cylinder 8, which ended up having a couple of scratches in the cylinder wall. I also found some rust, but it looks like it was running like this for a while? The block is standard bore, so it should clean up. Crank was also standard, but had some pitting in a few spots so it will need to be ground.

Rust Waste


Metal Silver Nickel Steel Titanium


Oh and I figured out why the motor was pulled, lol.

Iron Rust Household hardware


I ordered .030 Trick Flow pistons and some Scat 4340 connecting rods today as well. This will be a very, very fun motor.
 
Back
Top