
-
Hello there guest and Welcome to The #1 Classic Mustang forum!
To gain full access you must Register. Registration is free and it takes only a few moments to complete.
Already a member? Login here then!
You are using an out of date browser. It may not display this or other websites correctly.
You should upgrade or use an alternative browser.
You should upgrade or use an alternative browser.
Boom's 68 fastback
- Thread starter Boom
- Start date

tarafied1
Well-Known Member
Jerry put them in his "Anti-Eleanor" 67 Fastback. He doesn't post here anymore but I could ask him for feedback if interested...Pretty sure we have a member here with the one-piece glass. Maybe he will chime in.

Jerry put them in his "Anti-Eleanor" 67 Fastback. He doesn't post here anymore but I could ask him for feedback if interested...
I'd be interested to hear what he has to say, maybe he has the updated version.
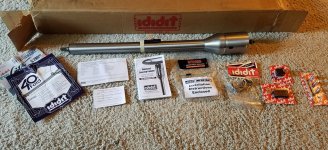
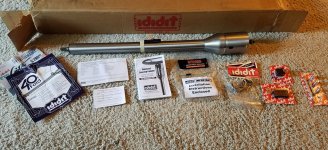
Been pretty busy lately. I was going through a divorce, thankfully its finalized and I can get back to working on my car.
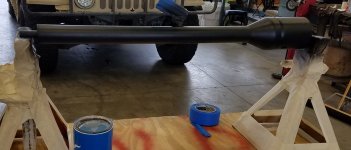
I did get the column primed and painted. I used Eastwood's 2K epoxy primer and rat rod satin black. That's the plan for entire interior, and the aluminum dash and door panels from the 67 deluxe interior. I need to finish a few small things, but the column is mounted and fits great with the billet bracket.
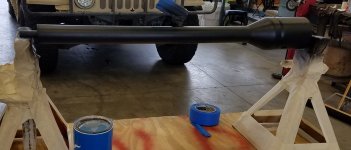 20171005_182402 by Brett, on Flickr
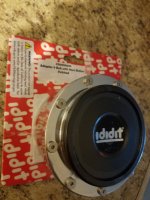 20171005_163352 by Brett, on Flickr
I also started installing Dynamat Extreme sound deadener. What a difference it makes when installed on the roof. No more empty tin can rattle. I have coated the roof, over the rear wheelwells, and over the rear axle. I plan to do the entire floor once the welding is finished on the underside. I'm also probably going to put some on the inside of the quarter panels.
I also got around to installing the Lokar Billet gas pedal. It was a pain by myself but I managed to use some threaded rod to help hold it in place. I'll get the brake and clutch pedal installed this weekend hopefully. The clutch pedal is just going to sit there for now as I still have the C4. One day it'll get the manual swap.
I'd like to get the driver's door installed this weekend. I replaced it as the original one had a huge dent in it. I've installed a new latch and all new weatherstripping on it while it's been sitting in the spare room.
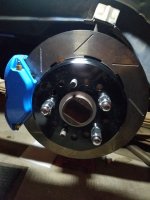
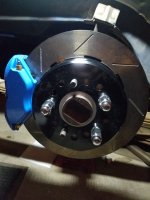
Depending on how much time I get I may start cleaning up the rear axle. I need to clean it up real good and then paint it so I can install the new rear disc brake kit to match the front.
I did get the column primed and painted. I used Eastwood's 2K epoxy primer and rat rod satin black. That's the plan for entire interior, and the aluminum dash and door panels from the 67 deluxe interior. I need to finish a few small things, but the column is mounted and fits great with the billet bracket.
20171005_182402 by Brett, on Flickr20171005_163352 by Brett, on FlickrI also started installing Dynamat Extreme sound deadener. What a difference it makes when installed on the roof. No more empty tin can rattle. I have coated the roof, over the rear wheelwells, and over the rear axle. I plan to do the entire floor once the welding is finished on the underside. I'm also probably going to put some on the inside of the quarter panels.
I also got around to installing the Lokar Billet gas pedal. It was a pain by myself but I managed to use some threaded rod to help hold it in place. I'll get the brake and clutch pedal installed this weekend hopefully. The clutch pedal is just going to sit there for now as I still have the C4. One day it'll get the manual swap.
I'd like to get the driver's door installed this weekend. I replaced it as the original one had a huge dent in it. I've installed a new latch and all new weatherstripping on it while it's been sitting in the spare room.
Depending on how much time I get I may start cleaning up the rear axle. I need to clean it up real good and then paint it so I can install the new rear disc brake kit to match the front.
Attachments
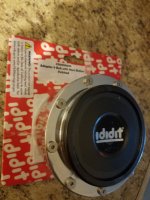
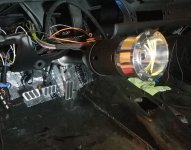
Test fit the steering wheel adapter and installed the pedals. Didn't like how misaligned the pedals look, but they aren't in position yet, just resting on the floorboard.
 20171006_104028 by Brett, on Flickr
I also picked up the bolts for the door hinges.
20171006_104028 by Brett, on FlickrI also picked up the bolts for the door hinges.
Attachments
I got the new door on. It was a bit of a struggle to align it, I'm blaming the new weatherstripping. My plan is to let it sit for a bit and have the weatherstripping compress a bit allowing me to align it better. It looks a bit off with the car being flat black and the door is semi gloss.
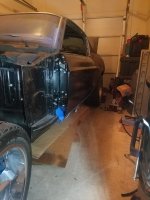 20171006_195416 by Brett, on Flickr
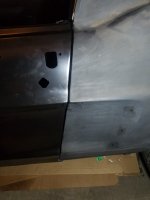 20171006_195430 by Brett, on Flickr
20171006_195416 by Brett, on Flickr20171006_195430 by Brett, on FlickrAttachments
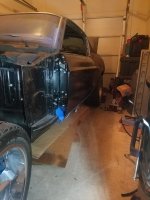
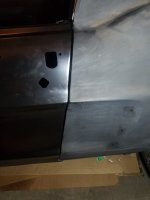
I cleaned up the rear wheelwells this weekend. I know I still have alot of work to do, but Little by little, right! I have been leaning towards installing an AJE rear subframe so I can install a fox 4 link rear axle. I'd probably go with a 9" that's been made to fit a foxbody since they are pretty much a bolt in for the 67-68 body.
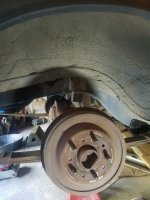 20171008_175106 by Brett, on Flickr
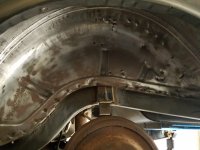 20171015_120445 by Brett, on Flickr
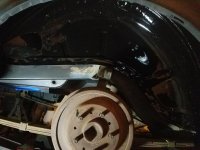 20171015_220935 by Brett, on Flickr
20171008_175106 by Brett, on Flickr20171015_120445 by Brett, on Flickr20171015_220935 by Brett, on FlickrAttachments
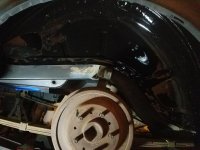
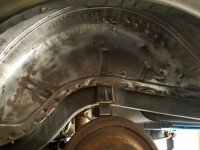
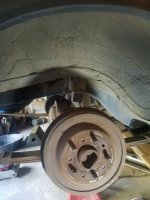
Attachments

JeffTepper
Well-Known Member
Don't know if you made your power window decision yet so here is my 2 cents:
I installed the Electric Life kit along with one of the console switch kits from A-1 Electric about a dozen years ago.
Generally, the folks with slow "up" issues at that time had glass alignment problems which contributed to the issue. In my case I had emptied the door of all hardware prior to paint so I addressed the glass alignment as part of reassembly. Overall the Electric Life worked well for about 10 years. At that point the window motors seemed to labor in the "up" position. During troubleshooting I determined that the light duty switches seemed to be the limiting factor. Simply running power directly to the window motors confirmed the weak point. My solution was to fabricate a relay bank of 4 Bosch style relays. "Up" speed returned to acceptable.
In looking at the switch kits offered by Nu Life, they offer what appear to be some of the same switches as A1 Electric. I suggest a relay bank with whatever set you select.
I ended up installing a pair of console switches in the seat belt cups in the factory center console and covered the crank handles in the door panels with a pair of deluxe dash emblems for '67-'68. Some MacGyver-ing was needed but virtually everyone who commented thought the install was factory.
I installed the Electric Life kit along with one of the console switch kits from A-1 Electric about a dozen years ago.
Generally, the folks with slow "up" issues at that time had glass alignment problems which contributed to the issue. In my case I had emptied the door of all hardware prior to paint so I addressed the glass alignment as part of reassembly. Overall the Electric Life worked well for about 10 years. At that point the window motors seemed to labor in the "up" position. During troubleshooting I determined that the light duty switches seemed to be the limiting factor. Simply running power directly to the window motors confirmed the weak point. My solution was to fabricate a relay bank of 4 Bosch style relays. "Up" speed returned to acceptable.
In looking at the switch kits offered by Nu Life, they offer what appear to be some of the same switches as A1 Electric. I suggest a relay bank with whatever set you select.
I ended up installing a pair of console switches in the seat belt cups in the factory center console and covered the crank handles in the door panels with a pair of deluxe dash emblems for '67-'68. Some MacGyver-ing was needed but virtually everyone who commented thought the install was factory.


Don't know if you made your power window decision yet so here is my 2 cents:
I installed the Electric Life kit along with one of the console switch kits from A-1 Electric about a dozen years ago.
Generally, the folks with slow "up" issues at that time had glass alignment problems which contributed to the issue. In my case I had emptied the door of all hardware prior to paint so I addressed the glass alignment as part of reassembly. Overall the Electric Life worked well for about 10 years. At that point the window motors seemed to labor in the "up" position. During troubleshooting I determined that the light duty switches seemed to be the limiting factor. Simply running power directly to the window motors confirmed the weak point. My solution was to fabricate a relay bank of 4 Bosch style relays. "Up" speed returned to acceptable.
In looking at the switch kits offered by Nu Life, they offer what appear to be some of the same switches as A1 Electric. I suggest a relay bank with whatever set you select.
I ended up installing a pair of console switches in the seat belt cups in the factory center console and covered the crank handles in the door panels with a pair of deluxe dash emblems for '67-'68. Some MacGyver-ing was needed but virtually everyone who commented thought the install was factory.
Nu relics use the same OEM GM (Delphi) motor assembly. Metal gearbox. Much more durable and provides much more torque than the A1 Chinese stuff. When was the last time you ever heard of problems with the actual motor part of a OEM set-up? Switch and harness failures but rarely a motor.
Switch contacts are not really made to handle the full load amperage of a DC window motor pulling across them. OEMs use switches to power relays to carry the heavy load. You should always use relays when conducting current loads above control level.
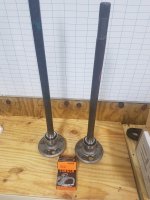
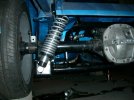
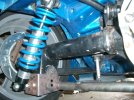
Got some more sanded and coated on the underside. I went to the junkyard and found an 8.8 axle that I'm looking to get next week from the junkyard. I want to run the AJE kit that lets you mount the fox/sn95 style 4 link rear axle. Next weekend with the sales I can pick up this axle for ~$100 or less, disc to disc trac loc 3.27 geared 8.8. I need to clean it up, and get new fox length axles, which end up being about 1/4" narrower then the factory 8" so the wheels will tuck in a bit more. That'll help since I plan on lowering this car.
Speaking of lowering the car, I picked up the Eastwood fender roller. It was a huge pain but I got a good bit of the rear lips rolled.
I also got a good deal on the Modern Driveline hydraulic clutch kit, I need to install that, it looks like its going to interfere with one of my brake master cylinder lines so I'll probably have to redo that.
I'm still gathering misc fittings and such for my MPFI intake install. Hoping for a Black Friday sale on some injectors.
Just some random ramblings right now.
Speaking of lowering the car, I picked up the Eastwood fender roller. It was a huge pain but I got a good bit of the rear lips rolled.
I also got a good deal on the Modern Driveline hydraulic clutch kit, I need to install that, it looks like its going to interfere with one of my brake master cylinder lines so I'll probably have to redo that.
I'm still gathering misc fittings and such for my MPFI intake install. Hoping for a Black Friday sale on some injectors.
Just some random ramblings right now.
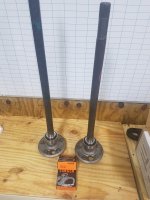
Got the axle today. Disc to disc was $80. I think that is a great deal. I already talked to Shaun and he has a solution that'll still allow me to use his brake set-up on the fox axle. Just need to order some new fox length shafts. Thanks to Black Friday everything is on sale.
so let me understand, you are getting an Explorer 8.8 and will narrow it to use Fox 8.8 axles (at least the fox length axles because foxes were 4 lug)? Sounds cool
It's an 8.8 from a 98 Mustang. The housing is the same one the fox had, the only difference is the 94-98 use a longer axle shaft after it comes out of the housing to allow for an ABS ring. Just need to install fox length axles and it'll be the perfect axle width for 67-68. No cutting or welding needed. The AJE kit bolts in and provides the mounting points for the 4 link found on the 86-04 Mustangs. You can get fox axles with 5 lug, so no issues with wheels either.
Got a few more parts, getting ready for the EFI install. I had to make the brackets that hold the injector rail on. Just grabbed a flat strip of aluminum at Home Depot - cut, heated, bent, drilled, and ground down.
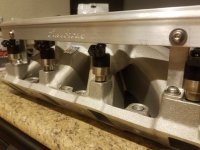 20171128_222649 by Brett, on Flickr
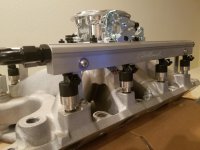 20171129_220108 by Brett, on Flickr
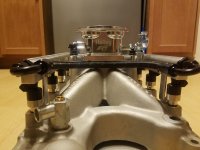 20171129_215820 by Brett, on Flickr
20171128_222649 by Brett, on Flickr20171129_220108 by Brett, on Flickr20171129_215820 by Brett, on FlickrAttachments
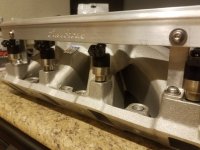
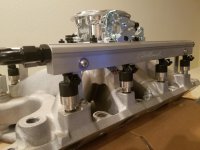
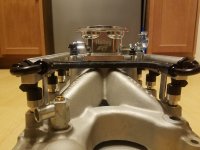

That's nice! Had to laugh at the last pic though as you must have been laying on the floor to get that shot!
"Dog's eye view"