• Hello there guest and Welcome to The #1 Classic Mustang forum!
    To gain full access you must Register. Registration is free and it takes only a few moments to complete.
    Already a member? Login here then!

Boom's 68 fastback

Finally craved sine time to swing by and get the car spun around so I can do the rear suspension swap.

Mostly went to plan. The idea was to roll ot forward, put it in doll's to spun it around, then roll it back in. The dollyals up front were useless on the asphalt. Still got it spun around.

Next step is to get it in the air. Got some nifty new jackstands with pads. To hold thevrear end up.

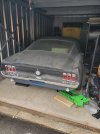
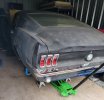
Here's some shots of the car in the sin from the first time in awhile.
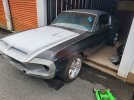
PSX_20230703_104633.jpg

PSX_20230703_104707.jpg
 
Loaded up a handful of tools and went over to get started on the car this morning.

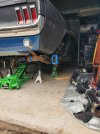
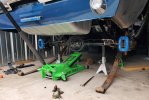
First step was getting it off the ground. Started with the rear and then lifted the front to set it on the race ramps stands. I'm super happy to have bought these.

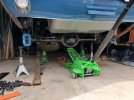
Once the car was in the air, I had to get some stands to put under the subframe connectors since wheels are coming off.

PSX_20230704_114117.jpg

PSX_20230704_114141.jpg

The u bolt nuts came off pretty easily. I didn't clean then up, just hut them with a quick wd40 beforehand. The rear shackles came off easy enough too.

PSX_20230704_114203.jpg

PSX_20230704_114224.jpg

I did move the old axle down and back more. I'll need to pull the brakes off this axle and store them until I'm ready to mount them PM the new axle. I need to make sure I don't need anything different to mount them too.

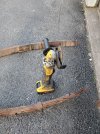
As pretty much everyone else's car has been, my front leaf bolts seem to be siezed to the sleeve. I left my fancy new grinder at work, so I'll grab that and get the leafs out next time I can get to work on the car.

I felt like everything went pretty smooth today.
 
I don't envy you having to work in such a tight space although my garage experience is pretty much the same with all the equipment and stuff I have packed in there. Can't wait for the day I can manage at least two open bays worth of room into which I can center a project.
 
Yeah its a real bummer working in a space like this. Even worse that it's not actually at my house. But it's the best option I have for now until the car is a but further along.

My last house had a nice 2 bay garage, I definitely miss that setup.

I hope to get a chance soon to swing by and get those leafs cut out. Do you guys think a cutoff wheel on a grinder is better or a Sawzall? I'll take both, just wondering which is better given the space.
 
I second use the death wheel to cut things off such as this. A Sawzall blade seems to want to find its own path through, the death wheel is more controllable. Death wheels just scare the bejesus out of me in confined spaces.
 
Swung by and took a shot at cutting out the front eye bolts. I was partially successful.

PSX_20230705_220330.jpgPSX_20230705_220314.jpg

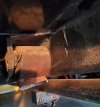
I managed to cut the outside half off but realized that the inner side is very tight with the subframe connectors.

I decided to cut the springs off so I'd have more room to cut the bolt.

I was thinking maybe crafting a spacer of sorts out of wood along the subframe connector and trying to use a Sawzall to trim the bolt. Does that sound plausible?
 
Can't you use a center punch and knock it out? Put a bit of WD 40 on the bolt and tap it out.
 
Last edited:
Can't you use a center punch and knock it out? Put a bit of WD 40 on the bolt and tap it out.
There's not room on the outter side. Maybe if I cut off the inner side I could try to tap it out. Issue is the bolt gets siezed to the sleeve in the leaf bushing and won't fit through the mounting holes.

Worst case is I just have to go chop happy and go at the spring eye until it all falls out.
 
Did you use a good penetrating oil and let it soak? I have had luck going that route.

No I wasn't that squared away when I went up there last. All I had was some WD. I plan to get up there in the morning and tackle it some more.

I need to get the leafs fully out, and take out the pinion snubber mount thing. That could possibly be removed with some spot weld cutters according to the destructions I got from Shaun. After those steps are done I can clean everything up and begin to install the 3 link brackets
 
Went up and hacked away at the leafs some more. Ran out of juice in my batteries. I had three with me but they weren't fully charged (d'oh!)

My plan is to cut away a chunk of the leaf wrap to get at the sleeve and try to work it loose from the bolt.

20230708_093722.jpg
 
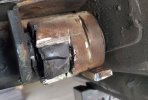
Victory! I get both leafs out. Wasn't too bad once I got the vice grips on the actual sleeve.

PSX_20230708_165038.jpg


Just need to get the pinion snubbed mount removed and clean everything up before beginning to install the brackets.

Thats a tomorrow task. Wanted to give the grinder time to cool down. Definitely been getting a workout last few days.
 
I get the pinion snubber mount out and cleaned up that area and where the springs were. It started raining like crazy, so I called it for now.

I want to pick up a small bottle of POR-15 and go over those areas before installing anything. I know I may have to do some clearancing for the one 3 link bracket but if not, then I'll be ahead.
 
Please take the time to remove all the rust before the POR-15. It only takes a few extra minutes but the effort lasts a lifetime. Clean it. Sand it. Treat with something like phosphoric acid, rinse clean and then coat it.
 
I definitely do try and get all the rust I can off. Usually with wire brushes and the like. I've not use phosphoric acid before. The entire underside has been sanded, cleaned, and POR'd expect for the areas where I just removed items.

I also have used eastwood's internal frame coatings on the areas I can't reach.
 
Rust gets down deep into the "pores" of the metal, the little pits, etc. The thin acid liquid gets in after it and kills it. Stopping it in its tracks. It also acts as a great adhesion promoter for any top coat. POR-15's Metal Prep or whatever they call it is a phosphoric acid solution.
 
Back
Top