
-
Hello there guest and Welcome to The #1 Classic Mustang forum!
To gain full access you must Register. Registration is free and it takes only a few moments to complete.
Already a member? Login here then!
You are using an out of date browser. It may not display this or other websites correctly.
You should upgrade or use an alternative browser.
You should upgrade or use an alternative browser.
70_Fastback: RAT ROD - 193x Ford / 1942 GMC Truck
- Thread starter 70_Fastback
- Start date

70_Fastback
Hell Bent for Speed
Not sure if I should take that as a compliment or not Pete...! :confu

AzPete
Well-Known Member
"70_Fastback" said:Not sure if I should take that as a compliment or not Pete...! :confu
:thu :wor :bowdown
70_Fastback
Hell Bent for Speed
"lethal289" said:J., when are you going to just say screw it, and build the whole body yourself? Its looking real good.
Oh I do have body sheet metal work to do... :confu
70_Fastback
Hell Bent for Speed
Got a little more done over the holiday week prior to jacking up my back. I must be getting old...
Since I was doing the floor structure around the transmission, I figured I better get the damn trans mount made and welded in.
Nothing fancy on this since it won't be seen. Just standard 1/4" thick plate - cut & welded for the mounting base. I used the mount that was already on the trans for now.
Started by laying out the base mounting plate:
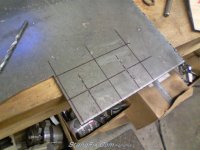
I need (want) a milling machine to mill out smoother grooves. But these were not bad by hand - yes HAND. My sabre saw would not be found! so I drilled holes and laced a hacksaw blade through the holes and cut cut cut!
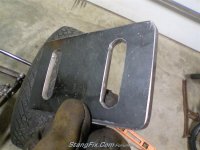
Vertical risers:
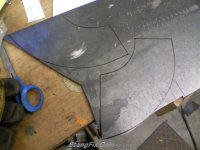
Cut on the band saw again. Had to break down and get another new blade too.
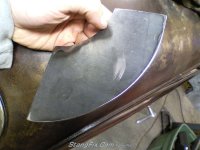
And welded in. I had to weld this in, in place laying upside down - hence not the most beauteous welds ever :roll
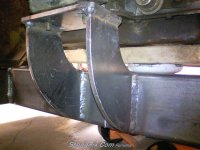
But it's solid :thu
Since I was doing the floor structure around the transmission, I figured I better get the damn trans mount made and welded in.
Nothing fancy on this since it won't be seen. Just standard 1/4" thick plate - cut & welded for the mounting base. I used the mount that was already on the trans for now.
Started by laying out the base mounting plate:
I need (want) a milling machine to mill out smoother grooves. But these were not bad by hand - yes HAND. My sabre saw would not be found! so I drilled holes and laced a hacksaw blade through the holes and cut cut cut!
Vertical risers:
Cut on the band saw again. Had to break down and get another new blade too.
And welded in. I had to weld this in, in place laying upside down - hence not the most beauteous welds ever :roll
But it's solid :thu
70_Fastback
Hell Bent for Speed
And then continued on the floor structure. This is proving to be a slow process - but I like how it's evolving so far.
I made the 2nd drive shaft/trans tunnel hoop and the main channel along the trans:
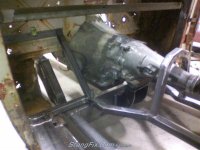
I turned the floor channel and tied them into the front door posts as well as that main rocker structure. It's nice and sturdy now. I also eliminated that original piece of 45* floor structure and will recreate it all new:
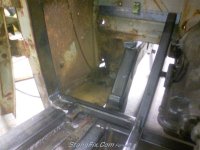
Started the new toe board structure as well. The void space to the left of the lower frame rail will be where I located the master cylinder. I will have to make some pedal linkage to fit - but it should be doable. The toe board sheet metal will be 2 pieces here - the outer portion being removable to access the master cylinder as well.
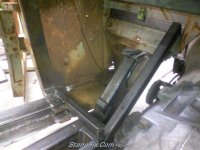
And where the steel work ties together at the door post - it is flat, the picture makes it look stepped, but it's not. I just need to smooth down the weld bead a little bit. The sheet metal flooring will lay nicely on it though.
I made the 2nd drive shaft/trans tunnel hoop and the main channel along the trans:
I turned the floor channel and tied them into the front door posts as well as that main rocker structure. It's nice and sturdy now. I also eliminated that original piece of 45* floor structure and will recreate it all new:
Started the new toe board structure as well. The void space to the left of the lower frame rail will be where I located the master cylinder. I will have to make some pedal linkage to fit - but it should be doable. The toe board sheet metal will be 2 pieces here - the outer portion being removable to access the master cylinder as well.
And where the steel work ties together at the door post - it is flat, the picture makes it look stepped, but it's not. I just need to smooth down the weld bead a little bit. The sheet metal flooring will lay nicely on it though.

70_Fastback
Hell Bent for Speed
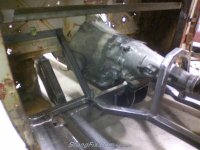
It will be tight - yes. But I am trying to minimize the "structure" inside of the cab. The bolts for the mount do not extend very far down through the frame mount, so not much lifting is required. More tilting and not so much lifting.
And I don't plan on removing the trans very often compared to how often I will be inside.
And I don't plan on removing the trans very often compared to how often I will be inside.
70_Fastback
Hell Bent for Speed
Oh, and here was a shot of the rear cross member also:


daveSanborn
Active Member
Where will the turret mount? J/K. Be careful you don't turn this thing into a 2 ton beast.

 art
art
70_Fastback
Hell Bent for Speed
"daveSanborn" said:Where will the turret mount? J/K. Be careful you don't turn this thing into a 2 ton beast.
Yeah, I know Dave - but I can still deadlift the cab pretty easily so far. So that must mean I am OK then - right? :confu

RyanG85
Well-Known Member
So how did you tweak your back.......... :confu"70_Fastback" said:I can still deadlift the cab pretty easily so far.
70_Fastback
Hell Bent for Speed
Takin a leak.
A
Anonymous
Guest
So, you hurt your back while fantasizing??
daveSanborn
Active Member
"70_Fastback" said:Yeah, I know Dave - but I can still deadlift the cab pretty easily so far. So that must mean I am OK then - right? :confu
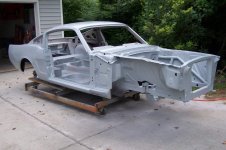
Just the cab? A buddy and I lifted and sat the below chassis onto the pictured dolly. LOL. I'm sure you'll be fine. Your ratrod may come in a little on the heavy side, but it's not as if you'll have it on the dragstrip where every pound counts. The good news is you can fab up a snow plow mount for it and REALLY turn some heads come next winter!
Last edited by a moderator:
70_Fastback
Hell Bent for Speed
The square tubing is also 11 gauge. Just FYI. So not a lot of weight to it. The 1-1/2 x 3 stuff is 3/16" wall though - a bit heavier. But as far as structure goes, there will only be a couple more cross braces for floor supports and then the sheet metal.
So not a ton more to add. LoL. I said ton.
So not a ton more to add. LoL. I said ton.
70_Fastback
Hell Bent for Speed
Got the floor structure wrapped up this weekend - just need a couple of cross braces under the seat area, I ran out of square tubing though.
To back up a bit and photo document some process.
I started with making the main rails for the trans tunnel & drive shaft loop:
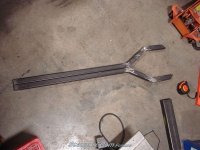
The main rails tied together with the tranny loop. Also the base toe board kickers tie into the door pillars.
The floor uprights also tie into the firewall:
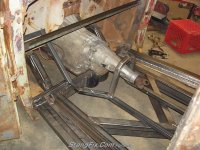
Shot looking at the rear hoop with the main ties:
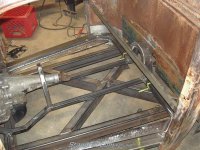
Cage structure for the trans hump & D.S. loop:
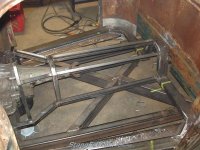
You can see the firewall hoop and the sheet metal gap at the firewall - I'll address that in a minute:
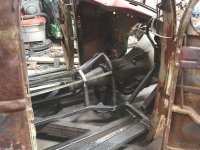
This was the old piece of firewall hump that was way to high and rusted and basically it was just not working out - so out it came.
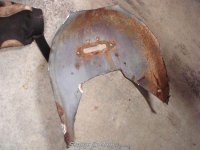
This the the amount that I am dropping the trans tunnel opening. I also made it flush with the firewall in lieu of sunk in:
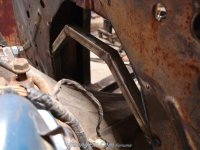
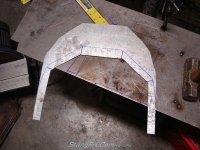
Patch sheeting:
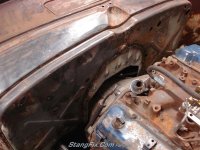
Spotted in and also cherry welded to the front hoop structure:
The sheet metal hanging down below will be bent around the new hoop structure to form a new smooth lip on the outside edge:
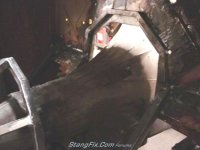
Cage structure complete - ready for sheet metal wrap:
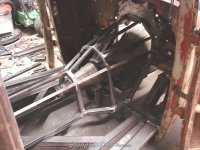
To back up a bit and photo document some process.
I started with making the main rails for the trans tunnel & drive shaft loop:
The main rails tied together with the tranny loop. Also the base toe board kickers tie into the door pillars.
The floor uprights also tie into the firewall:
Shot looking at the rear hoop with the main ties:
Cage structure for the trans hump & D.S. loop:
You can see the firewall hoop and the sheet metal gap at the firewall - I'll address that in a minute:
This was the old piece of firewall hump that was way to high and rusted and basically it was just not working out - so out it came.
This the the amount that I am dropping the trans tunnel opening. I also made it flush with the firewall in lieu of sunk in:
Patch sheeting:
Spotted in and also cherry welded to the front hoop structure:
The sheet metal hanging down below will be bent around the new hoop structure to form a new smooth lip on the outside edge:
Cage structure complete - ready for sheet metal wrap:
70_Fastback
Hell Bent for Speed
Next large task was making the cab to frame mounts and getting the cab located spot on.
I took some pretty beefy 1/4" steel and sliced it in half. I had to get creative with the extension bracketry for my bandsaw to cut these since it was a little past a 45* cut.
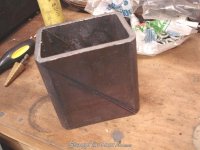
And there are actually 2 different sizes of mounts. A shallower one for the front and deeper for the rear (ala Kevin style):
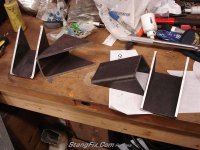
Front mount welded on and the cab bolted down. I am looking for some scrap pieces of tire to make a rubber isolater between the body & mount still:
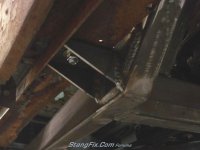
The rear mount - which had to be taller due to the slope of the cab:
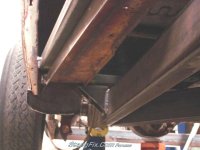
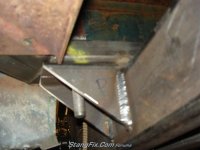
(and yes, that is a temporary bolt)
Access point inside - behind the seats:
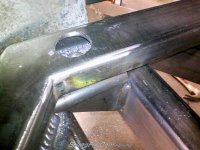
I took some pretty beefy 1/4" steel and sliced it in half. I had to get creative with the extension bracketry for my bandsaw to cut these since it was a little past a 45* cut.
And there are actually 2 different sizes of mounts. A shallower one for the front and deeper for the rear (ala Kevin style):
Front mount welded on and the cab bolted down. I am looking for some scrap pieces of tire to make a rubber isolater between the body & mount still:
The rear mount - which had to be taller due to the slope of the cab:
(and yes, that is a temporary bolt)
Access point inside - behind the seats: