
-
Hello there guest and Welcome to The #1 Classic Mustang forum!
To gain full access you must Register. Registration is free and it takes only a few moments to complete.
Already a member? Login here then!
You are using an out of date browser. It may not display this or other websites correctly.
You should upgrade or use an alternative browser.
You should upgrade or use an alternative browser.
Had some me time
- Thread starter B67FSTB
- Start date


B67FSTB
The NorCal dude from Belgium
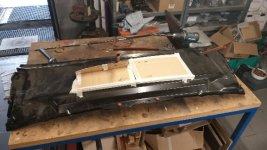
OK.Today was a all rainy day and I decided to tackle the cowl....again.
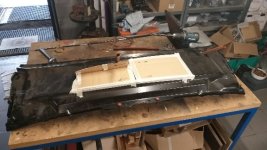
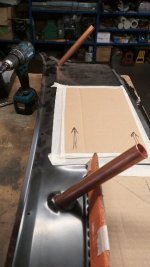
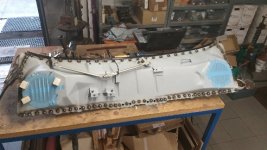
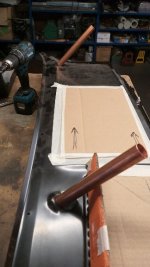
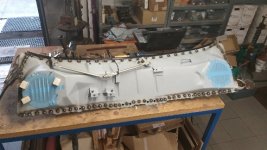
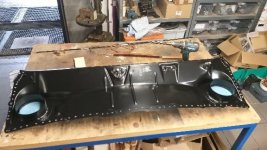
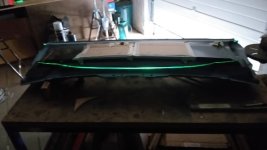
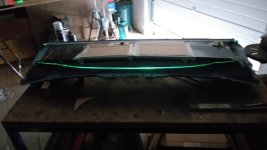
Despite all comments I decide to put the upper and lower together prior installing on the car. I want to be sure the wiper pivots are a bit in the center of the holes in the upper part. I used some copper tubing to center them. Next was drilling about 100 holes in the lower part. And afterwards to weld both pieces together.
Next will be grinding the welds flush.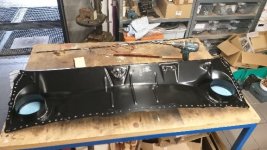
Verstuurd vanaf mijn SM-A605FN met Tapatalk
Despite all comments I decide to put the upper and lower together prior installing on the car. I want to be sure the wiper pivots are a bit in the center of the holes in the upper part. I used some copper tubing to center them. Next was drilling about 100 holes in the lower part. And afterwards to weld both pieces together.
Next will be grinding the welds flush.
Verstuurd vanaf mijn SM-A605FN met Tapatalk
Attachments
-
 d7f39ea849f37868d1da42bd56d89cac.jpg30.5 KB · Views: 0
 -
 7007f96ee0dcb3769b769b059f16e7b0.jpg39.3 KB · Views: 0
 -
 d7f39ea849f37868d1da42bd56d89cac.jpg30.5 KB · Views: 0
 -
 64fecd3ab3f052f06df7129402f14ea9.jpg39.3 KB · Views: 0
 -
 64fecd3ab3f052f06df7129402f14ea9.jpg39.3 KB · Views: 0
 -
 5d48b86566115100ae065237f71a65eb.jpg45.7 KB · Views: 0
 -
 5d48b86566115100ae065237f71a65eb.jpg45.7 KB · Views: 0

B67FSTB
The NorCal dude from Belgium
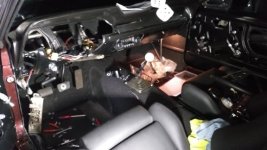
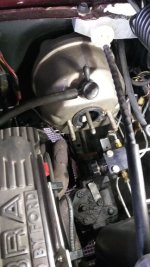
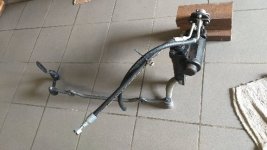
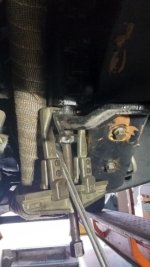
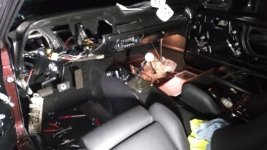
Temps outside are going down. Before storing the stang for the winter I wanted to change the orignal power steering to a borgeson setup. Removed the instrument cluster , steeringwheel and column . Masterbrake cylinder went out and already removed centerlink with slave cylinder.
I want to save the orignal steeringbox so I have to remove the pitman arm from the steeringbox. It doesn't move !! Man , I think I will regret this swap ! It took me 7 hours to do all this and the pitman arm isn't removed from the steeringbox. I am beaten for today. To save the steeringbox , I have to dissemble it in the car. Meaning remove cover , remove pitman arm so I can push the sectorshaft a bit upwards so I can pull the long steeringshaft out of the box. Thats the plan.
Or...remove the header... another pleasant job
.
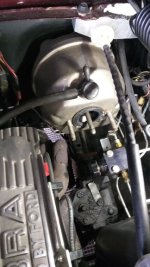
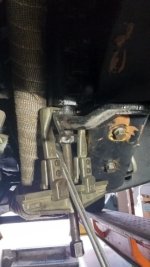
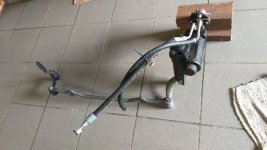
Verstuurd vanaf mijn SM-A605FN met Tapatalk
I want to save the orignal steeringbox so I have to remove the pitman arm from the steeringbox. It doesn't move !! Man , I think I will regret this swap ! It took me 7 hours to do all this and the pitman arm isn't removed from the steeringbox. I am beaten for today. To save the steeringbox , I have to dissemble it in the car. Meaning remove cover , remove pitman arm so I can push the sectorshaft a bit upwards so I can pull the long steeringshaft out of the box. Thats the plan.
Or...remove the header... another pleasant job
.
Verstuurd vanaf mijn SM-A605FN met Tapatalk
Attachments
-
 1b19f0959b72791c6e10c32d57f0f13c.jpg37.8 KB · Views: 0
 -
 c3d013547c03b70626fc6cc6aed5db61.jpg32.5 KB · Views: 0
 -
 0764bce1bf3ab874a7a8ec3cc7230533.jpg30.8 KB · Views: 0
 -
 1b19f0959b72791c6e10c32d57f0f13c.jpg37.8 KB · Views: 0
 -
 7da18ff25118d2c0299b71b756bcdbbf.jpg32.7 KB · Views: 0
 -
 0764bce1bf3ab874a7a8ec3cc7230533.jpg30.8 KB · Views: 0
Last edited:
B67FSTB
The NorCal dude from Belgium
After a good night sleep and some thinking , I decided to tackle the job different.
I remove spark plug cables , spark plugs , LH header and LH valve cover. I then could remove the whole steeringbox out off the car !! Job done !!
Next installing Borgeson box and measuring and cutting column. And cutting an old worn steering shaft and grind a double D so it fit the rag joint at the box.
That will take time. Like they say : measure twice , cut once....or was it the other way around ????
I remove spark plug cables , spark plugs , LH header and LH valve cover. I then could remove the whole steeringbox out off the car !! Job done !!
Next installing Borgeson box and measuring and cutting column. And cutting an old worn steering shaft and grind a double D so it fit the rag joint at the box.
That will take time. Like they say : measure twice , cut once....or was it the other way around ????

Bruno, not sure of your plans for the pump to use with the Borgeson box but I recommend tweaking it to lower the output pressure. I used a Saginaw style pump and a replacement valve that reduced the output pressure about 30%. It still provides really good assist levels but not so much as to remove too much "road feel".


B67FSTB
The NorCal dude from Belgium
Ok. I scrambled the parts together over the years cause I am on the budget...as always. I noticed that you can use the orignal Ford p/s pump when buying the hoses. So , I choosed the hoses for the Ford p/s pump.
How good it will work , I don't know but heard alot of good thing of this conversion. I'll have to wait and see/feel . I exspect more roadfeel from this setup. Above 45mls/hr the p/s
should feel sturdier IMO.
I guess by next may it should zll be good ! [emoji6]
Today I tackled the steeringcolumn. A bit scary to cut a column or the shaft cause I only have one and its not an easy buy overhere !
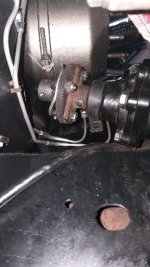
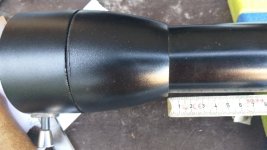
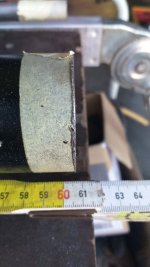
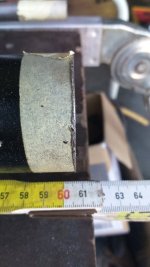
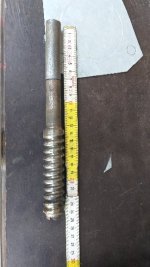
Installed Borgeson box and measured from the clamp that holds the column. I must say all went very good. Had to cut once and all is good. In pics some measurements of all the pieces. Hope this can help someone who will tackle this conversion.
Verstuurd vanaf mijn SM-A605FN met Tapatalk
How good it will work , I don't know but heard alot of good thing of this conversion. I'll have to wait and see/feel . I exspect more roadfeel from this setup. Above 45mls/hr the p/s
should feel sturdier IMO.
I guess by next may it should zll be good ! [emoji6]
Today I tackled the steeringcolumn. A bit scary to cut a column or the shaft cause I only have one and its not an easy buy overhere !
Installed Borgeson box and measured from the clamp that holds the column. I must say all went very good. Had to cut once and all is good. In pics some measurements of all the pieces. Hope this can help someone who will tackle this conversion.
Verstuurd vanaf mijn SM-A605FN met Tapatalk
Attachments
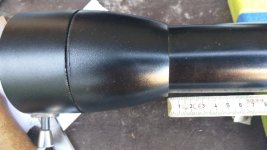


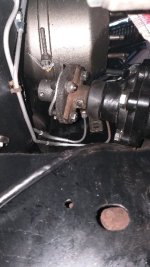
B67FSTB
The NorCal dude from Belgium
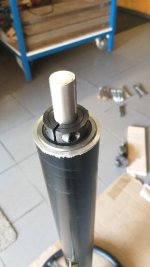
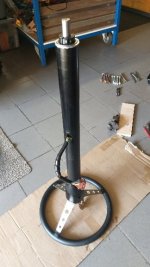
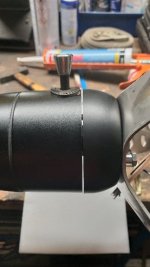
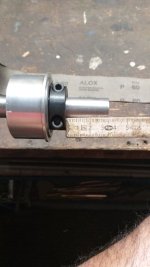
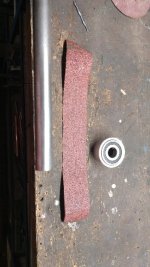
After measuring and cutting the column , I assembled steeringwheel with shaft and column as a whole. Took some measurements of how much the shaft has to be cut. Grinding with cloth sandpaper so the lower bearing will fit. ( self engineered) .
Final I assembled it all together and checked clearance between column and steeringwheel.
Next will be making double D at the end of the shaft. Wish me luck.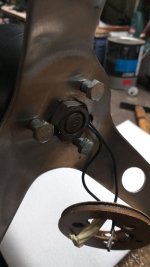
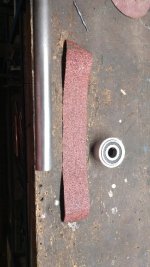
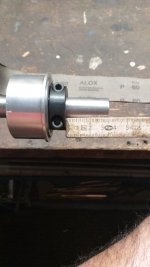
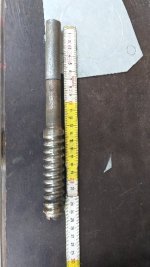
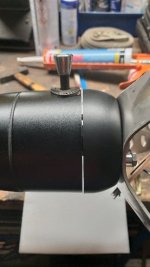
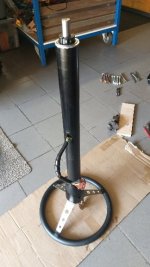
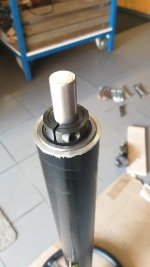
Verstuurd vanaf mijn SM-A605FN met Tapatalk
Final I assembled it all together and checked clearance between column and steeringwheel.
Next will be making double D at the end of the shaft. Wish me luck.
Verstuurd vanaf mijn SM-A605FN met Tapatalk
Attachments
-
 2d63122d5cbb872b345a942906e9a2fa.jpg22.9 KB · Views: 0
 -
 b7e6d20a4e82806cb8d5ab034d7dfa89.jpg34 KB · Views: 0
 -
 b7e6d20a4e82806cb8d5ab034d7dfa89.jpg34 KB · Views: 0
 -
 914761729ab7088a1309b36789dc86ef.jpg25.8 KB · Views: 0
 -
 914761729ab7088a1309b36789dc86ef.jpg25.8 KB · Views: 0
 -
 d084d417f52e0f33ce6ca2757c0fe47e.jpg33.4 KB · Views: 0
 -
 3d51308d91bcfa56c601fa8df12e97c8.jpg23.5 KB · Views: 0
 -
 3d51308d91bcfa56c601fa8df12e97c8.jpg23.5 KB · Views: 0
 -
 389cb774ae9a72f751d3e80100572947.jpg39.8 KB · Views: 0
 -
 389cb774ae9a72f751d3e80100572947.jpg39.8 KB · Views: 0
 -
 d39496ff42ad019b599d8cd445078ddb.jpg23.8 KB · Views: 0
 -
 d39496ff42ad019b599d8cd445078ddb.jpg23.8 KB · Views: 0
 -
 d084d417f52e0f33ce6ca2757c0fe47e.jpg33.4 KB · Views: 0
Nice work so far, Bruno. I remember being a bit nervous cutting down the column too.
The improved feel of the Borgeson set-up vs. any "rebuilt to new" 60's power steering system that I ever drove is HUGE as long as the other mechanical bits of the steering linkage are in good shape. When I first drove mine I had a 2014 GT and would say the '65 gave me a much better sense of the road and, to my preferences, a better feel at the wheel. I will repeat that reduced pump pressure was a key to making wheel input critical to my satisfaction.
I can't wait to get the truck on the road so I can do some real life feel comparison to it's electrically assisted system. Truth be told I expect to still prefer the Borgeson but that was not an option I wanted to go with running the flathead.
The improved feel of the Borgeson set-up vs. any "rebuilt to new" 60's power steering system that I ever drove is HUGE as long as the other mechanical bits of the steering linkage are in good shape. When I first drove mine I had a 2014 GT and would say the '65 gave me a much better sense of the road and, to my preferences, a better feel at the wheel. I will repeat that reduced pump pressure was a key to making wheel input critical to my satisfaction.
I can't wait to get the truck on the road so I can do some real life feel comparison to it's electrically assisted system. Truth be told I expect to still prefer the Borgeson but that was not an option I wanted to go with running the flathead.
B67FSTB
The NorCal dude from Belgium
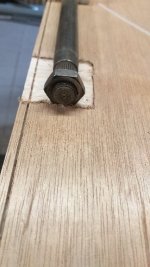
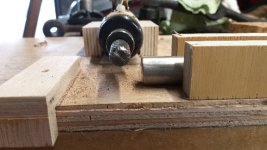
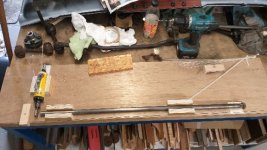
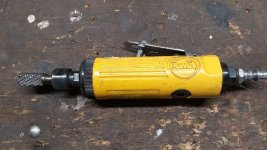
After making the garden ready for autum and winter and trimming 120m of hedges , I took time to make a " tool " so I can make a " double D " at the end of the cut steering shaft. I want it to be precise so it sits firm in the rag joint.
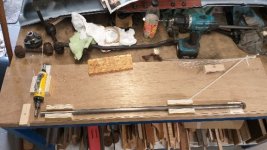
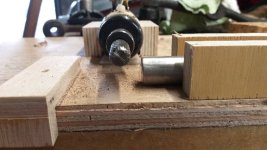
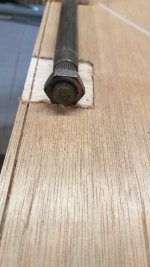
I have a pneumatic grinder and a carbon "cutter" . Did some measurements , zip tight it , make some reinforcements and guidances. I gonna take the nut as a template to grind the other side at exactly 180 °
You all have to wait for the result...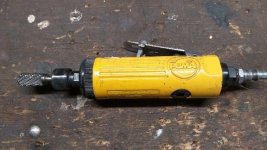
Verstuurd vanaf mijn SM-A605FN met Tapatalk
I have a pneumatic grinder and a carbon "cutter" . Did some measurements , zip tight it , make some reinforcements and guidances. I gonna take the nut as a template to grind the other side at exactly 180 °
You all have to wait for the result...
Verstuurd vanaf mijn SM-A605FN met Tapatalk
Attachments
-
 8f35726ffc235102364d3bd495b26947.jpg43.6 KB · Views: 0
 -
 6b402b482189895074ee09cd43dbabc6.jpg33.3 KB · Views: 0
 -
 de0cf46ba03d018afe4762c430ceb8f8.jpg32.8 KB · Views: 0
 -
 de0cf46ba03d018afe4762c430ceb8f8.jpg32.8 KB · Views: 0
 -
 8f35726ffc235102364d3bd495b26947.jpg43.6 KB · Views: 0
 -
 0e8a4969c151a9df2edb7ad8c4e11b5e.jpg41.7 KB · Views: 0
 -
 0e8a4969c151a9df2edb7ad8c4e11b5e.jpg41.7 KB · Views: 0
B67FSTB
The NorCal dude from Belgium
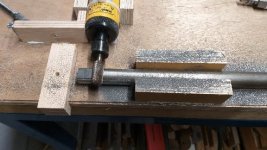
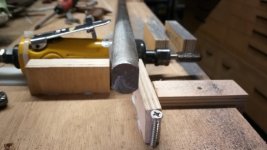
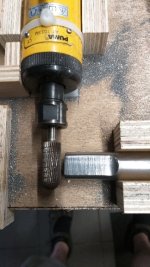
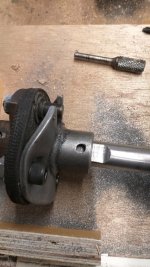
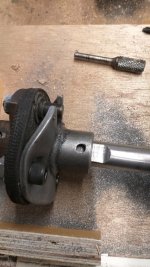
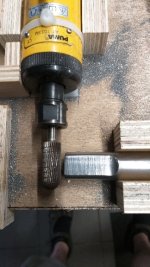
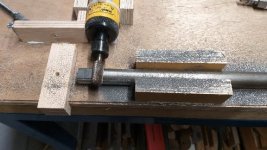
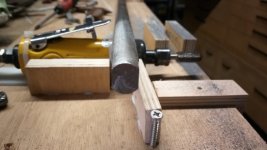
Succes !! With the first cutter is did not work cause...it had no bite at all. Found another one but was slightly smaller in diameter.
After a little adjustment I could "shave" the shaft .[emoji849][emoji16]
I am very pleased how things went . Exactly how I imagened it in bed , very early in the morning.
Verstuurd vanaf mijn SM-A605FN met Tapatalk
After a little adjustment I could "shave" the shaft .[emoji849][emoji16]
I am very pleased how things went . Exactly how I imagened it in bed , very early in the morning.
Verstuurd vanaf mijn SM-A605FN met Tapatalk
Attachments
-
 19621473149df385259fa0b2d46ed126.jpg43.3 KB · Views: 0
 -
 a3bfa60ea8306f7804f1cb9b14c32b91.jpg41.8 KB · Views: 0
 -
 a3bfa60ea8306f7804f1cb9b14c32b91.jpg41.8 KB · Views: 0
 -
 d1ea12a0c82eff2cc21a4a1006863a57.jpg27.5 KB · Views: 0
 -
 7b0e2aaab3b223d082f94f36504f15f4.jpg42.9 KB · Views: 0
 -
 7b0e2aaab3b223d082f94f36504f15f4.jpg42.9 KB · Views: 0
 -
 d1ea12a0c82eff2cc21a4a1006863a57.jpg27.5 KB · Views: 0
B67FSTB
The NorCal dude from Belgium
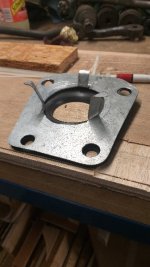
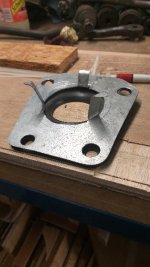
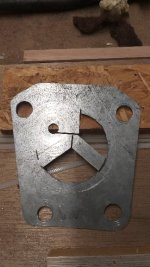
Today I have to make another lower steering column seal plate. The one that "holds" the steeringcolumn at the lower part. Like the one that is supplied with a borgeson conversion kit. In that order. I had some zinc plted sheetmetal laying around.
Copied the orignal one and included the holding taps in the design. Just eyeballing of how the angel would be.
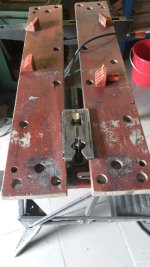
Took the jigsaw and clamped into the workmate.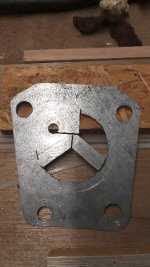
Verstuurd vanaf mijn SM-A605FN met Tapatalk
Copied the orignal one and included the holding taps in the design. Just eyeballing of how the angel would be.
Took the jigsaw and clamped into the workmate.
Verstuurd vanaf mijn SM-A605FN met Tapatalk
Attachments


B67FSTB
The NorCal dude from Belgium
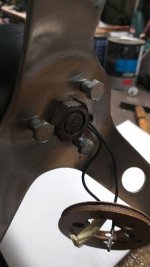
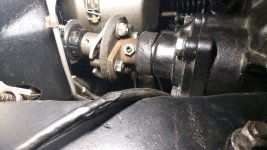
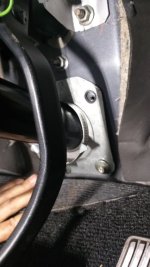
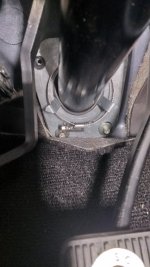
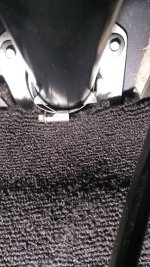
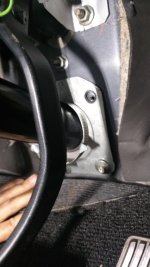
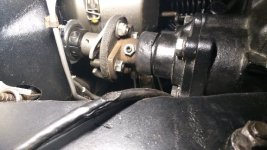
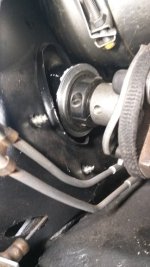
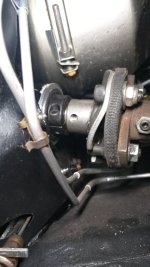
Next was installing the steeringcolumn.First I had to center the input of the box by adding a washer between the frame and box. Once that was done, Man , that went in smooth !! Even clamping the lower part of the steering column is OK . All dimensions and gaps were , to me , 100%. Very, very pleased with my work.
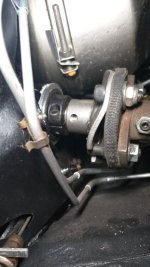
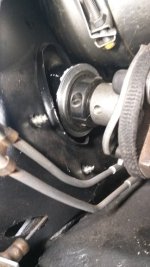
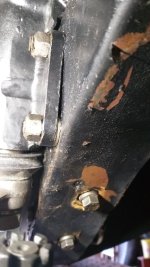
Verstuurd vanaf mijn SM-A605FN met Tapatalk
Verstuurd vanaf mijn SM-A605FN met Tapatalk
Attachments
-
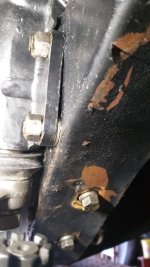 9dfa84d45d5b9c9967d4e441e758aa5d.jpg36.3 KB · Views: 0
 -
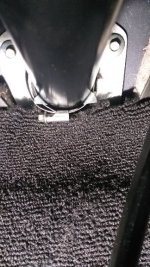 90b07d61b315d926ccb9ef3159bfec6b.jpg56.1 KB · Views: 0
 -
 90b07d61b315d926ccb9ef3159bfec6b.jpg56.1 KB · Views: 0
 -
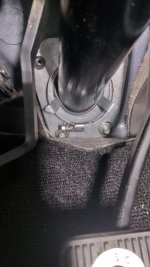 7058068b03bb31ab3d9d8e210bcbbdbf.jpg31.3 KB · Views: 0
 -
 7058068b03bb31ab3d9d8e210bcbbdbf.jpg31.3 KB · Views: 0
 -
 f525f645bce5aa0b053e9316a6961cbd.jpg29.9 KB · Views: 0
 -
 f525f645bce5aa0b053e9316a6961cbd.jpg29.9 KB · Views: 0
 -
 b7987cc8b98ff408b3830f642224c12d.jpg39.3 KB · Views: 0
 -
 b7987cc8b98ff408b3830f642224c12d.jpg39.3 KB · Views: 0
 -
 fc388f4f50ea5596b97fcc5f0bab85f1.jpg31.4 KB · Views: 0
 -
 fc388f4f50ea5596b97fcc5f0bab85f1.jpg31.4 KB · Views: 0
 -
 c27892590532ca2c38c2b7765612cc9d.jpg32.8 KB · Views: 0
 -
 c27892590532ca2c38c2b7765612cc9d.jpg32.8 KB · Views: 0