• Hello there guest and Welcome to The #1 Classic Mustang forum!
    To gain full access you must Register. Registration is free and it takes only a few moments to complete.
    Already a member? Login here then!

1967 Build called Electra

Oh man, I hope I don't ever have to deal with a cowl. So far so good *crosses fingers*...
Id go ahead and get a big jub of water and pour in your cowl check it for leaks before you get too far along.


Finally success!!! The cowl is sealed up and no more leaking. I just have to paint it, weld it back shut and then on to the next task
 
Got back to work, cowl is welded shut, painted, sealed, and ready for the last of paint. I also finally installed my headliner. So what really has me interested is the rear might be POSI in this sucker. I rolled it back and hit the gas a little hard and it left 2 tire marks. I was pretty sure it was an Open rear and the tag says it is....Soooo the tag might be wrong and im curious as hell
 
Got back to work, cowl is welded shut, painted, sealed, and ready for the last of paint. I also finally installed my headliner. So what really has me interested is the rear might be POSI in this sucker. I rolled it back and hit the gas a little hard and it left 2 tire marks. I was pretty sure it was an Open rear and the tag says it is....Soooo the tag might be wrong and im curious as hell
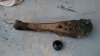
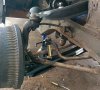
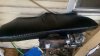
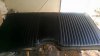
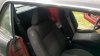
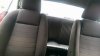
Should be very easy to tell if someone put a GM rear end under it. :D:rolleyes:

Posi (posi-traction) is a GM term for their differential. Ford has Trac-Lok. Come on. man!

Jack up the rear and spin a tire. If the other tire spins the opposite way its an open rear. BTW, it is possible to have both tires spin with an open given the right circumstances. That design applies the torque to the wheel with the best traction. If you were to say dump the clutch in loose gravel for an instant both wheels could be driven.
 
lol! I know, I know.......I learned mostly on Chevy's so i tend to say POSI. Trac Lok or Equloc Right?

I got the double backed carpet in, painted the old vinyl seats i got black, installed them, put the scratched up side panels in, both seat belts are bolted in, and installed the 09 Mustang seats. I need to trim the carpet some more for the door sills but the interior is looking good

Probably going to remove the front seats and paint them to match the rear. Dupli Color Flat black
 

Attachments

  • 20713_10155412729775521_476584909433434902_n.jpg
    20713_10155412729775521_476584909433434902_n.jpg
    58.4 KB · Views: 27
  • 10154265_10155412729970521_6744651249756808304_n.jpg
    10154265_10155412729970521_6744651249756808304_n.jpg
    48.4 KB · Views: 28
  • 11102650_10155412729185521_4632053806903249985_n.jpg
    11102650_10155412729185521_4632053806903249985_n.jpg
    97.4 KB · Views: 28
  • 11129911_10155412729430521_1628903825099523872_n.jpg
    11129911_10155412729430521_1628903825099523872_n.jpg
    58.3 KB · Views: 28
  • 11133723_10155412729330521_1914680235934910196_n.jpg
    11133723_10155412729330521_1914680235934910196_n.jpg
    36 KB · Views: 24
Well with the day off from training due to a cleanse (Dont ask) i decided in my weak state id work on the mustang. Took the top half apart and found some of the problems.

1: The spring wasn't turned properly and seated in the rocker
2: The rocker was shot and i couldn't get it to budge by hand
3: It certainly had I6 Springs
4: Insulator pads were half there and falling apart

So once apart and i did the arning drop. It was a pain and used all of my 18V dewalt battery to complete

Once Apart i checked the fit of the upper control and it was a little tight. I couldnt get the bolts to go all the way in but it did eventually go in.. Just took wiggling.

I had a mini grease gun and of course it didn't work for ****. Ended up going and getting a regular grease gun and found out exactly what you guys meant by needing right angle zerks. So all of that installed and greased together.

I installed roller rockers and Grab a track 620 springs with supposedly a 1" insulator...Looks pretty tiny only being about 1/4" thick on the top.

Either way....It took about 6 hours since ive never done any of it but the whole upper has been install on the passenger side. I have to do the lower and replace the rest of the bushing still but then on to the other sidepass side old crap.jpg pass temp.jpg pass side arning.jpg Pass side upper.jpg
 
^Glad to hear it wasn't just me. I was all "why am I looking at suspension pics?"

Jeff, how did drilling go on those UCA holes?
 
The drilling was tedious but rather easy. The templates are awesome....I dont know why i keep calling them roller rockers...I was off my game...The juice cleanse had me unstable..lol The things i do to cut weight. Anyway yes roller perches from ORP is what i meant. v Maybe cause they rock back and fourth? lol

Im actually going through parts i need right now. I need to Order ORP steering setup as my tie rods and idler need replaced. I have money coming this weekend so im just deciding on what else to order. Contacted MTF to find out when there fog light billet grille will be back in for order. Looking at headers and a few other things.
 
ordered ORP Make it steer kit, Roller idler arm and outer tie rod setup, brushed aluminum instrument cluster, new outer shock tower bumpers, 17" BG Gasser wheels to get rid of the spacers, the rod kit for the heater controls i need to replace, and it all put a big smile on my face
 
had to have it. While replacing the pass side upper section you could see how loose it was from idler to lower. So if i have to buy it might as well get the good stuff
 
Got to the drivers side and got the Arniing drop, UCA, Roller perch, and spring installed. I went ahead and put 2 washers under the perch to raise it up and bit so we will see how it sits once i complete everything. Oddly enough, I watched videos of replacing UPRs and they said shims are only used on 65-66....The driver side of mine had shims....WTF? Passenger side did not.. Weirdness
 
Last edited:
First, maybe I'm just tired from working on my car all day, but I can't figure out "UPR". Do you mean UCA?

As for shims, some folks shim the front a bit to add more caster by leaning the top balljoint rearward. Shortening the strut rod to add caster brings the wheel forward, so the idea is to keep the wheel more centered.

If you had shims on both bolts, maybe the last person to align it just didn't realize the lower arm has a concentric. I think the earlier cars use shims because they have a regular bolt on the LCA pivot.
 
Trying to decide what to work on tomorrow. I worked on my truck today but really accomplished very little. Not sure if im ready to tackle the LCAs plus i need to work on the gauge cluster of the truck blah soo many things
 
LCA Removed and Installed the New LCAs, Strut Rod Bushings, End Link Rods, and the sway bar bushing all on the passenger side. Took me 5 hours total. 2 hours for removal and then 3 hours for the install. From the lessons learned the other side should be a lot easier and once i finish that ill move on to the steering
 

Attachments

  • old lca.jpg
    old lca.jpg
    73.2 KB · Views: 13
  • lca.jpg
    lca.jpg
    126.2 KB · Views: 14
Back
Top