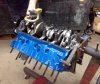
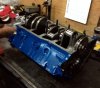
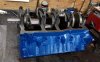
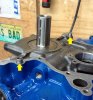
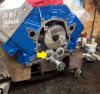
What's with the censorship?! Some of us might want to see the kind of girls Art appreciates.Today I had a machinist check the bearing tolerances. All were very consistant and within acceptable range. Let the assembly begin !!
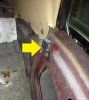
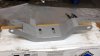
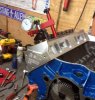
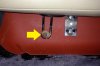
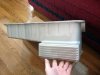
Steve @ SellersRodShop fabbed my T5 trans support. I test fit it today and it fits !!
Navigation
Install the app
How to install the app on iOS
Follow along with the video below to see how to install our site as a web app on your home screen.

Note: This feature currently requires accessing the site using the built-in Safari browser.
More options
-
Hello there guest and Welcome to The #1 Classic Mustang forum!
To gain full access you must Register. Registration is free and it takes only a few moments to complete.
Already a member? Login here then!
You are using an out of date browser. It may not display this or other websites correctly.
You should upgrade or use an alternative browser.
You should upgrade or use an alternative browser.
Mach1Mark's '65 coupe restomod
- Thread starter Mach1Mark
- Start date
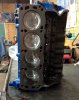
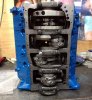
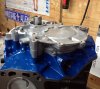
Cut rings to correct gap for each cylinder, installed rings on pistons, installed one-piece rear main seal and crank in block and torqued main caps.
Attachments

Last edited:
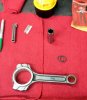
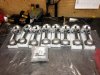
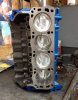
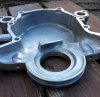
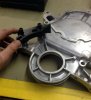
Today, installed piston/rod assemblies into block and torque, media strip new trans support (ready for powdercoating) an modify new timing cover by cutting/grinding chain guide.
Attachments
Ordered my custom grind Comp Cam today. Should be here in a week and a half. Also got another UPS delivery from Jegs today (ARP bolt kits and one-piece Motorsport oil pan gasket).
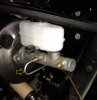
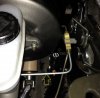
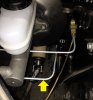
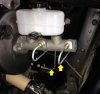
Degreased and re-installed oem rear brake hard line. Also cleaned up the oem attaching hardware. Had to re-bend, trim a short piece of line and double flare the end that attached to the prop valve. Im a little beat tired from climbing under the car and in/out of the engine bay so much. Since I installed the vacuum booster and master cyl a year ago the booster had gotten some surface rust (I thought it was plated and wouldnt rust). Well, I sanded the rust off and applied some cast iron colored paint to match the master cyl.
Attachments
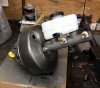
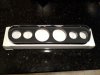
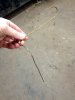
Today, re-installed the brake vacuum booster and master cyl., fabbed a new brake line from the master cyl to the distribution block, installed a few clips to hold the rear brake line and e-brake cable in place. Also, my six gauge dash bezel arrived.
Attachments

We are at similar stages now, Mark. I want to feel like it is approaching the finish line but when I write out the list of odds and ends to wrap up it seems a mile long, doesn't it?
You're doing a great job of banging items off the list. I suppose I should do the same and start documenting stuff on my build thread too.
Keep it up!
You're doing a great job of banging items off the list. I suppose I should do the same and start documenting stuff on my build thread too.
Keep it up!
Hi Terry
Keep knocking the little things off the list and pretty soon the list is done. I'm thinking I am going to be driving mine this summer. Ive got a LOT of money left to spend buying parts but the issue is time. I work out-of-town so I have one or two days a week I can work on the Colt. Keeping a blog/diary has helped keep me motivated and I have friends/family/Mustangers who all want to see my progress.
Ive got another Mustang ('70 Mach 1) that has been ready for paint for ten years that will likely be re-started this year. I am planning on keeping a blog/diary for that Mustang too. Send me a PM if there is anything I can help you with. Monkeystash (Ryan) has been my build buddy as we used to live in the same area of Atlanta. We talk regularly and compare notes. That's helpful too.
Today I test fit the timing cover dowels, test fit the Scott Drake six gauge dash bezel (had to bend the two lower tabs to align with the attaching screws) and fabbed the last front brake line. Also, my custom Comp Cam arrived this week. Yayyyyyy !!!
Attachments
Ponyman66
Yak, yak, yak
Ummm, Mark I hate to tell you this, but that was a coat hanger you fabbed up! 
J/K Looking good. Sounds like you may have it on the road soon!
J/K Looking good. Sounds like you may have it on the road soon!
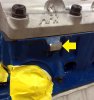
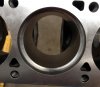
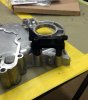
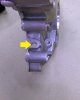
Today, we checked the valve-to-piston clearance, spent a lot of time grinding the cam gear drive pin to clear including some grinding on the block, installed the cam and cam gear drive, installed the radio grill, installed the trim on the lower edge of the windshield, enlarged holes and installed rear seat back hold-down screws, test fit the adjustable timing pointer, drilled a new hole in the timing cover for a front sump dip stick.
Attachments
-
 ATI timing pointer (1).JPG612.9 KB · Views: 22
 -
 ATI timing pointer (2).JPG500 KB · Views: 19
 -
 Cam drive gear.JPG1.1 MB · Views: 21
 -
 Checking valve clear.JPG685.4 KB · Views: 19
 -
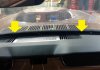 Dash trim.JPG981.7 KB · Views: 19
 -
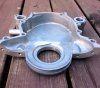
 Dipstick hole in timing cover.JPG624.3 KB · Views: 20
 -
 Radio grill.JPG974 KB · Views: 23
 -
 Rear seat back screw.JPG510.4 KB · Views: 18
Last edited:
That gear drive picture would give someone around here a scary flashback...if he ever visited the site.
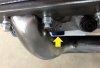
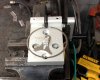
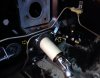
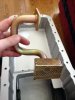
Today I changed the springs that came stock (solid roller cam) on my AFR aluminum heads for some softer Comp Cams springs (hydraulic roller cam) that will work with my Webers. Also trial fit the timing cover and the ARP bolts and ATI timing pointer (still need two more bolts . . . the ARP tech told me they dont make a timing cover kit for my kind of Windsor and I wouldnt be happy). Had to clearance the inside of the timing cover some more as it would not seat flush against the block face (the cover was being held away by the gear drive planet gear pin). Also, trial fit my new Lunati roller lifters
Attachments
Last edited:
monkeystash
Active Member
Looking good buddy. ARP will swap you bolt for bolt for ones that don't fit from their kits. I had to swap several out because Ford made way too many water pump variations for ARP to keep up with. I may have a few extra bolts too.
Sent from my iPad using Tapatalk
Sent from my iPad using Tapatalk
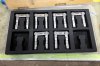
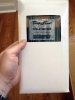
That pick of your new lifters explains the high cost. That die-cut foam is expensive!
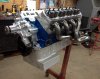
Your engine is coming together nicely. Gonna be sweet!
Your engine is coming together nicely. Gonna be sweet!
Yesterday I trial fit the Comp Cams 1.72:1 roller rocker and had the assistance of a ASE mechanic Mustanger buddy in determining the push rod length needed. He figured that I would be at 0.618" lift for intake and 0.617" lift for exhaust. Cool !!
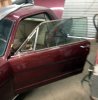
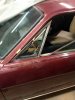
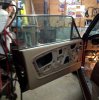
I have been putting off installing the driver door glass because I wasnt looking forward to doing it. I managed to get everything installed and working. Now I need to do the final adjustments for all the door glass.
I have been putting off installing the driver door glass because I wasnt looking forward to doing it. I managed to get everything installed and working. Now I need to do the final adjustments for all the door glass.
Attachments
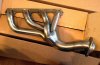
Had some goodies arrive this week, cant wait to install them. JBA stainless steel shorty hedders, valve push rods and cast aluminum oil pan. Racy !!
Attachments

Don't ya just love when the big brown trucks pulls up!
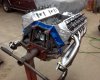
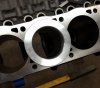
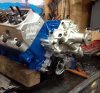
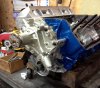
Today, installed the timing cover and crank balancer, indexed #1 cylinder and the timing pointer, installed the water pump, installed the oil pump and pick up (checked pick up clearance with the bottom of pan), installed oil pan but had to switch to a diferent type of bolt as the ARP stud set was too short, installed heads, installed guide plates, installed hedders. Making progress and should be ready to fire in a week (I hope).