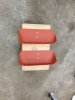
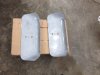
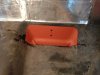
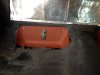
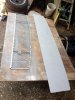
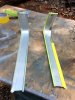
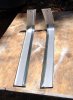
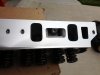
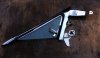
Painted both horns semi gloss black and installed, bead blasted and primered dual exhaust reinforcing plates, primered and test fit. Had to remove some seam sealer to get the plates to fit tight.
Navigation
Install the app
How to install the app on iOS
Follow along with the video below to see how to install our site as a web app on your home screen.

Note: This feature currently requires accessing the site using the built-in Safari browser.
More options
-
Hello there guest and Welcome to The #1 Classic Mustang forum!
To gain full access you must Register. Registration is free and it takes only a few moments to complete.
Already a member? Login here then!
You are using an out of date browser. It may not display this or other websites correctly.
You should upgrade or use an alternative browser.
You should upgrade or use an alternative browser.
Mach1Mark's '65 coupe restomod
- Thread starter Mach1Mark
- Start date

"stangg" said:Another option for chroming...
http://www.mustangcorral.com/cgi-bin/cp-app.cgi?usr=51F1514253&rnd=3502748&rrc=N&affl=&cip=&act=&aff=&pg=prod&ref=clvent&cat=excl&catstr=HOME:cl:excl
I got my vent window frames from Mustang Corral back in 2007 and very pleased with the chroming quality. They basically take your frames as a core and ship you out a set they already have on hand. The chrome looks great but if you are concerned with every detail being perfect then you may want to call them first. The only issue with the ones I received is that the little V detail at the lower front corner was somewhat sanded out... probably to remove some light pitting. In my opinion a very minor deviation for a non concourse type car. No one has ever commented on them and I've seen several other high end cars with the same issue so hardly a concern for me. For $225, plus shipping and cores, I think it's a very good alternative...
Thanks for the lead, it was indeed a good option. I say WAS because they dont exchange them anymore due to the EPA making it very expensive for plating shops to produce finished product.
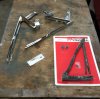
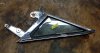
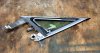
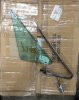
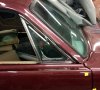
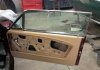
Last Saturday I began to reassemble the vent window assemblies. Instead of having the originals replated (which was cost prohibitive courtesy of the EPA) I purchased repro vent window frames made out-of-country. Also choose the concours-quality rubber seal kit as well.
Attachments
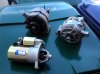
A Mustanger buddy gave me these parts when he cleaned up his garage. Im keeping the mini starter and the late model alternator. The old style alternator is available to any one who needs it (you pay for the ride). I had all tested at a local alternator shop and they all work so you will get a new 42A unit.
Attachments
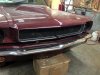
Today, media stripped and primered original grill, primered and sanded new rear package tray, R & R original grill opening trim, install grill trim, install two more rivets on pass side vent frame (after making a very small spacer to allow the rivet gun to work properly).
Attachments
.JPG")
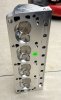
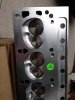
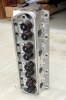
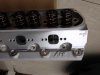
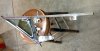
 Two weeks ago I found an OUTSTANDING buy on a pair of the best aluminum SBF heads Ive seen in a LOOOOONG time so even though I wasn't quite ready to make the buy I couldn't pass them up. Got'em for at LEAST $400 under MSRP and I am one happy Mustanger !!! They arrived last Monday so I had to wait a week to inspect them. These are some SEXY heads !!
Two weeks ago I found an OUTSTANDING buy on a pair of the best aluminum SBF heads Ive seen in a LOOOOONG time so even though I wasn't quite ready to make the buy I couldn't pass them up. Got'em for at LEAST $400 under MSRP and I am one happy Mustanger !!! They arrived last Monday so I had to wait a week to inspect them. These are some SEXY heads !!Attachments
Last edited:
monkeystash
Active Member
Damn, those are nice!
Thx, Ryan. They are even more impressive in person. EVERYONE should have these heads !!
I make oil
Active Member
Those are nice. ")
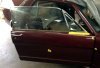
Today, I finished assembling the pass side wind wing frame and installed it in the door, cleaned/detailed both door glass, began install of pass side door glass and installed the grill center trim.
Attachments
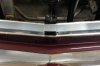
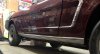
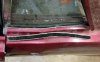
Today, continued installation of pass side glass and roll-up mechanism (what a three ring circus) all that remains is to adjust the wind wing and door glass for proper fit and operation , cleaned/inspected the rocker trim, installed the rocker trim.
Attachments
Grabber70Mach
Well-Known Member
Looking good.
Sent from my GT-P5210 using Tapatalk
Sent from my GT-P5210 using Tapatalk
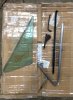
My buddy Tom Mc laid some fresh chassis black paint on my Monte Carlo bar and my grill and some Palomino stain on my rear package tray. I test fit the grill, inserted the driver side door glass into the door, installed the driver door catch and rear glass guide. Began installing window felts (started with rear quarter windows).
Attachments

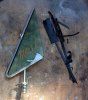
Yesterday I assembled the driver side wind wing assy. Now there is a working latch for the wind wing for the first time since Ive owned the Colt. AND all new weather stripping. Had to re-bed the glass into a repro glass frame because the latch has always been broken.
Attachments
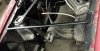
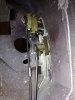
Today I installed the modified driver door actuator rod. This is because for some reason the repro door latch is not exactly like he original and the rod would not allow the door handle button to operate properly. After shortening the rod and adding a threaded coupler everything works like it should. Also, continued to adjust the pass door glass, wind wing glass and rear quarter glass. Almost got it. Then on to the driver side.
Attachments
Grabber70Mach
Well-Known Member
You may want to think about putting a jam nut on to keep the union from adjusting during use.
Sent from my GT-P5210 using Tapatalk
Sent from my GT-P5210 using Tapatalk
Tack it. There is no need to ever adjust it once set to the right length.You may want to think about putting a jam nut on to keep the union from adjusting during use.
Thanks for your ideas, men. Would you accept my idea of using lock-tite as viable?
Grabber70Mach
Well-Known Member
Red, yes.
Sent from my GT-P5210 using Tapatalk
Sent from my GT-P5210 using Tapatalk